Everything You Need to Know About Graduated Neutral Density Filters

The article is over 5 years old. The information in it may be outdated.
![]()
We are working on its update. In the meantime, you can read some more recent articles.
Gradient filters—landscape photographers use them all the time, but often other photographers don’t even know they exist. Today’s article is about what they are and why they’re used.
Surely you’ve encountered the situation where you’re out photographing the beauty of nature right there before you… and your camera’s display shows you that the sky is too bright, the ground is too dark, and unless you can change that, you’re about to have a bad day.
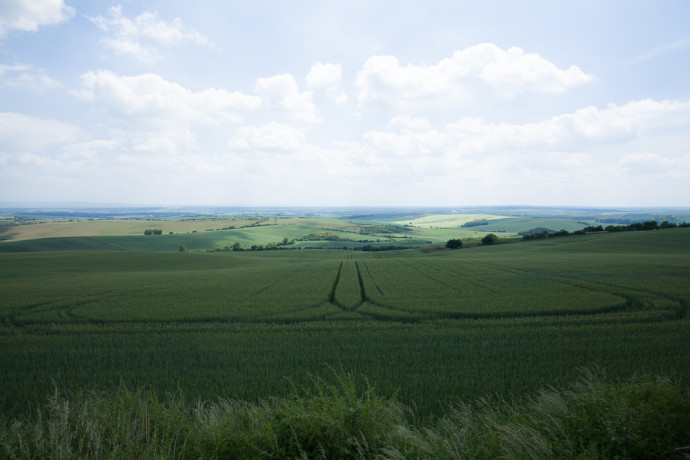
Canon 5D Mark II, Canon EF 16-35/2.8 II, 1/100 s, F8.0, ISO 200, focus 19 mm
One reason for this is because a digital camera’s sensor doesn’t support nearly as wide a range of lights and shadows at once as the human eye and brain can handle.
One solution for this is to shoot very carefully to avoid blowout in the sky, and then use a computer to darken the sky further while brightening the ground.
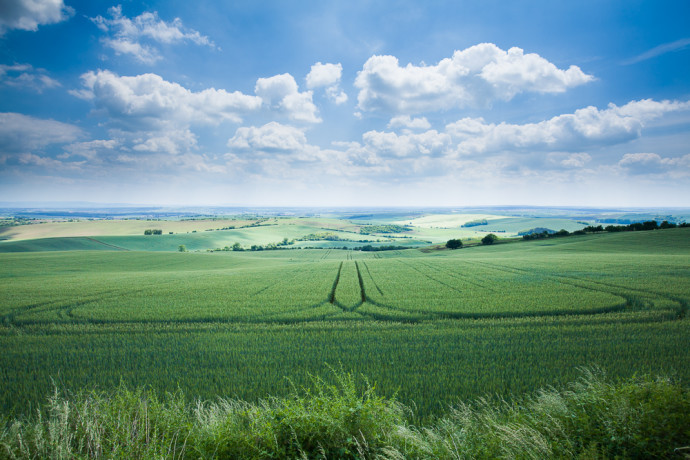
Canon 5D Mark II, Canon EF 16-35/2.8 II, 1/100 s, F8.0, ISO 200, focus 19 mm
Even though this picture is still usable at web resolution, the strong brightening has brought out the noise in its lower half. This noise becomes worse the more “drastically” you even out the brightnesses in the earth and sky. For prints, for example, this picture is unusable.
One solution is to take two pictures with varying exposures and blend them together. But in that case you’ll need to use a tripod, because otherwise it’s very easy to accidentally make the camera move, preventing the pictures from fitting together.
And another solution is to use the subject of today’s article—graduated neutral density filters, which were designed to solve precisely this problem.
What Kind of Gradient?
These filters contain plastic or glass that’s clear at one end and dark at the other. Somewhere in the middle there’s a gradient, which may be sharp or gradual. The filter’s darkness and gradient steepness are the two key properties for every gradient filter.
Here’s one of the simplest examples—a common screw-on filter from B+W.
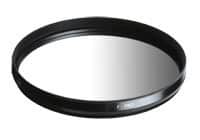
You position the gradient on the horizon—that way, the filter’s top part darkens the sky, while the ground remains unaffected.
What if the Horizon’s Off Center?
These filters can be rotated, but they always require you to put the exposure gradient in the middle of the scene. So if you want to move the horizon lower or higher, a round filter is not going to fit that need.
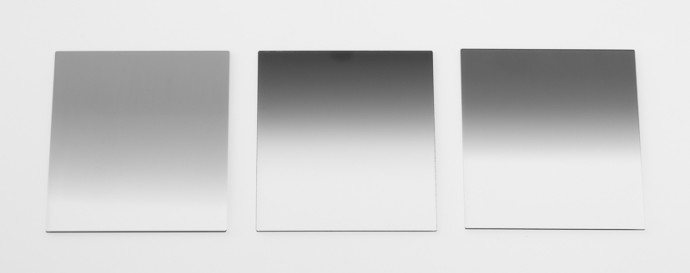
However, there are alternatives that can be shifted. Here we’re talking about an entirely different system, which we’ll discuss below. These filters are in the shape of a rectangular plate, and they’re placed on a special holder in front of the lens. This is a screw-on holder, and it’s stable after it’s attached, while enabling you to shift the filter inside it up or down.
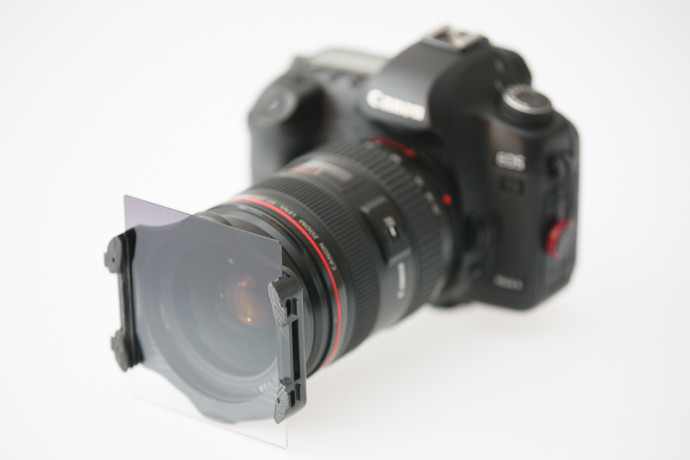
Choosing a Brand
Many companies make these systems and filters. Cokin filters are well-known and are cheaper than the competition, but these are easily-scratched plastic filters. Then there’s Lee, a company that offers high-quality glass filters—but these are significantly more expensive. Other manufacturers include Hitech, Tiffen, and Singh-Ray. Some people swear by using one company’s holder and another company’s filter (e.g. Cokin P holders and Hitech filters).
A word of warning, however: parts from different manufacturers are not always compatible, so be sure to research before you buy. Even within individual companies there can be multiple, separate sets that differ in the most important way—width.
Filter Width
These filters’ widths significantly exceed the diameters of normal round filters, because these filters are held at a larger distance from the lens, and so they need to cover a larger area. So if you have an ultrawide lens or are planning to get one, then you’ll need to look at the wider, and unfortunately also more expensive, filter lines.
For illustration: the standard Cokin P series has a width of 84 mm, but for wide lenses that may not be enough, and you’ll need to switch to the 100 mm width. The next, and highest, series has a width of 130 mm, but that’s more for medium-format cameras. (Note that other manufacturers sell even wider filters.)
You’ll be glad to know that with the help of an adapter, even wide holders can be mounted onto small lenses, so you can always get by with only one set of equipment.
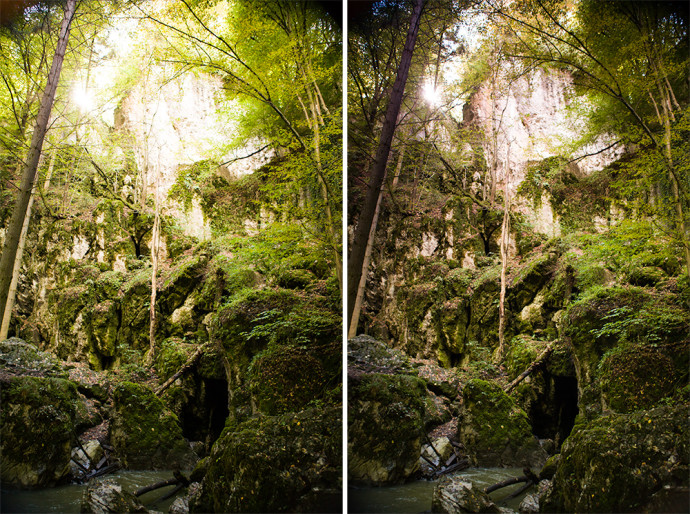
Canon 5D Mark II, Canon EF 24-70/2.8, 1/50 s on left and 1/30 s on right, F3.2, ISO 800, focus 70 mm
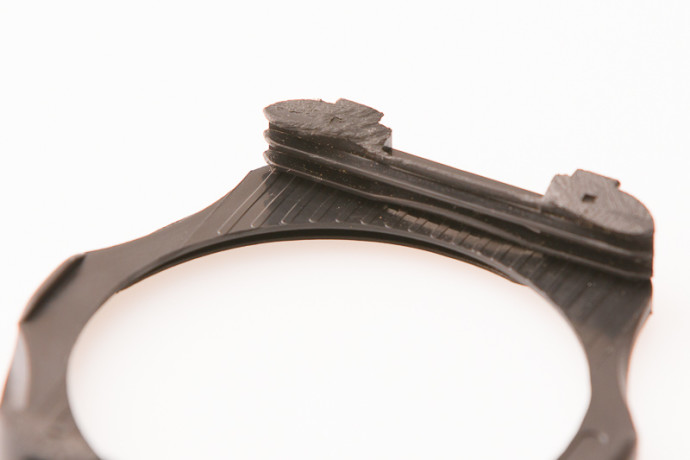
Another important thing for holders is how many filters they hold—for two reasons. The first is that you might want to use other filters with your gradient filters—for example a square neutral gray filter. (These are square because you don’t need to shift them.) The second is that multi-slot holders can end up overhanging into the frame. Sometimes the best solution is to saw off the leftover slot(s) and go from e.g. three positions down to two.

Disadvantages
Besides the need to haul filters around everywhere and to fumble around mounting them, there’s a technical and photographic problem involved. Filters’ gradients are always straight, and so when for example you encounter a landscape with rolling hills, the gradient is obviously not going to follow those hills. It helps to either mask the problem via a filter with a gradual gradient, or tend to the problem area with computer edits.
Other Tips
You don’t always need to actually attach a filter. With practice, you can just hold the filter in front of the lens while you shoot. Of course in your next photo you might not be holding it in quite the same place… but this is a usable traveller’s quick-fix.
eBay is full of very cheap filters. They tend to be low-quality, though; for example they can slightly blur images and add glare when shooting against the light, so they are only for the brave or for people still just experimenting with filters.
Where Now?
This is the last article in our series on filters. If you’ve missed our previous articles on polarizing and neutral gray filters, you can check them out now.

Doug Cahill
I have found your articles on filters very informative; as I am still learning the pit-falls when using them. My thanks to all the contributors of these articles. Doug.
Zoner
Thank you, Doug, it’s great to read that!
Ed Cobb (Double Shot)
Vit, thanks for the article. However, you have missed out a significant disadvantage with rectangular filters as many impart a color cast to the image even the so-called “high-end” brands. The color cast can sometimes but not always be removed or at least reduced with image editing software. I try to minimize my use of these filters as I find it can take more work to remove/reduce color cast introduced by filters than it does to deal with exposure issues, by either taking multiple exposures of the same scene and, as you say, blending in software or relying entirely on software to fix up an image taken without the use of filters. (Noise issue noted). Ed
Vit Kovalcik
Ed, thanks for your insight. I have probably not used the filters that much to encounter this problem – there were some slight casts, but fixable with an image editor. Of course, the solutions you propose usually work well too if you have a reasonably still scene. I am glad that you pointed out this issue, as it may be important for other potential users of the gradient filters.
beckoningchasm
I’m still experimenting with ND photography, but I’m using the double polarizing filters method (previously mentioned on this site). So far I’ve found that to be pretty flexible–is there an advantage to using ND filters instead?
Vit Kovalcik
I am glad you like the two polarizers, it is my favorite trick too :) However, they are designed for a slightly different purpose than graduated ND filters described in this article, which can selectively darken only part of the scene. The stacked polarized filters cannot do that (as well as “simple” ND filters) , but I like variable strength of the two polarizers – that is certainly their big advantage.