Learn to Photograph Children, Step by Step
Many variables are involved when photographing children: light, expression, composition, camera position, and more. You produce your final picture by mixing these “ingredients.” Don’t know where to start? We’d like to help you and advise you on how to do photos of children right.
If you don’t have the right ingredients, you’ll find it hard to take a great picture. Don’t look at your planned picture as (just) a whole—think of it as the sum of its parts, which you want to capture as well as you can.
Light and Kid Photography
You need light for more than just being able to see things. It also determines your picture’s mood, and it models your subject.
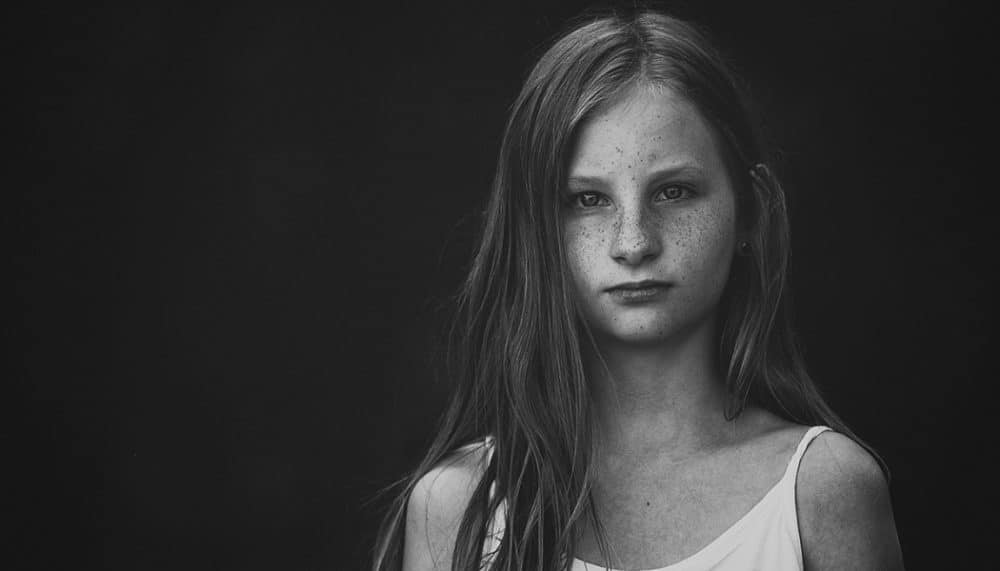
A face looks different when lighted up through a window from the side than when that window is in front of it. Under cloudy skies, a face will lack significant shadows; on a sunny day, meanwhile, people’s faces have more contrast due to the presence of light and shadow.
When you’re starting out, it’s best to photograph children under cloudy skies. The light will be beautifully soft (diffuse), and so you won’t have to puzzle over work with high contrasts, which often produce overexposed spots. Light under the clouds is very suitable for photographing young children, because it underscores their gentleness.
An area in shadow (such as a porch) on a sunny day can work similarly. Here you have to make sure that the background behind your subject is in shadow. Pictures where a child is in shadow but is in front of a brightly lit background don’t look very good. Also, the background ends up drawing more attention than the child itself.

Canon EOS 6D, Canon EF 35 mm f/1.4L USM, 1/320 s, f/ 2.8, ISO 100, focal length 35 mm
Learn to perceive light; experiment over time with different types of natural light. From pictures under clouded skies, move on towards pictures taken at various times of the day and year. You’ll learn that not all light is the same.
Take advantage of “good light” from the Golden Hour as much as you can… but learn to take pictures in less ideal light conditions as well. That way, you’ll become aware of the differences between “good” and “bad” light. Between a photo that looks flat and one where shadows model the face and give it depth.

Canon EOS 6D, Canon EF 100 mm f/2.8 Macro USM, 1/125 s, f/3.2, ISO 200, focal length 100 mm
Before you get started with photographing children, study these articles:
The Right Focal Length for Photographing Children
There’s no universal guide on which focal length to pick when photographing children. Every photographer prefers a certain style and adapts their lens selection to it.
Do you like to photograph kids in their natural environment, and to be as close as possible and draw your audience into the action? Then a reportage focal length, i.e. about 24–35 mm, is the best one for you.
Would you prefer to shoot from farther away and get a dreamlike picture with a blurry background, where the child stands out as the picture’s only important element? Then choose a fast lens with a long focal length, 85 mm or more.
Keep in mind that the closer you stand to the child, the more you’ll emphasize perspective: objects close to the camera seem larger than those far away.

Canon EOS 6D, Canon EF 35 mm f/1.4L USM, 1/640, f/3.5, ISO 200, focal length 35 mm
Composition when Photographing Children
For your photo to rise above the norm, you need to think about composition. Placing the child in the center usually isn’t the right choice.
Avoid the common mistake of beginning photographers that could be called “too much space for the head, not enough on the sides.” The first defect can be solved via cropping in Zoner Studio. The second one is hard to solve.
How to Focus Right When Photographing Children
Forget about automatic focus point selection and choose one yourself. It can be the center point (use the method of “press, recompose, press all the way in”) or any of the others.
Always focus on the child’s eyes. If they are turned with one eye closer to you, focus on that eye. For quicker work, turn on autofocus (you can usually find the switch on the lens) and try the focusing modes called One Shot (or AF-S, good for stationary scenes) and Servo (or AF-C, good for photographing moving objects).
Content Is What Counts
This article is not here to convince you that there is one right way (in part because there isn’t), but rather to push you to get to know your camera. And to get the most out of its features when photographing children.
But don’t forget that even the very best technical knowledge and skill cannot make up for a lack of content. Take inspiration from your subjects themselves, and you’ll take impressive pictures that will be the jewels of your family album—and also something more.

Canon EOS 6D, Canon EF 35 mm f/1.4L USM, 1/800 s, f/2.8, ISO 100, focal length 35 mm
There are no comments yet.