Send an Unusuall Christmas Postcard – Paint and Draw with Light
Painting and drawing with light are two of the most entertaining roads to producing creative photographs. Together they form an area of photography where groups of people of all ages can work together and have fun together. With a little patience and enough time, you can create works reminiscent of actual paintings.
Things You’ll Need:
- A camera that offers full-manual mode and the option for long exposure times (30 seconds and up). Ideally it should also offer Bulb mode, where you can control the shutter manually.
- A tripod, to provide high-quality stabilization for your camera.
Light Painting vs. Light Drawing
These two techniques have one thing in common: working after dark. (Use an appropriate aperture to minimize the effect of any residual environmental light on the scene.) Both techniques can be used in practically any photographic genre, from still-lifes to landscapes. People, too, can be a part of the picture. This can be a road to some very creative portraits.
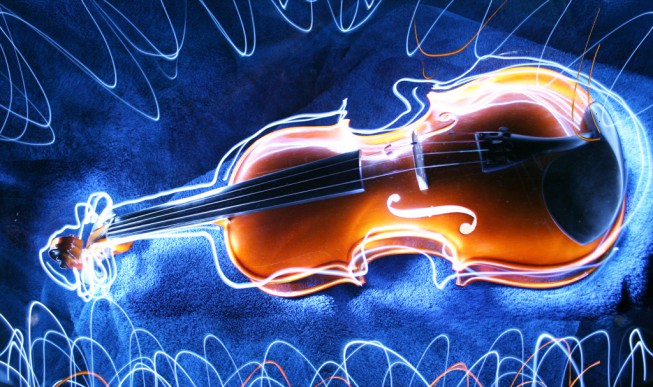
For the painting technique, use a light source such as a hand-held lamp or a system flash to gradually light up a scene. Cast light on the photographed objects with a fluid motion.Think about the process like coloring in a coloring book: all the elements in the scene are already “there,” and yet at the same time your hands are what gives them color and life. And just like with a coloring book, try to use fluid, smooth strokes. Use your control over lighting duration to set which areas will be lighter and which ones darker. Place colored sheets or gels over your light sources, or use colored light sources, to color individual objects in the scene. Take care not to shine the light source at your camera lens. Because of this concern, it’s a good idea to have a light source that’s equipped with a shade. If you are working with a physically-large scene and will need to move around during the shot, then take care to wear dark clothes and to keep on the move so you’re never in one place long enough to create “ghosts” in the photo. Unless, of course, such ghosts are a good fit for your artistic goals.
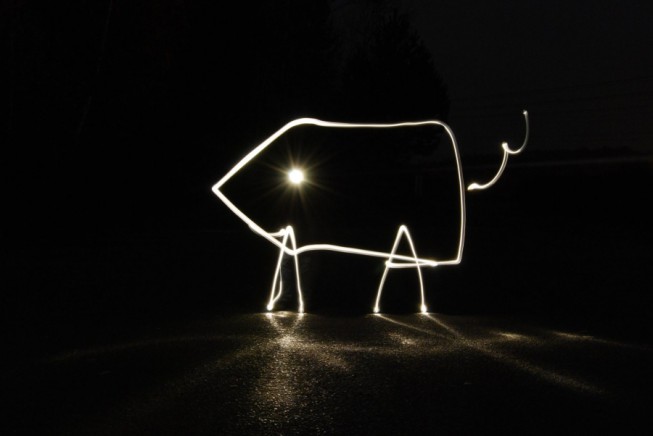
When drawing with light, you are not photographing a scene at all, but rather creating a picture by drawing with a light source aimed at the camera lens. Be careful during this to keep the light source moving, so you don’t have spots with blowout (overexposure) in the final picture. The output from this technique will be a bright drawing against a dark background.
Both painting and drawing can be combined within a single image, so e.g. a fictional figure can be drawn onto a painted real scene. By the way, if you include a person in the scene, strongly consider painting them into it using a system flash. That flash will enable you to expose the person in a thousandth of a second, preventing the motion blur that would arise when painting them in with a permanent light source.
Create a Simple Scene
When training in the art of light painting, start small—for example with a simple still-life that you compose at home. Note that when you’re lighting small objects, you’ll need a small light source too. Personally I use the Streamlight light stick, which include four colored attachments. Get this brand if you can find it second-hand—unfortunately they’re not made anymore.
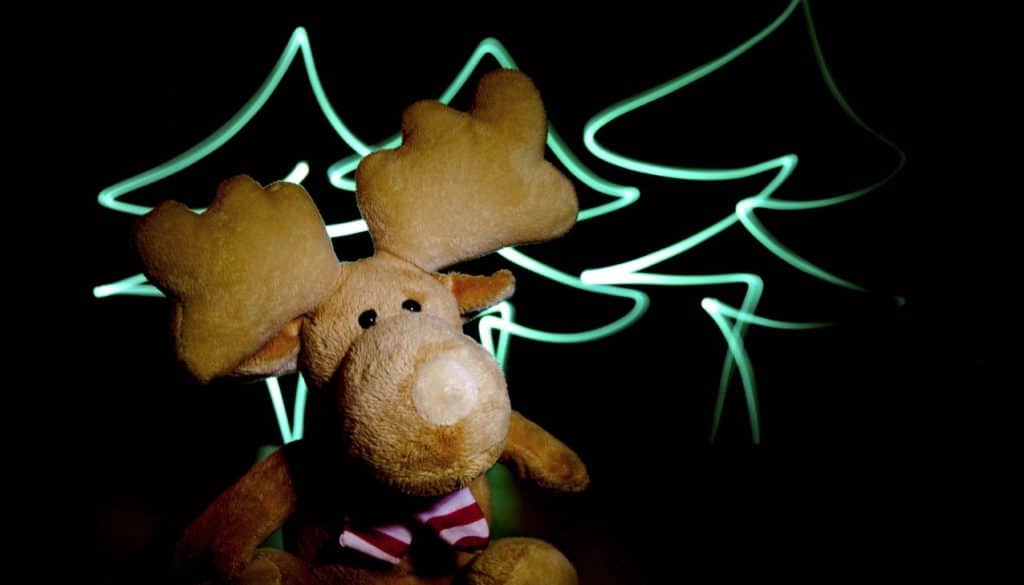
For my illustration of these techniques, I’ve used a very simple scene—a lone plush toy (the reindeer) placed on an ordinary table. I’ll be assuming below that you’ll try a similar still life yourself. Place the camera on a tripod and set the camera to bulb mode. Start with F8, ISO 100, and a time of 30 s. If your camera lets you use a longer time, then do—or better yet, configure Bulb Mode and use a remote to control the shutter. Set your focus point (in my case, it was the reindeer’s eyes) before you turn out the lights.

My example combines both techniques—both drawing and painting with light. For your own first experiment, the next step is to turn out the lights and start exposing. For the sample scene, 30s is just right. The reindeer was lighted from a position behind the camera, for about 10s with a slow, fluid motion. (Quick motions are a bad idea for this picture, because they would blur the drawing. But in some pictures that may not at all be a problem—just another tool in the creativity toolbox.) Then I turned off the light and moved behind the table with the reindeer. I then covered the light with green gel (a plastic film would also work) and painted tree outlines in the air using brisk, smooth strokes. It was pointed straight at the lens.
When you do this experiment, take it for granted that you won’t get it right on the first try. You’ll need several tries, during which you’ll be fine-tuning the lighting duration and angle, the composition, and the exposure settings. When I was creating this picture, I had to change from F8 to F5.6 and to raise the ISO to 200. Instead of increasing the sensitivity and decreasing the aperture, you can also use a longer exposure time. But if you do, you’ll need to increase the lighting time to match. If you go that route, it will take you to longer to photograph the scene, but you will be able to work more precisely.
My result after several attempts is this photograph:

What to Fix on Your Computer
Like any other photographs, these paintings and drawings deserve at least basic color and exposure fixes in a photo editor. When you’re shooting to the RAW format, you’ll especially appreciate Zoner Studio here. Open your picture in the program’s RAW module. It will probably be very dark, so start by raising the Exposure value. For this picture, that nicely improved the visibility of both the reindeer and the trees. But it also added unwanted emphasis to background details. To suppress the background again, I reduced the value of the Black Point. Then to wrap things up I increased detail by moving the Clarity slider into the positive values, and with that, my portrait of a plushie reindeer in a forest of light was done.

Advanced Scenes
As I mentioned in the introduction, light painting and drawing can be combined on much larger physical canvases than this. The masters of this twin genre can use these techniques to draw whole large landscapes including starry skies, or complicated scenes full of people and special effects. For inspiration, I can recommend to you the work of American photographer Dave Black, who uses light painting to create truly massive works, staged so impressively that they rival Hollywood films.
There are no comments yet.