Take Advantage of Auto ISO
Take Auto ISO. It’s been in cameras for years. Isn’t it time to give it a chance to shine?
DSLRs became much more affordable around 2009, and many people began taking pictures at that time. These freshly-minted beginners mostly used automatic settings, although the more adventurous of them also studied time, ISO, and aperture and soon started picking camera modes based on the situation. The snobbier among them used manual mode only and saw automated settings as something inferior. Maybe they were right. But are they right today?
Once you’ve mastered basic technical concepts like the exposure triangle, time, ISO, and aperture, you’re probably not going to be using the full (green) automatic mode—or even the P mode where you can set the ISO, white balance, and flash. But there’s no need to go straight to manual mode, because today’s cameras are sophisticated and powerful enough that the difference in output for different ISO values does not play as important a role as it once did.
Anyone reading this who started out in photography ten years ago will know exactly what I’m hinting at. In that era, if you were taking decent pictures at ISO 1600, then you had an exceptionally good camera. But today, 1600 is standard. And the difference between ISO 100 and ISO 1600 is minor today.
The Advantages of Auto ISO
Cameras have offered Auto ISO for quite some time now, but many photographers overlook and ignore it. However, there’s no good reason for that anymore! Auto ISO brings you both convenience and a better chance at a sharp picture. Let’s take a look at how it works, how to use it properly, and what settings to use.
With Auto ISO, you set a maximum time, and Auto ISO finds the most acceptable solution for you—the lowest workable ISO for the given exposure time. Naturally it also tries to keep from exceeding your maximum time.

But How Do I Set the Exposure Time?
The first question you’ll have is—what should I base the maximum time on? You have several options here, and in order to pick the right one, you’ll need to ask yourself a couple of questions.
First: what are you photographing? If it’s people in motion, then a maximum time of 1/160 s will work fine. But if you’re photographing sports, then you don’t want an exposure longer than 1/400 s.
The second thing you should think about is what lens you’re using. If you have a lens with a transfocator (a zoom lens) and its focal length is 200 mm at the long end, then your maximum time shouldn’t be above 1/200 s. If you have a fixed 35 lens on your camera, then it shouldn’t exceed 1/30 s.
With steady hands, you can take a sharp picture with an exposure time that’s the inverse of the lens’s focal length. For example for 200 mm, set a maximum of 1/200 s, for 400 mm set 1/400 s, and for 50 mm set 1/50 s.
Maximum ISO
The maximum ISO value is another important factor. Each photographer should set this value based on their own consideration and their camera’s possibilities, and if appropriate based on what’s being photographed.
One photographer’s unusably noisy photo may be another’s still-usable output. So before turning on this function, make sure to explore the limits of your equipment. But remember that with different lenses and lens speeds, these limits change. That influences not only your depth of field, but also your exposure time and thus your ISO value.
Switch to Aperture Mode
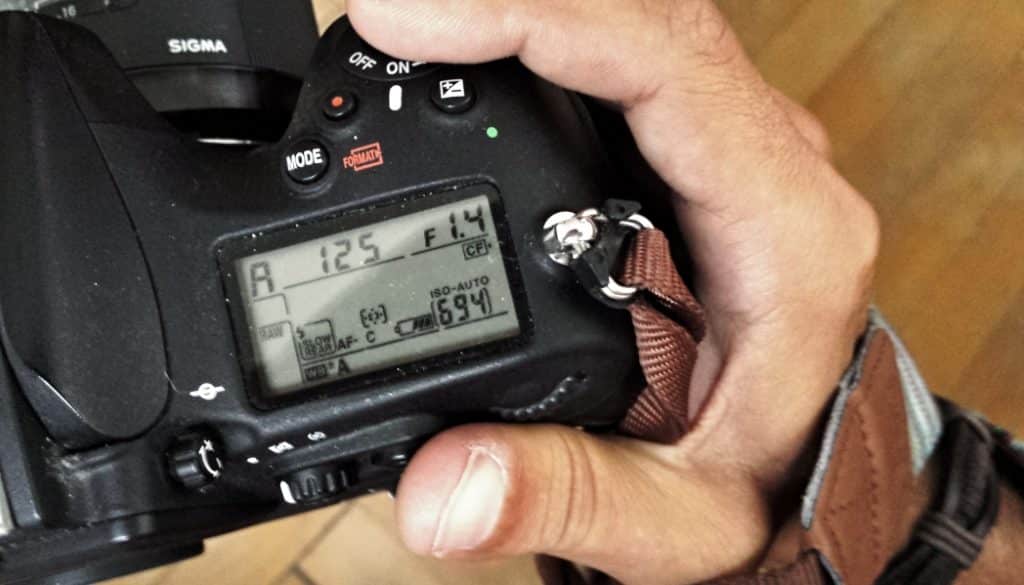
The Auto ISO function is best combined with the “A” aperture priority mode. You regulate depth of field with the aperture, and the camera calculates the best exposure combination on its own. Only within the boundaries that you have set, of course.
It’s good to test these values before you take any pictures that are important to you. This will make your photography work quicker, nimbler, and more efficient.
A Small Complication
But everything has its pluses and minuses. Here the minus lies in exposure metering—or more precisely, in the trouble of setting it up.
If you’ve already used Aperture Priority in the past, then you’ll know what I mean. Based on my experience, I’d recommend choosing point measurement and having the focus point (and here the metering point as well) on the object that you’re photographing. Check the picture and if needed fine-tune the exposure for future pictures by changing the EV value—go plus or minus depending on whether you want to raise or lower the exposure on future pictures.
Auto ISO Is Your Friend
Don’t throw every automated system on your camera out the window before you even try to make it work to your benefit. Modern cameras have brought progress, so why not try to harness that progress? And thanks to today’s excellent sensors, automatic ISO is a prime example of this.
There are no comments yet.