Mastering Exports: Quickly, Smartly, and Efficiently
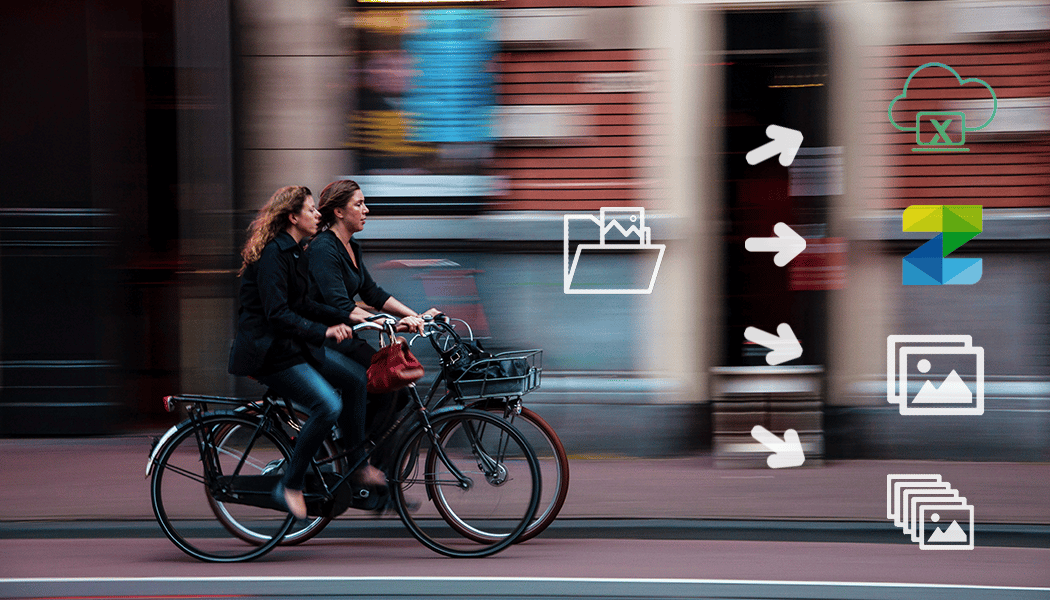
Photo editing is a process—from importing and organizing, to adjustments and finally exporting. Export is where your work culminates and you save your edited photos in their final form. But exporting isn’t as simple as it sounds. The improved Export feature in Zoner Studio offers a versatile set of tools. You can prepare previews, rename files, save photos online, or handle all these tasks simultaneously with ease.
Exporting creates a copy of your original file that includes all your adjustments, while preserving the original file. This differs significantly from traditional saving, which overwrites the original file.
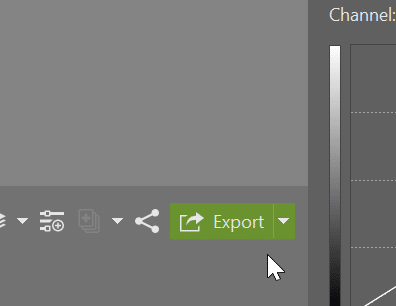
In Zoner Studio, the Export (Ctrl+Shift+X) icon is found in the Navigation toolbar. Export is available in every module of Zoner Studio, but is most commonly used in the Manager and Develop modules. To export, simply select one or more photos and click the green Export button to the right of the Filmstrip.
Export is essential when working with RAW files since you can’t save adjustments to RAW files. However, that’s not the only use. Let’s go through the various options and settings available in Export.
Export multiple files at once
Once you click Export, a new window appears. At the top, you can find the option to enable Export Multiple Presets Simultaneously. This allows you to select multiple exports. For example, save photos in both full resolution and reduced size for sharing online—all in one step.
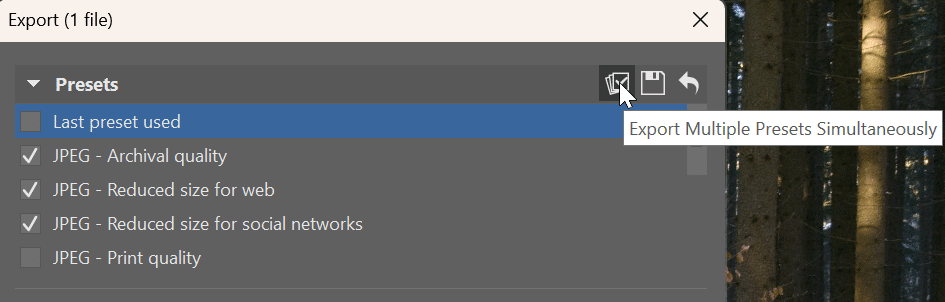
You can find these settings in the right panel by clicking the arrow next to Export. If you have Export settings that you use frequently, save them as presets for quick access. This can simplify your workflow.
When using multiple exports at once, there may be potential conflicts. For example, exporting files with the same name to one folder, or missing input files. In these cases, Zoner Studio will warn you before the export starts—saving you from surprises later.
Choose where to save
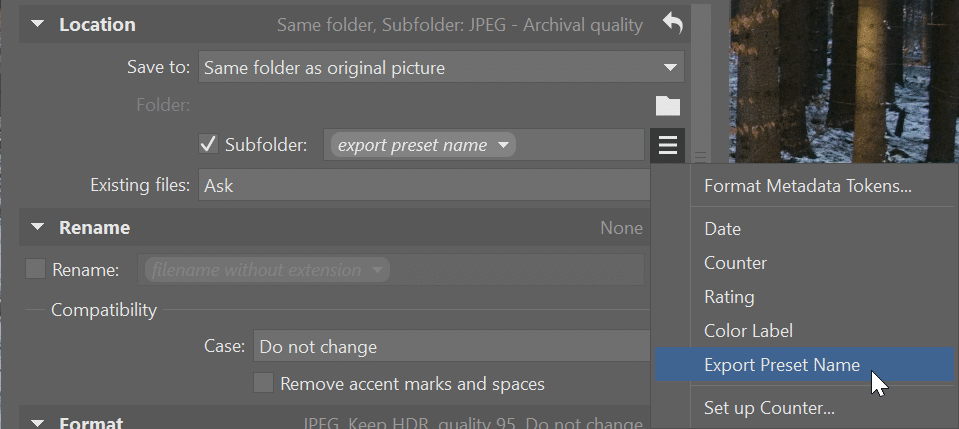
Next, choose the settings for your export. Choose where your exported images are saved. The system you choose is up to you. It’s consistency that matters. Many photographers save JPEGs in subfolders named after their original RAW files. It’s also a good idea to name the folders by export type. For multiple exports, you can organize them into subfolders like—JPEG – Archival quality or JPEG – Reduced size for web.
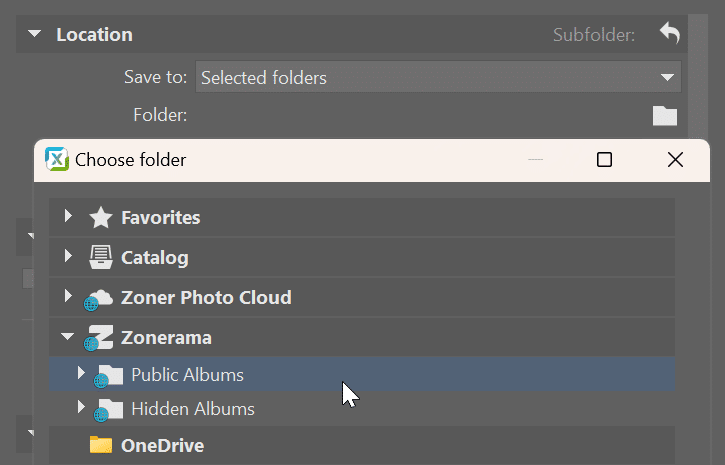
You are not limited to your hard drive. Choose Save to: Selected folders, click the folder icon and you can select the Zoner Photo Cloud or an album from your Zonerama gallery.
Batch renaming
Consistent naming is crucial for managing your file effectively. For example, you might name full-resolution photos by date and filename. Meanwhile, client previews might retain their original names for easy reference to their RAW files.
You can create custom naming patterns by using EXIF data, text, and other metadata tokens under Format Metadata Tokens. This gives you endless flexibility.

Select the right format
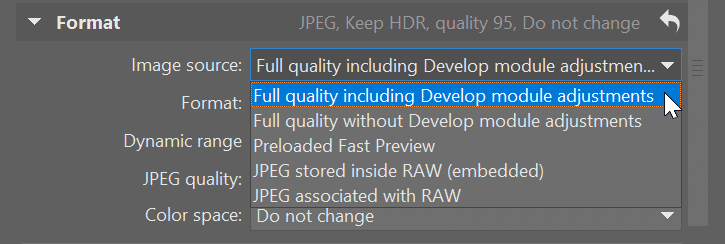
Under Format, choose your Image source. Full quality including Develop module adjustments is the most common choice. This means the photos are exported in full quality and include all the applied adjustments.
For small previews, use JPEG stored inside RAW (embedded). This puts the small previews already stored in the RAW file, making it ideal for exporting thousands of previews quickly.

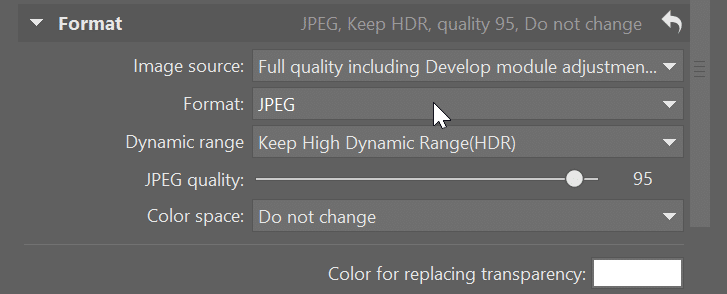
For HDR images, pay extra attention to the Format settings to be sure that your exported photos appear as intended.
There are additional options for photos edited in HDR that determine how HDR photos appear.

We’ve discussed HDR editing in several articles and videos. Check out Printing and Sharing HDR Photos Online, HDR Editing Brings Your Photos out of the Shadows, and HDR Editing in Zoner Studio.
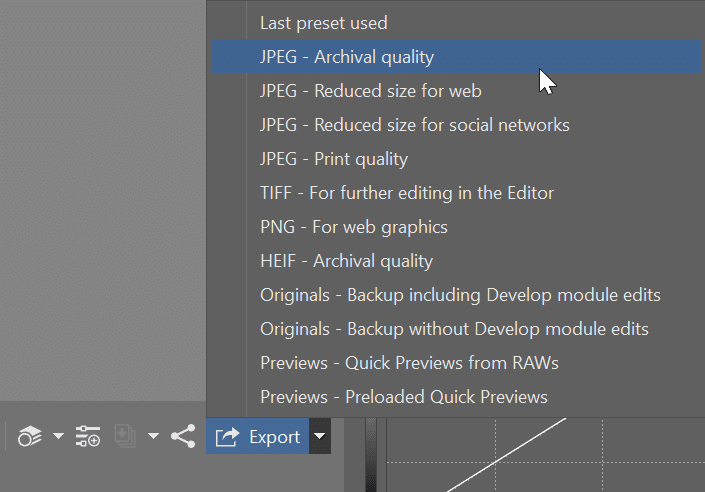
JPEG is the most used and most practical format. Occasionally, other formats may come in handy, such as PNG for images with transparency, TIFF for large-format high-quality printing. Choose the quality of your JPEG based on how you want to use it. At 95, there is virtually no visible loss of quality. However, around 50, the quality is much lower, but you save a significant amount of space when creating small previews for a large number of photos.
Choose the resolution
The dimensions you choose depend on their intended use. Don’t change the resolution for JPEG for archival. For sharing on social media, 2048px on the longer side works well. For client previews, 1024px on the longer side is probably sufficient.
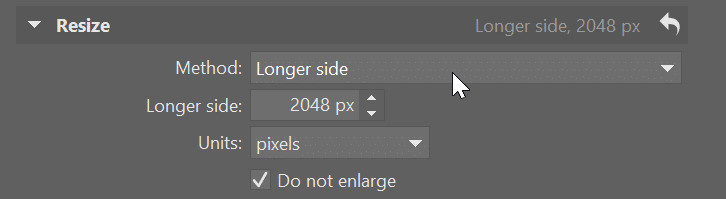
Resolution is closely related to sharpening. For example, when exporting to a lower resolution for social media, it’s a good idea to sharpen the photo. Use For screens for online sharing or For print if you’re printing photos.
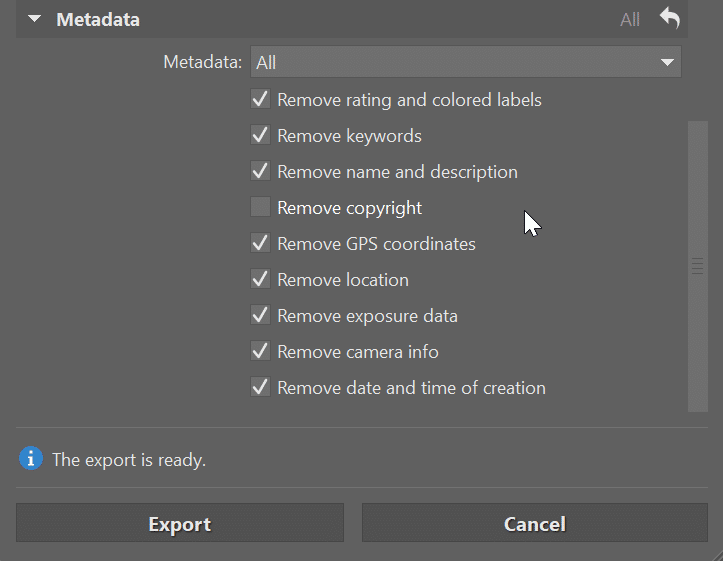
Master metadata
Decide which metadata to include In your exports. Removing metadata is a good option if you want to keep your shooting details private. You can choose which EXIF data to keep. Some people also remove metadata to save a few kB for each image.
Save your settings as presets
Export can be customized to meet your needs. If you use certain export settings frequently, save them as a preset to reuse by clicking Save Preset. Name the preset and have it available in export settings.

Ready, set, export
Once you’re happy with your settings, click Export. If there’s an issue, Zoner Studio notifies you before the process begins. Sit back, grab a coffee, and let Zoner Studio do the rest. Download Zoner Studio free for 7 days and discover how Export can simplify your workflow!
There are no comments yet.