Tips for Enhancing Your Home with Photographs
Every home has a unique atmosphere that is shaped by the pictures and photos in it. The size, colors, arrangement, and placement of these photos can enhance the overall concept of your home, making it feel pulled together and inviting. In this article, we’ll explore various aspects of decorating your living space with photographs and how to incorporate photography effectively into different spaces.
Every room of the house, whether it’s the kitchen, living room, kid’s room, or staircase, calls for a different style and arrangement of pictures. The existing decor or artwork may slightly complicate matters.
Since the purpose of photography is for it to be admired, it must be at the proper height. Its placement is also influenced by the color or theme of the photography. For example, should family photos be grouped together or displayed separately? We’ll answer these questions and more, so before you grab your hammer and nails, spare us a moment of your time. It’s only going to take 6 minutes.
Photographs and artwork in different rooms
Each space is arranged with furniture based on its function. In the kitchen, the centerpiece is usually the kitchen counter with cabinets. There might not be enough space for large canvases. Avoid cluttering empty walls with too many photos and choose photos related to food, family moments, or culinary experiences. Smaller groups of photographs or picture shelves that offer versatility can work great.
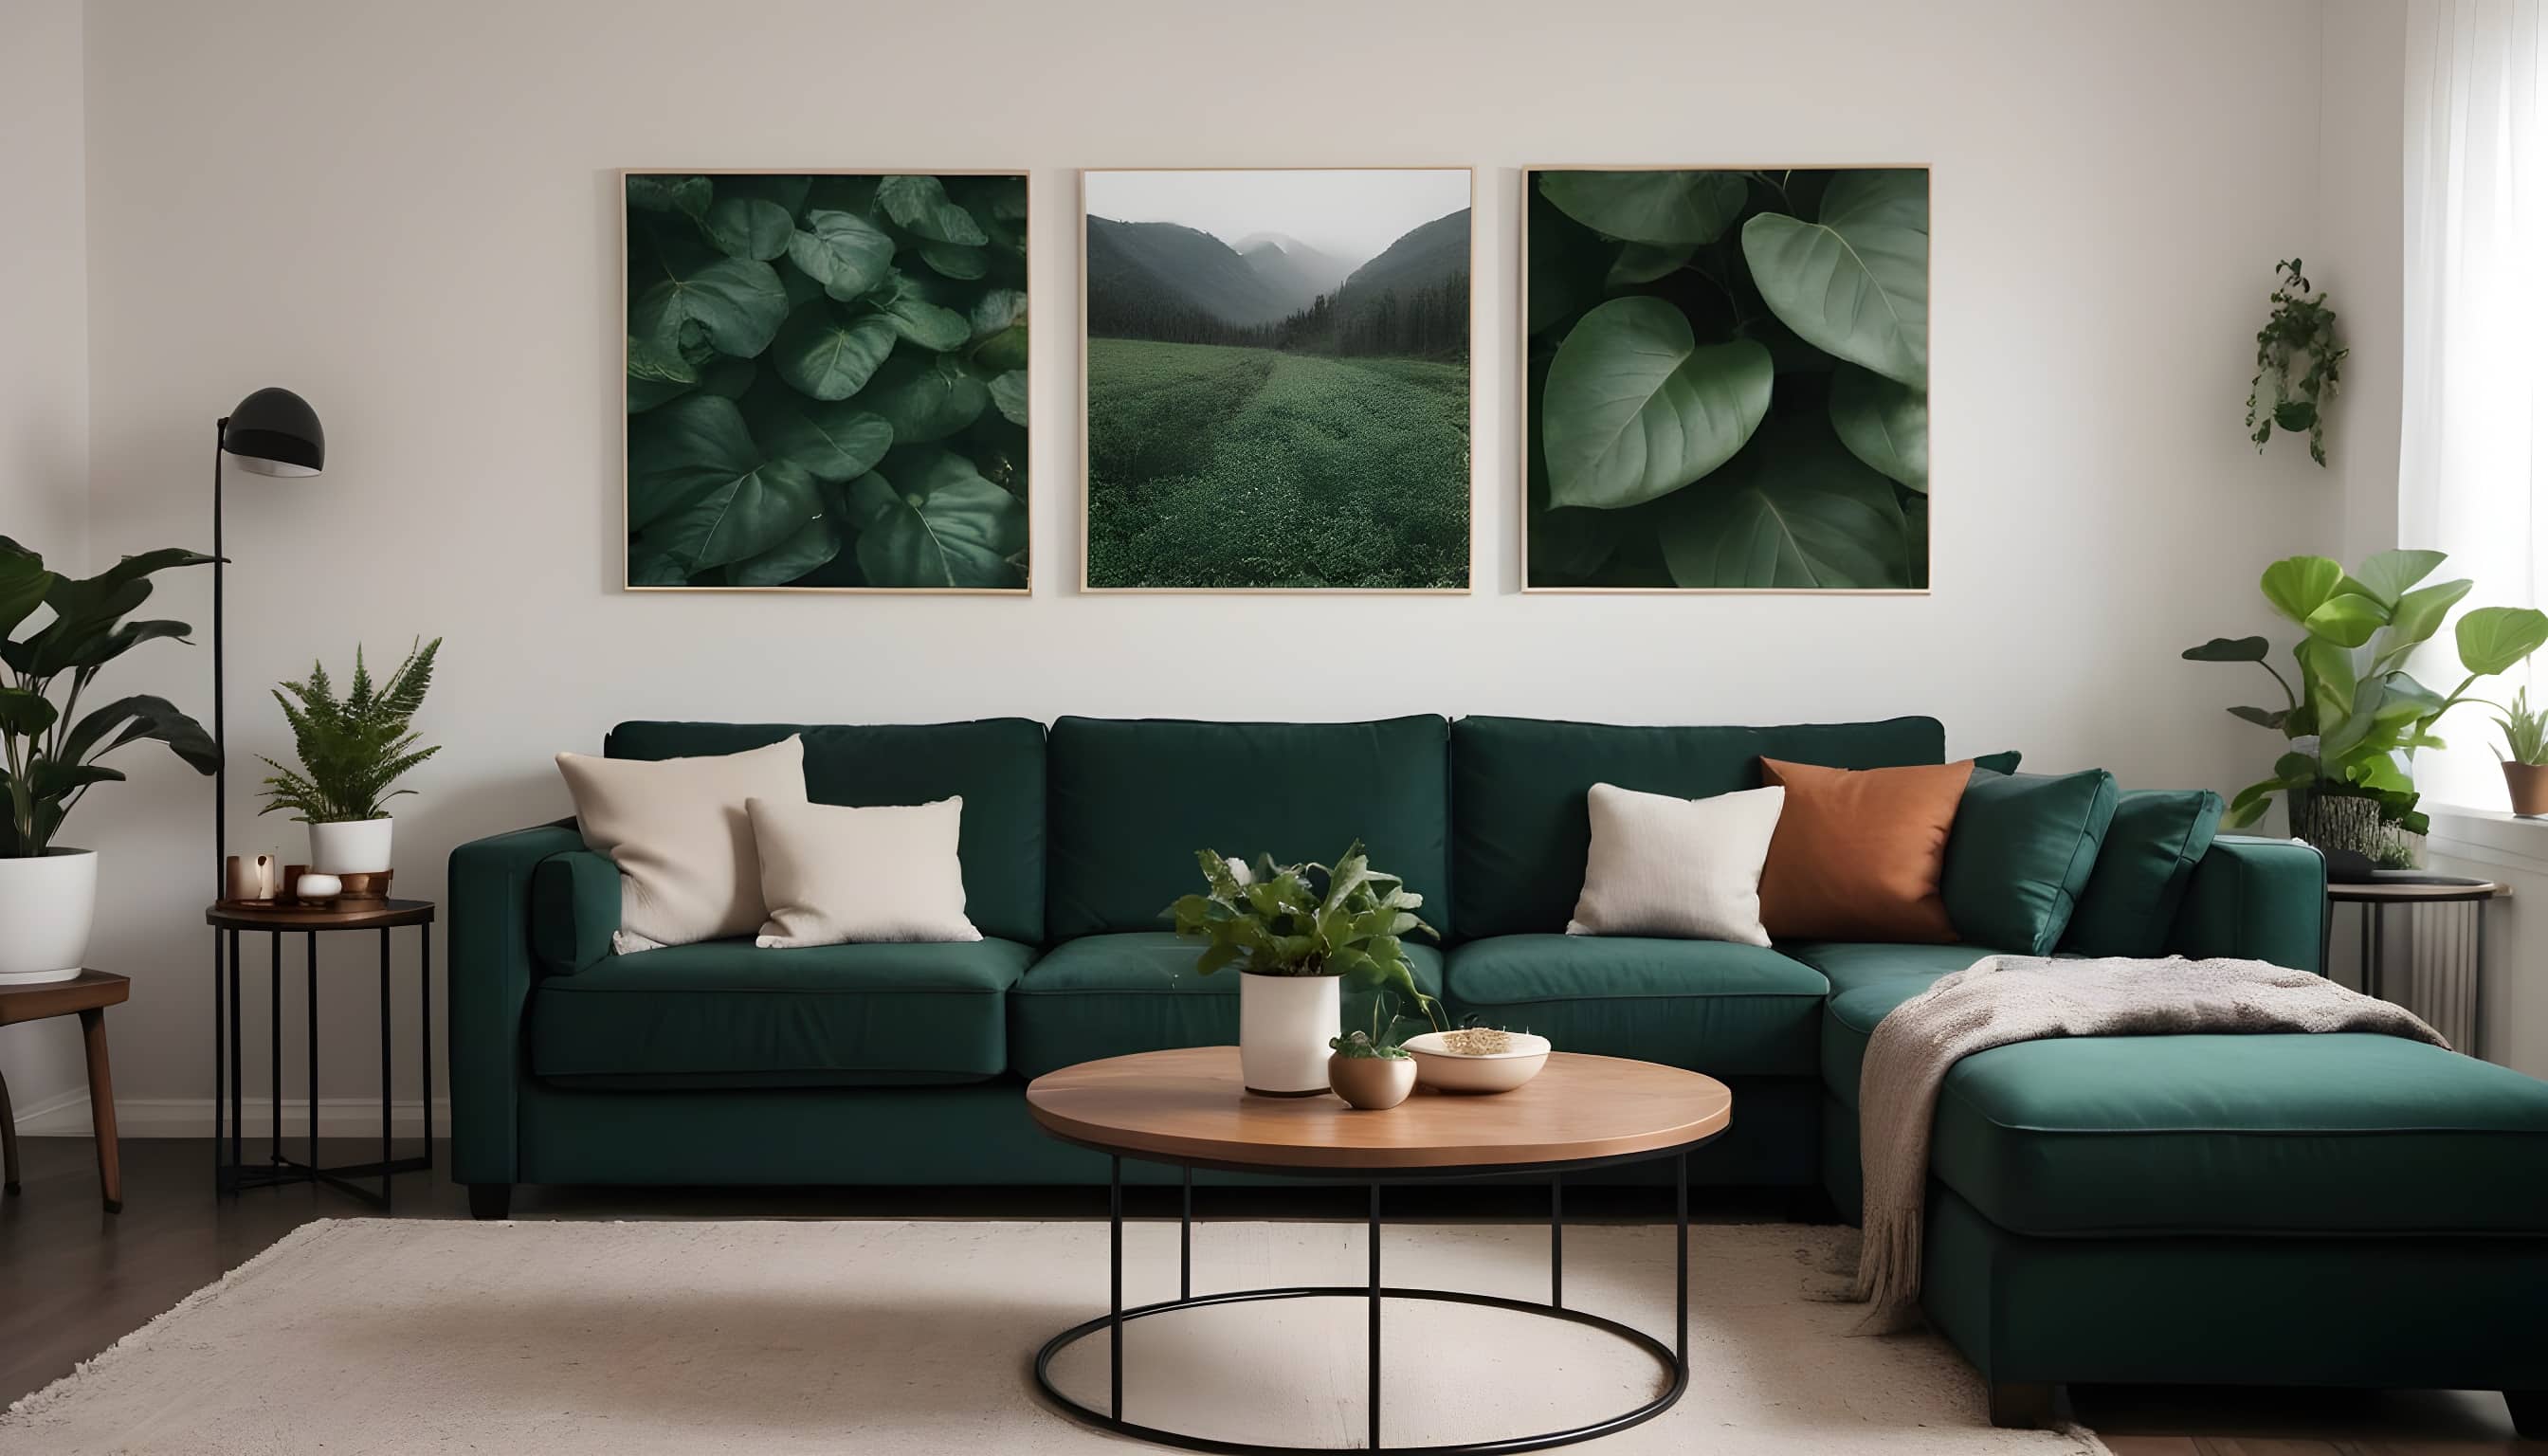
Experiment with different sizes of artwork in the living room. Create a gallery wall with a mix of small and large pieces that complement each other. If you have larger artwork, don’t limit yourself to traditional wall hanging. You can lean paintings against the wall in large, airy spaces. Smaller images and photos can be effectively placed on shelves, creating interesting visual layers.

TIP: Pictures over the bed make great decor pieces. For some people, a picture over their head can subconsciously evoke fears of it falling on them and worsen sleep quality. Choose a different wall and enjoy the view of the picture directly from the bed.
Creativity is key for children’s bedrooms, which change and evolve as they grow. The decor can also evolve with each developmental stage. Young children like cheerful colors, comforting photos of family and friends, and space to display their artistic creations.

Older children might enjoy frames with strings or hanging displays for photos of friends.

A very popular type of picture to hang are Polaroid-style Photos.

Matching motifs and colors
Combining colors in your interior spaces depends on your individual preferences and needs. If your space is based on a specific color, you can match it by choosing photos with similar colors or, conversely, using contrasting colors. If you don’t have photos that match or contrast with the space, try framing them in matching colors.
Combining black and white with color photos can bring balance to the entire photo arrangement. Choose a dominant theme in one color and complement it with black and white images.

When creating a gallery wall in one place, focus on a unified theme for the photographs, such as family portraits, landscapes, or art. This will enhance the balance of the entire space.
Placement of pictures: How high to hang photography and art
Generally, photographs should be hung at eye level. However, this varies for each person. While experimenting with different heights in a gallery, ensure that the images are easily visible. You don’t have to strictly adhere to the rule, especially in rooms with high ceilings, large artwork, or over desks or dining tables. Placing the centerpiece of the gallery at about 145cm from the ground is a safe bet.

For the dining room, opt for frames with washable covers, such as plexiglass or glass. This prevents the photos or artwork from getting dirty and allows you to quickly clean up any accidents, especially if you dine with children.
Create a photo collage
Photo and artwork collages are a popular design element in many homes. You don’t need to stick to a unified style, material, or color. Just respect the overall concept of the space and the room’s purpose.

Test out the arrangement of the collage using paper cutouts in the size of the pictures before actually hanging them up.

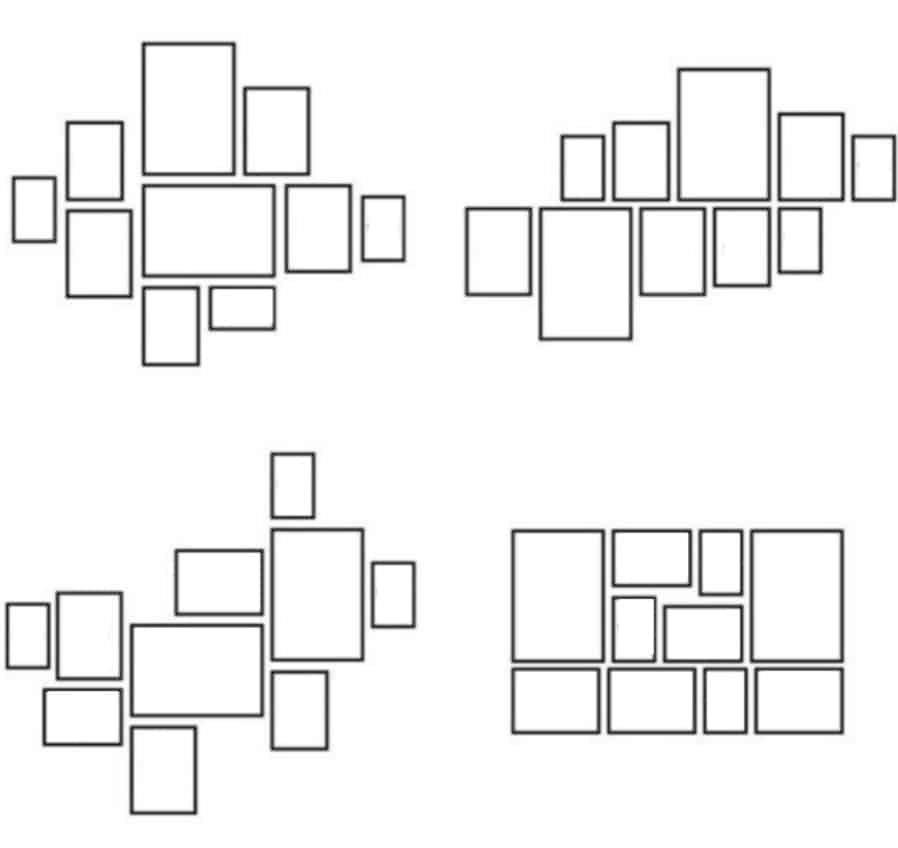
Before you start arranging the pictures, consider how you want to organize them and along which line. The options for arranging the picture gallery are as follows:
- Center Line: The center of the pictures lies on a horizontal line.
- Top Line: The top edge of the frames is in one plane.
- Bottom Line: The bottom edge of the pictures is in one horizontal line.
- Vertical Line: Layout suitable for narrow spaces.
- Diagonal Line: Leads the eye diagonally upwards.
- Wavy Line: Can bring a fresh design to distinctly angular spaces.
- Geometric Shape: Pictures are spread out to form a geometric shape.
Find a unified theme for the photo collage. This connecting element can be anything, and when it corresponds to the purpose of the room, it adds an unmistakable atmosphere to the space. Try a combination of black and white images, family photos, travel, or architecture photography.
When creating your photo collage, place larger photographs on the left. Why? Most people are accustomed to reading from left to right, so this layout is natural for the brain.
Arranging artwork on staircases and in other spaces
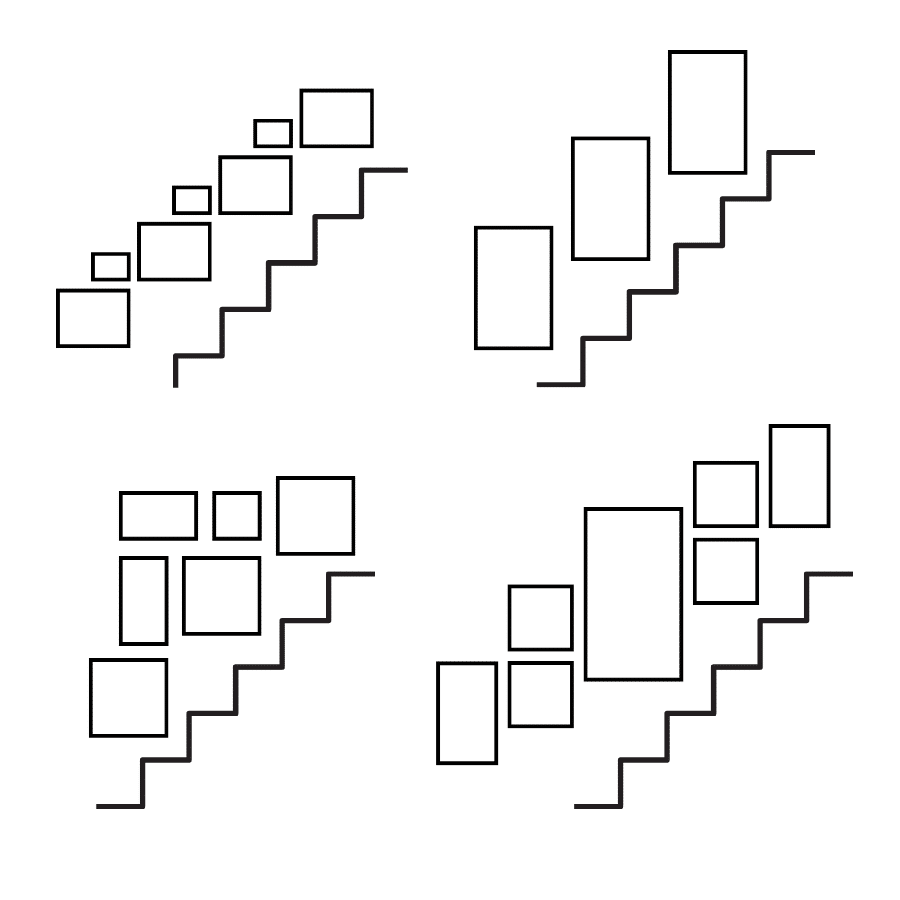
If you have a staircase, it is an excellent opportunity to create a dynamic atmosphere, play with perspective, or emphasize height. A collage that mirrors the staircase can create a pattern of images that unfold as you ascend or descend. Alternatively, stick to a unified theme or color.
TIP: Create a gallery wall of travel or family photos and establish a timeline.
If you’re leaning towards minimalism, opt for a more prominent motif, such as a triptych. Choose a single image and divide it into multiple canvases. With Zoner Studio, you can even adjust your triptych to move gradually along the staircase.
A single theme spread across several images also works well. All pieces can be centered, maintaining the same height over the stairs. Alternatively, you can align them with the top or bottom line. We recommend arranging them from largest to smallest upwards. This ensures that the lower images remain fully visible and their parts don’t get lost within the upper level.
Create a home full of memories with photography and create a place you’ll want to return to. Print photos in any size, on canvas, or foam board in the Print module of Zoner Studio. Download Zoner Studio with support for all features free for 7 days.home decor
There are no comments yet.