Zoner Studio Editing School II: Developing an Autumn Portrait Step by Step
This time around, we’ll show you how to edit an autumn portrait in the Develop module. And we’ll give you the original RAW on top, so that you can try out the edit for yourself. You’ll learn to work with local edits and fine-tune a photo’s colors—and you’ll also appreciate our practical tips on how to work in the Develop module.
Last time around, we showed you how to edit a nighttime portrait. This time we’ll be focusing on autumn. You definitely have a lot of photos with autumn colors, and you might be unsure of how to work with them in Zoner Studio. Read this article and let us show you how to edit an autumn portrait. Download the RAW file and try out the edit for yourself. You’ll definitely gain some autumn inspiration while you’re at it.
Download the RAW file and get to work.
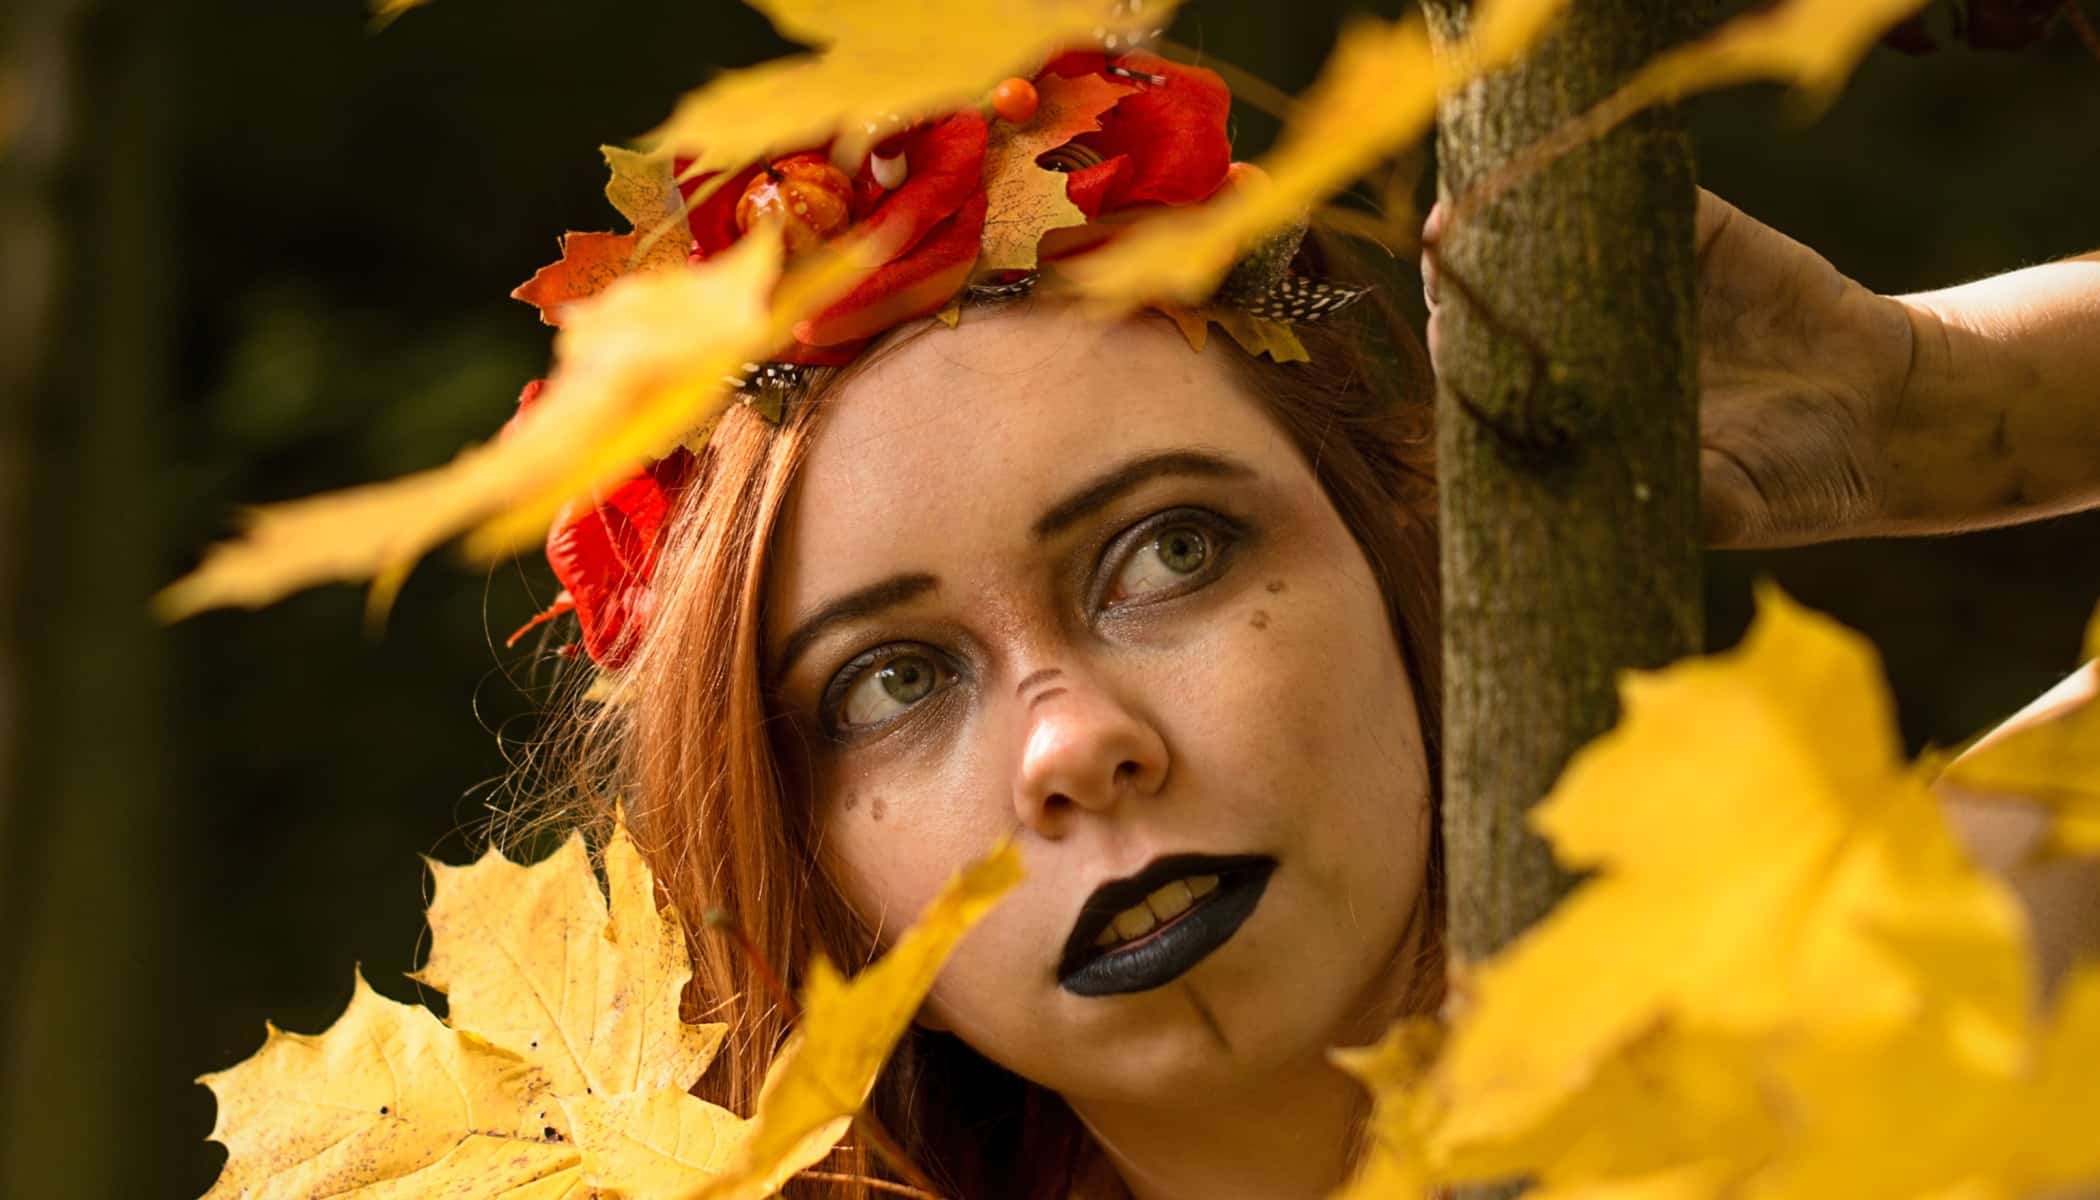
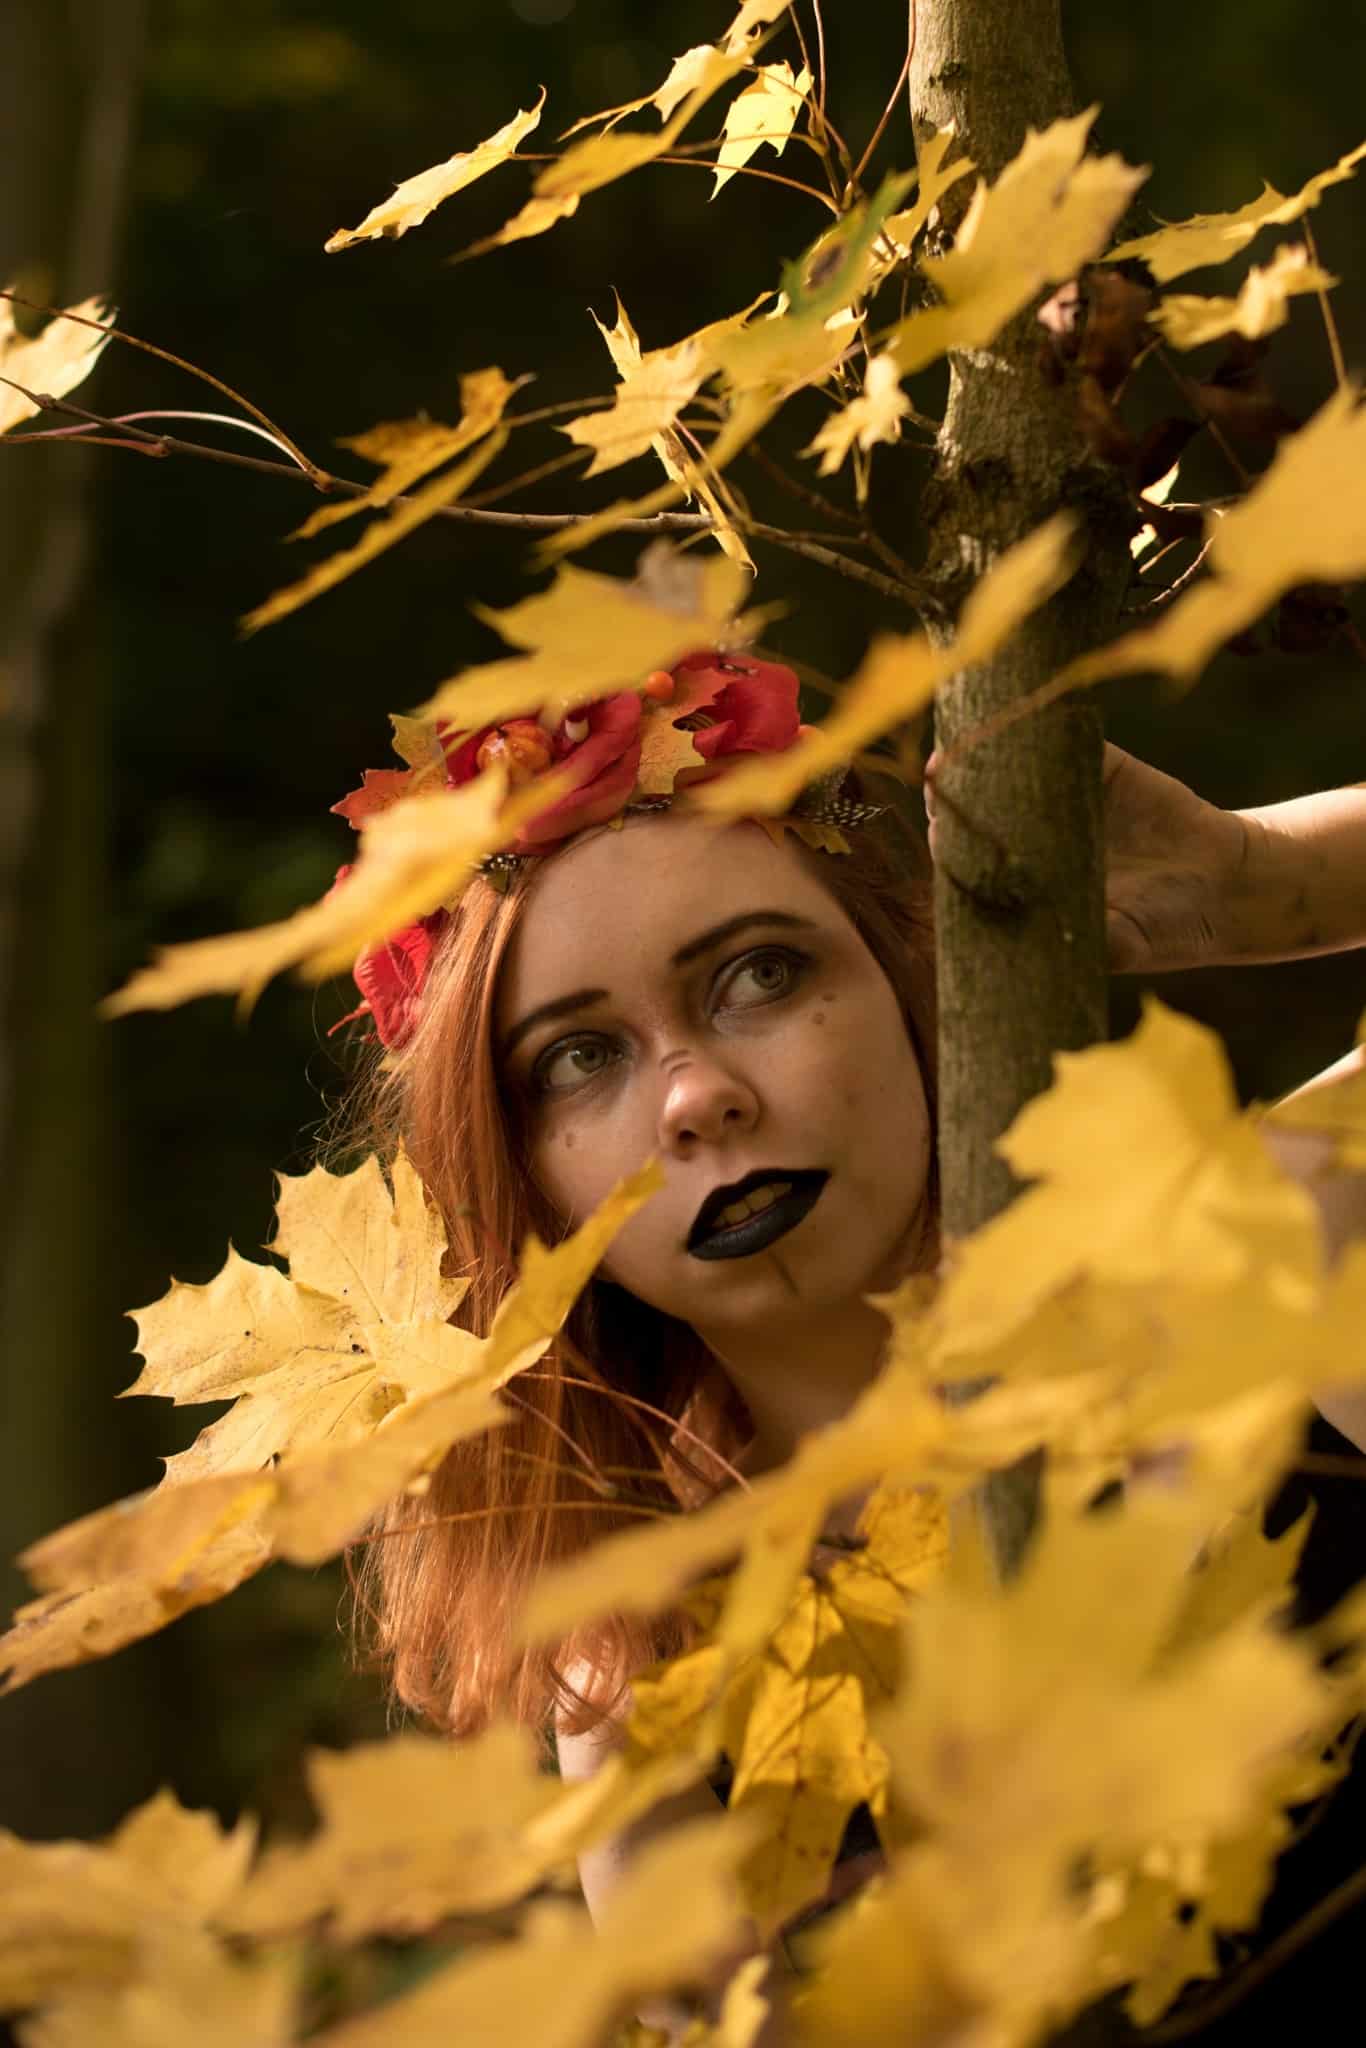
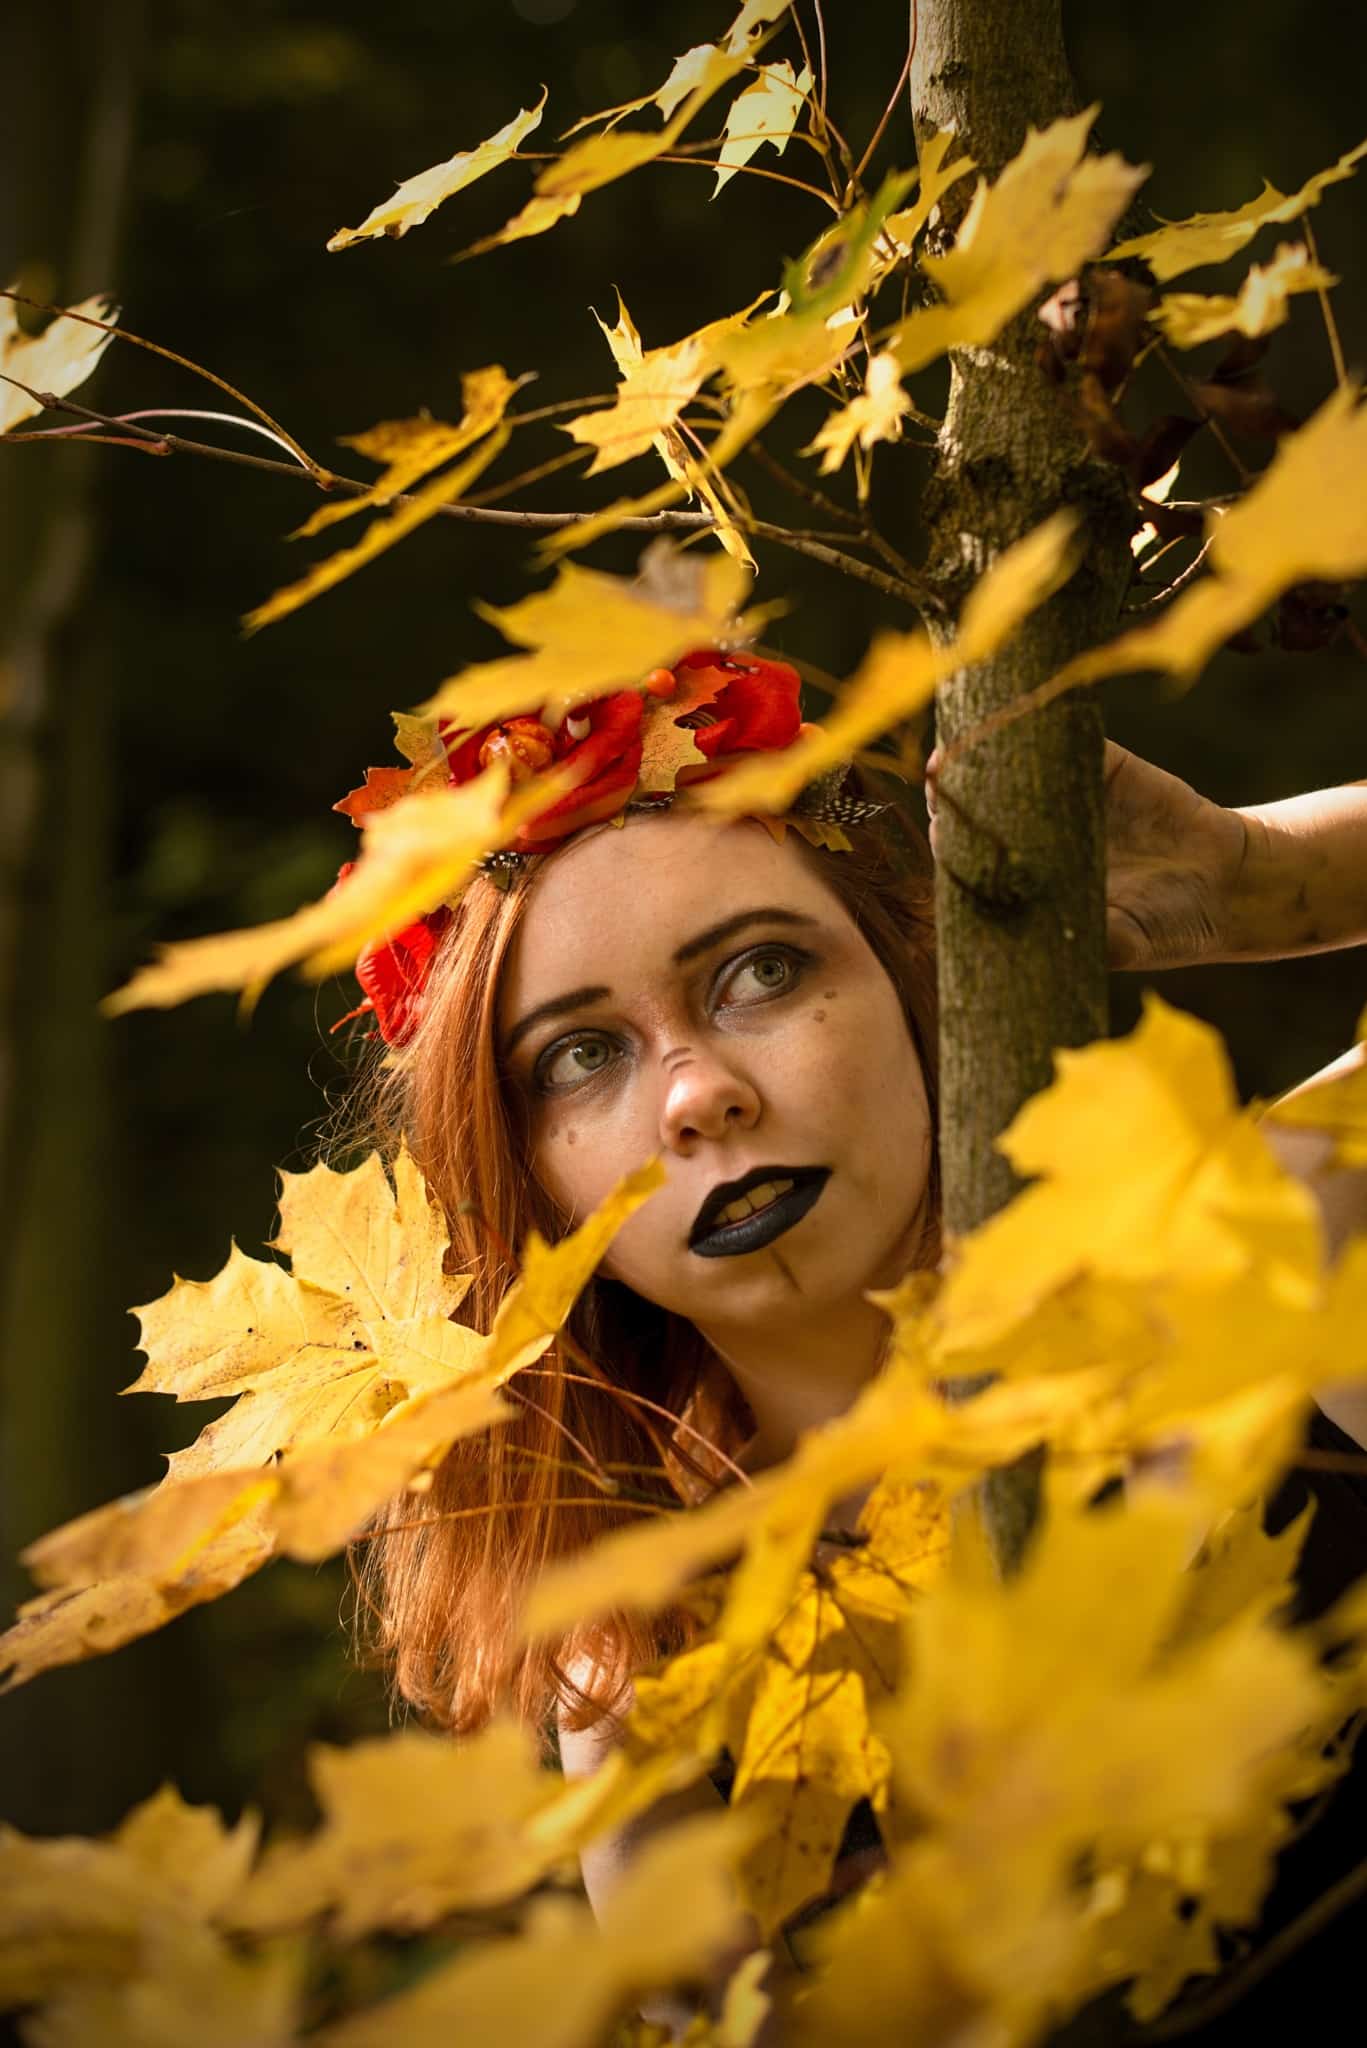
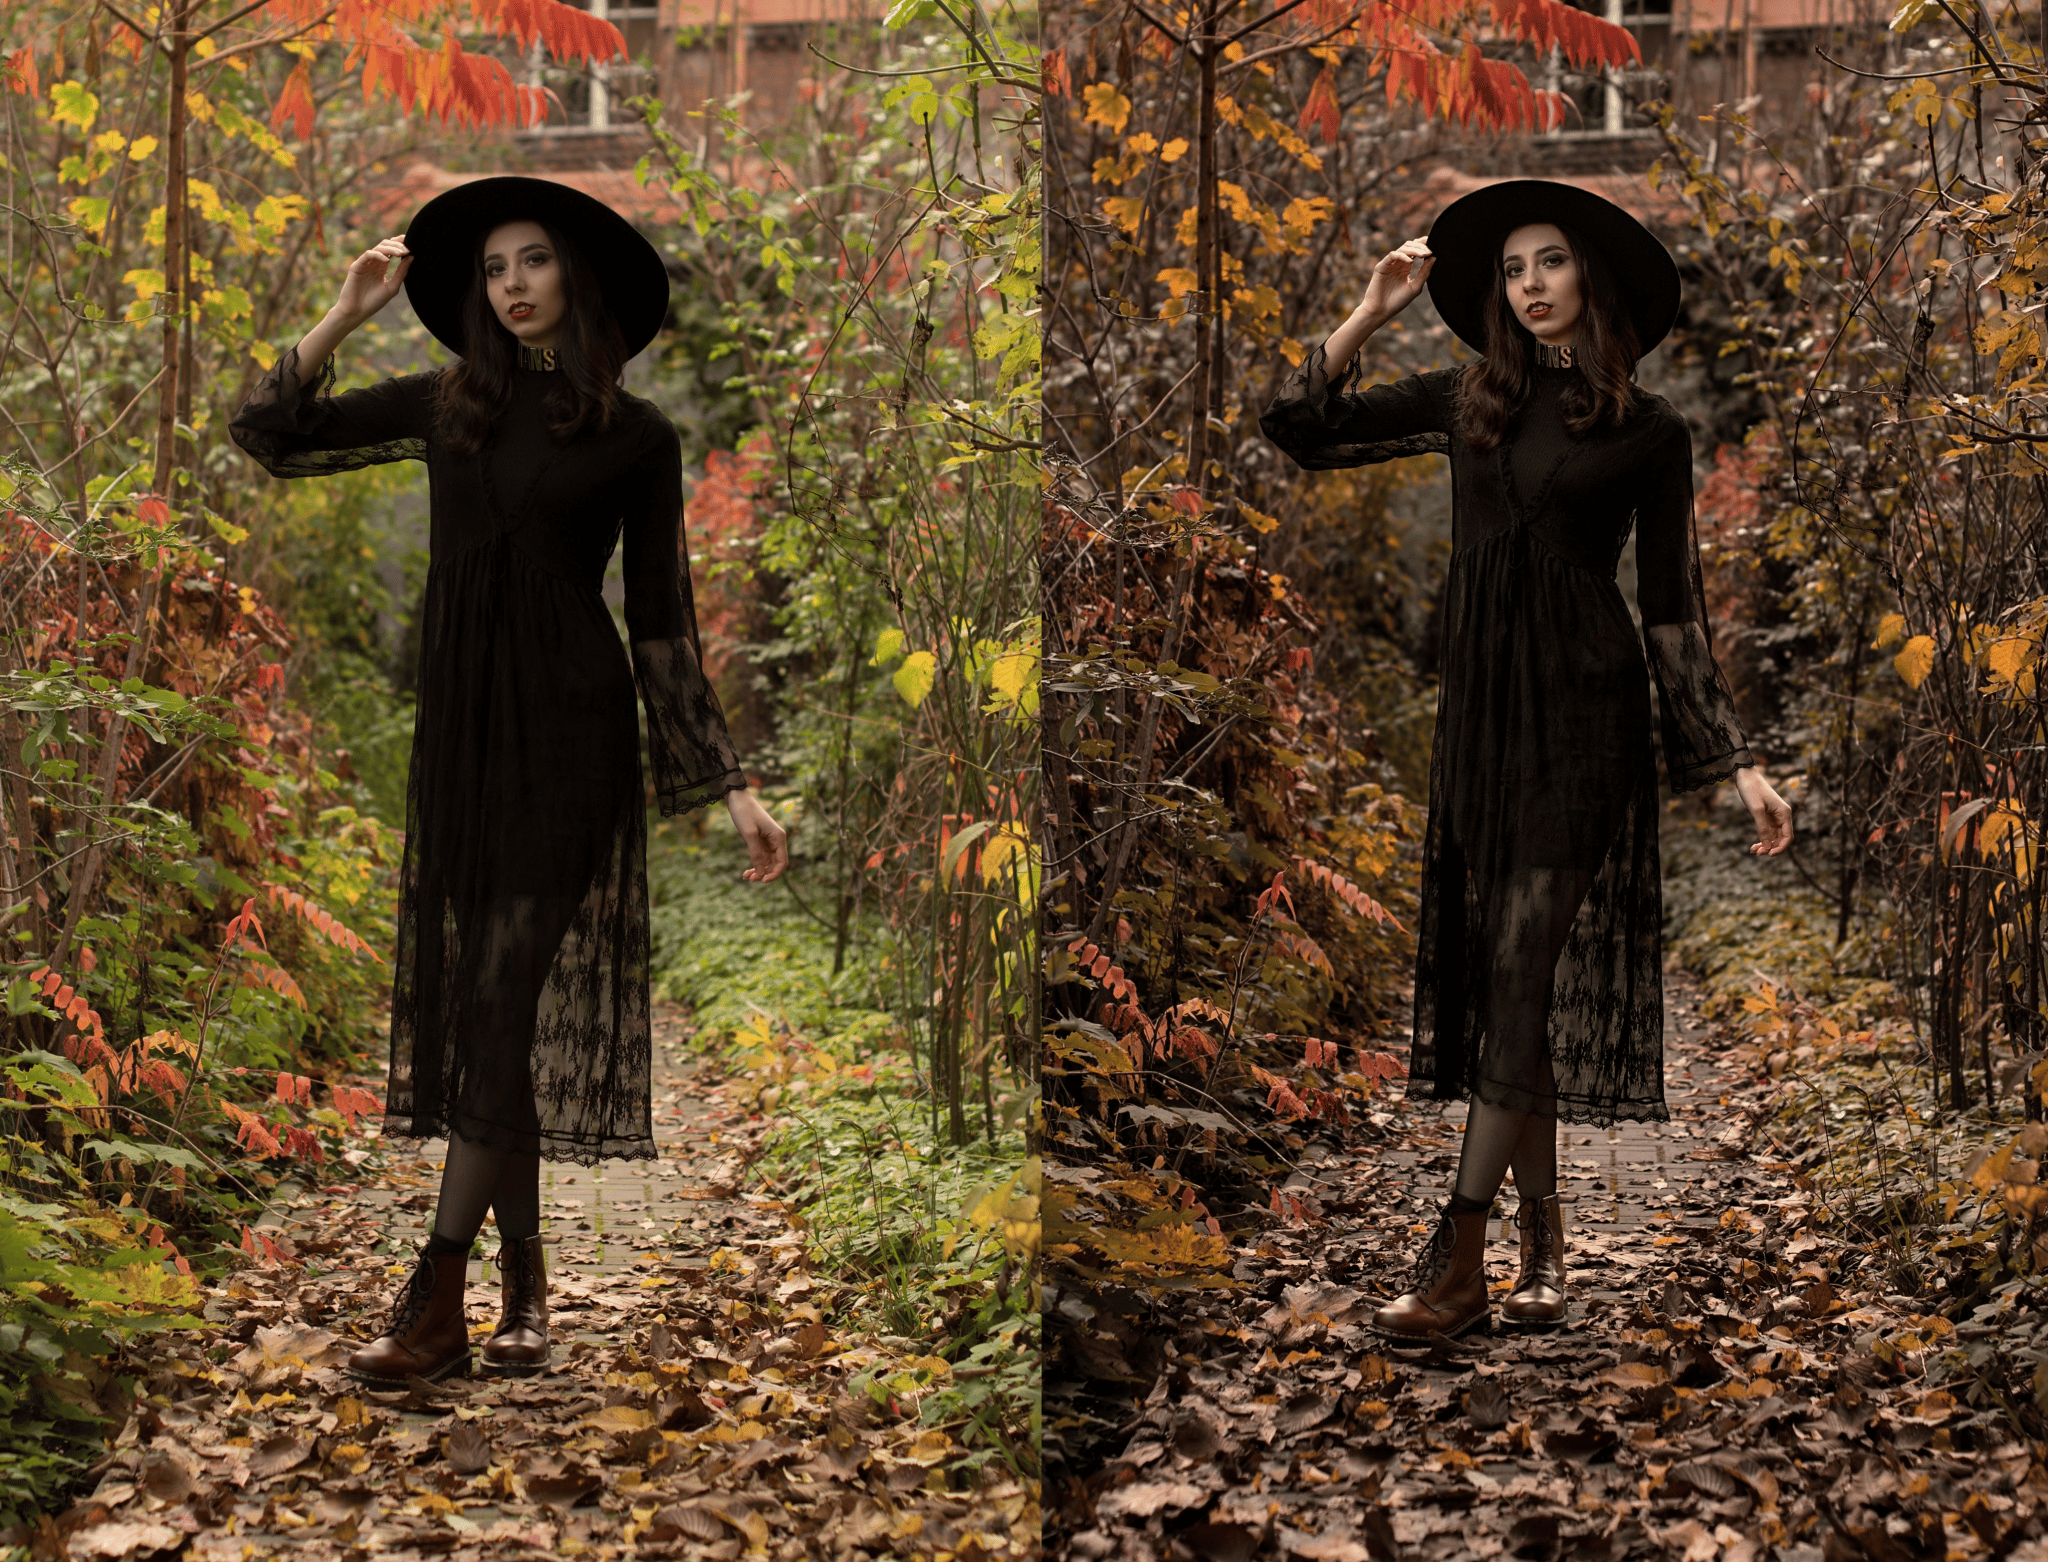
The photo before and after retouching. Nikon D750, Nikon 50mm f/1,4 AF-S NIKKOR G, 1/500 s, f/2.2, ISO 200, focal length 50 mm.
Go to the Develop Module
You will be working in the Develop module in Zoner Studio. You’ll be brightening the model and darkening their background. We’ll show you how to straighten the photo, how to play with its exposure, and how to use exposure to give a photo the atmosphere you want. We’ll also show you the right way to work with black in a picture so that textures aren’t drowned out in the picture’s darker areas, and yet the blacks remain black. You’ll get playful with colors here—you’re going to be emphasizing autumn tones and slightly shifting the picture’s tone curve. You’ll also be doing some basic retouching.
Crop the Photo and Straighten the Lines
First crop the photo using the Crop and Rotate (C) tool. We recommend leaving the existing ratio of sides or choosing one of the predefined ratios. Custom ratios are always a compromise and can destroy the composition you had in mind when taking your shot. In the photo here, you can see how the model has too much space above their head. We’ll crop the photo in a way that doesn’t cut anything off; we definitely don’t want to remove the poor model’s shoulder or arm.
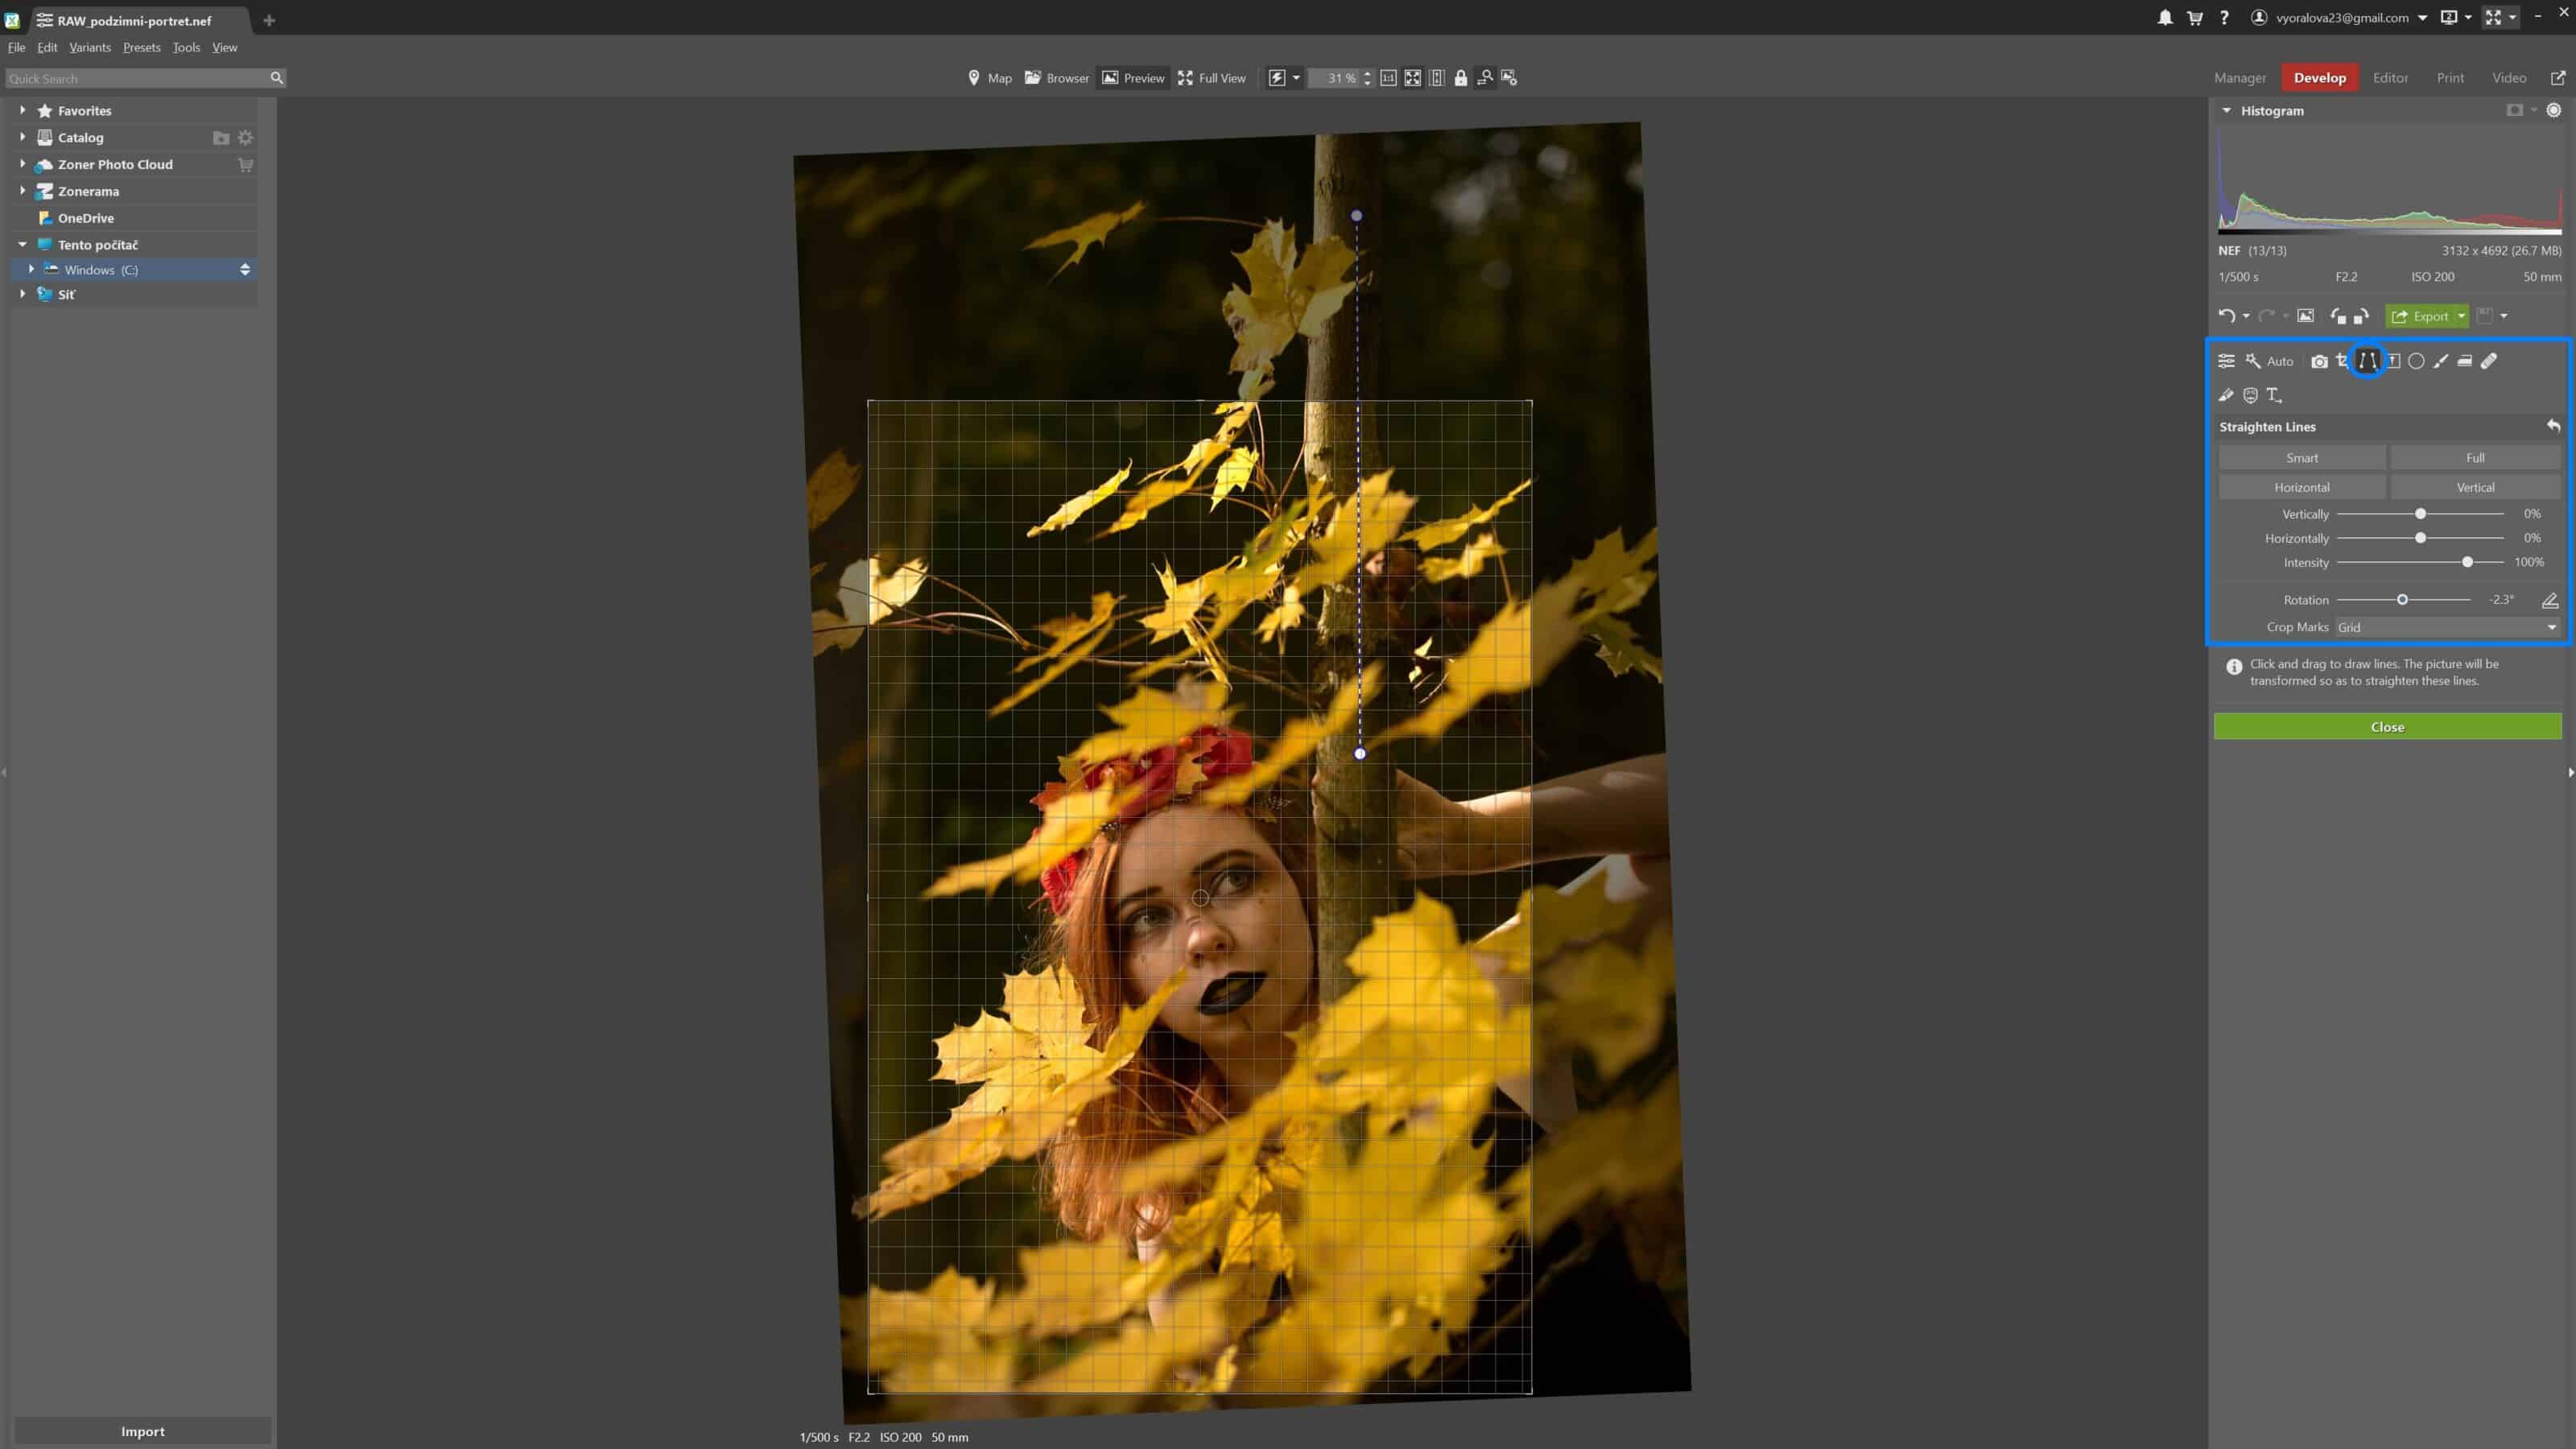
The photo also needs straightening—it is crooked at first sight. Use the Straighten Lines tool (K) to straighten a horizon in a single stroke. Find an object that is visibly slanted (a tree, wall, column, etc.) and run the mouse over it in a single stroke, producing a line. Zoner Studio does the rest of the work for you automatically. But note that if you create two or more lines, you can easily deform the photo.
Brighten the Model and Darken the Background
The model in a portrait stands out superbly if they are brighter than the background. You can strongly support this while taking the picture by using a reflector, but you can really perfect it in the Develop module. Use the Filter Brush (B). To see your brush strokes and which areas are and aren’t covered by the selection mask, turn on the Invert Mask option. Its button is at the top right above the histogram. This option shows your selection in blue.
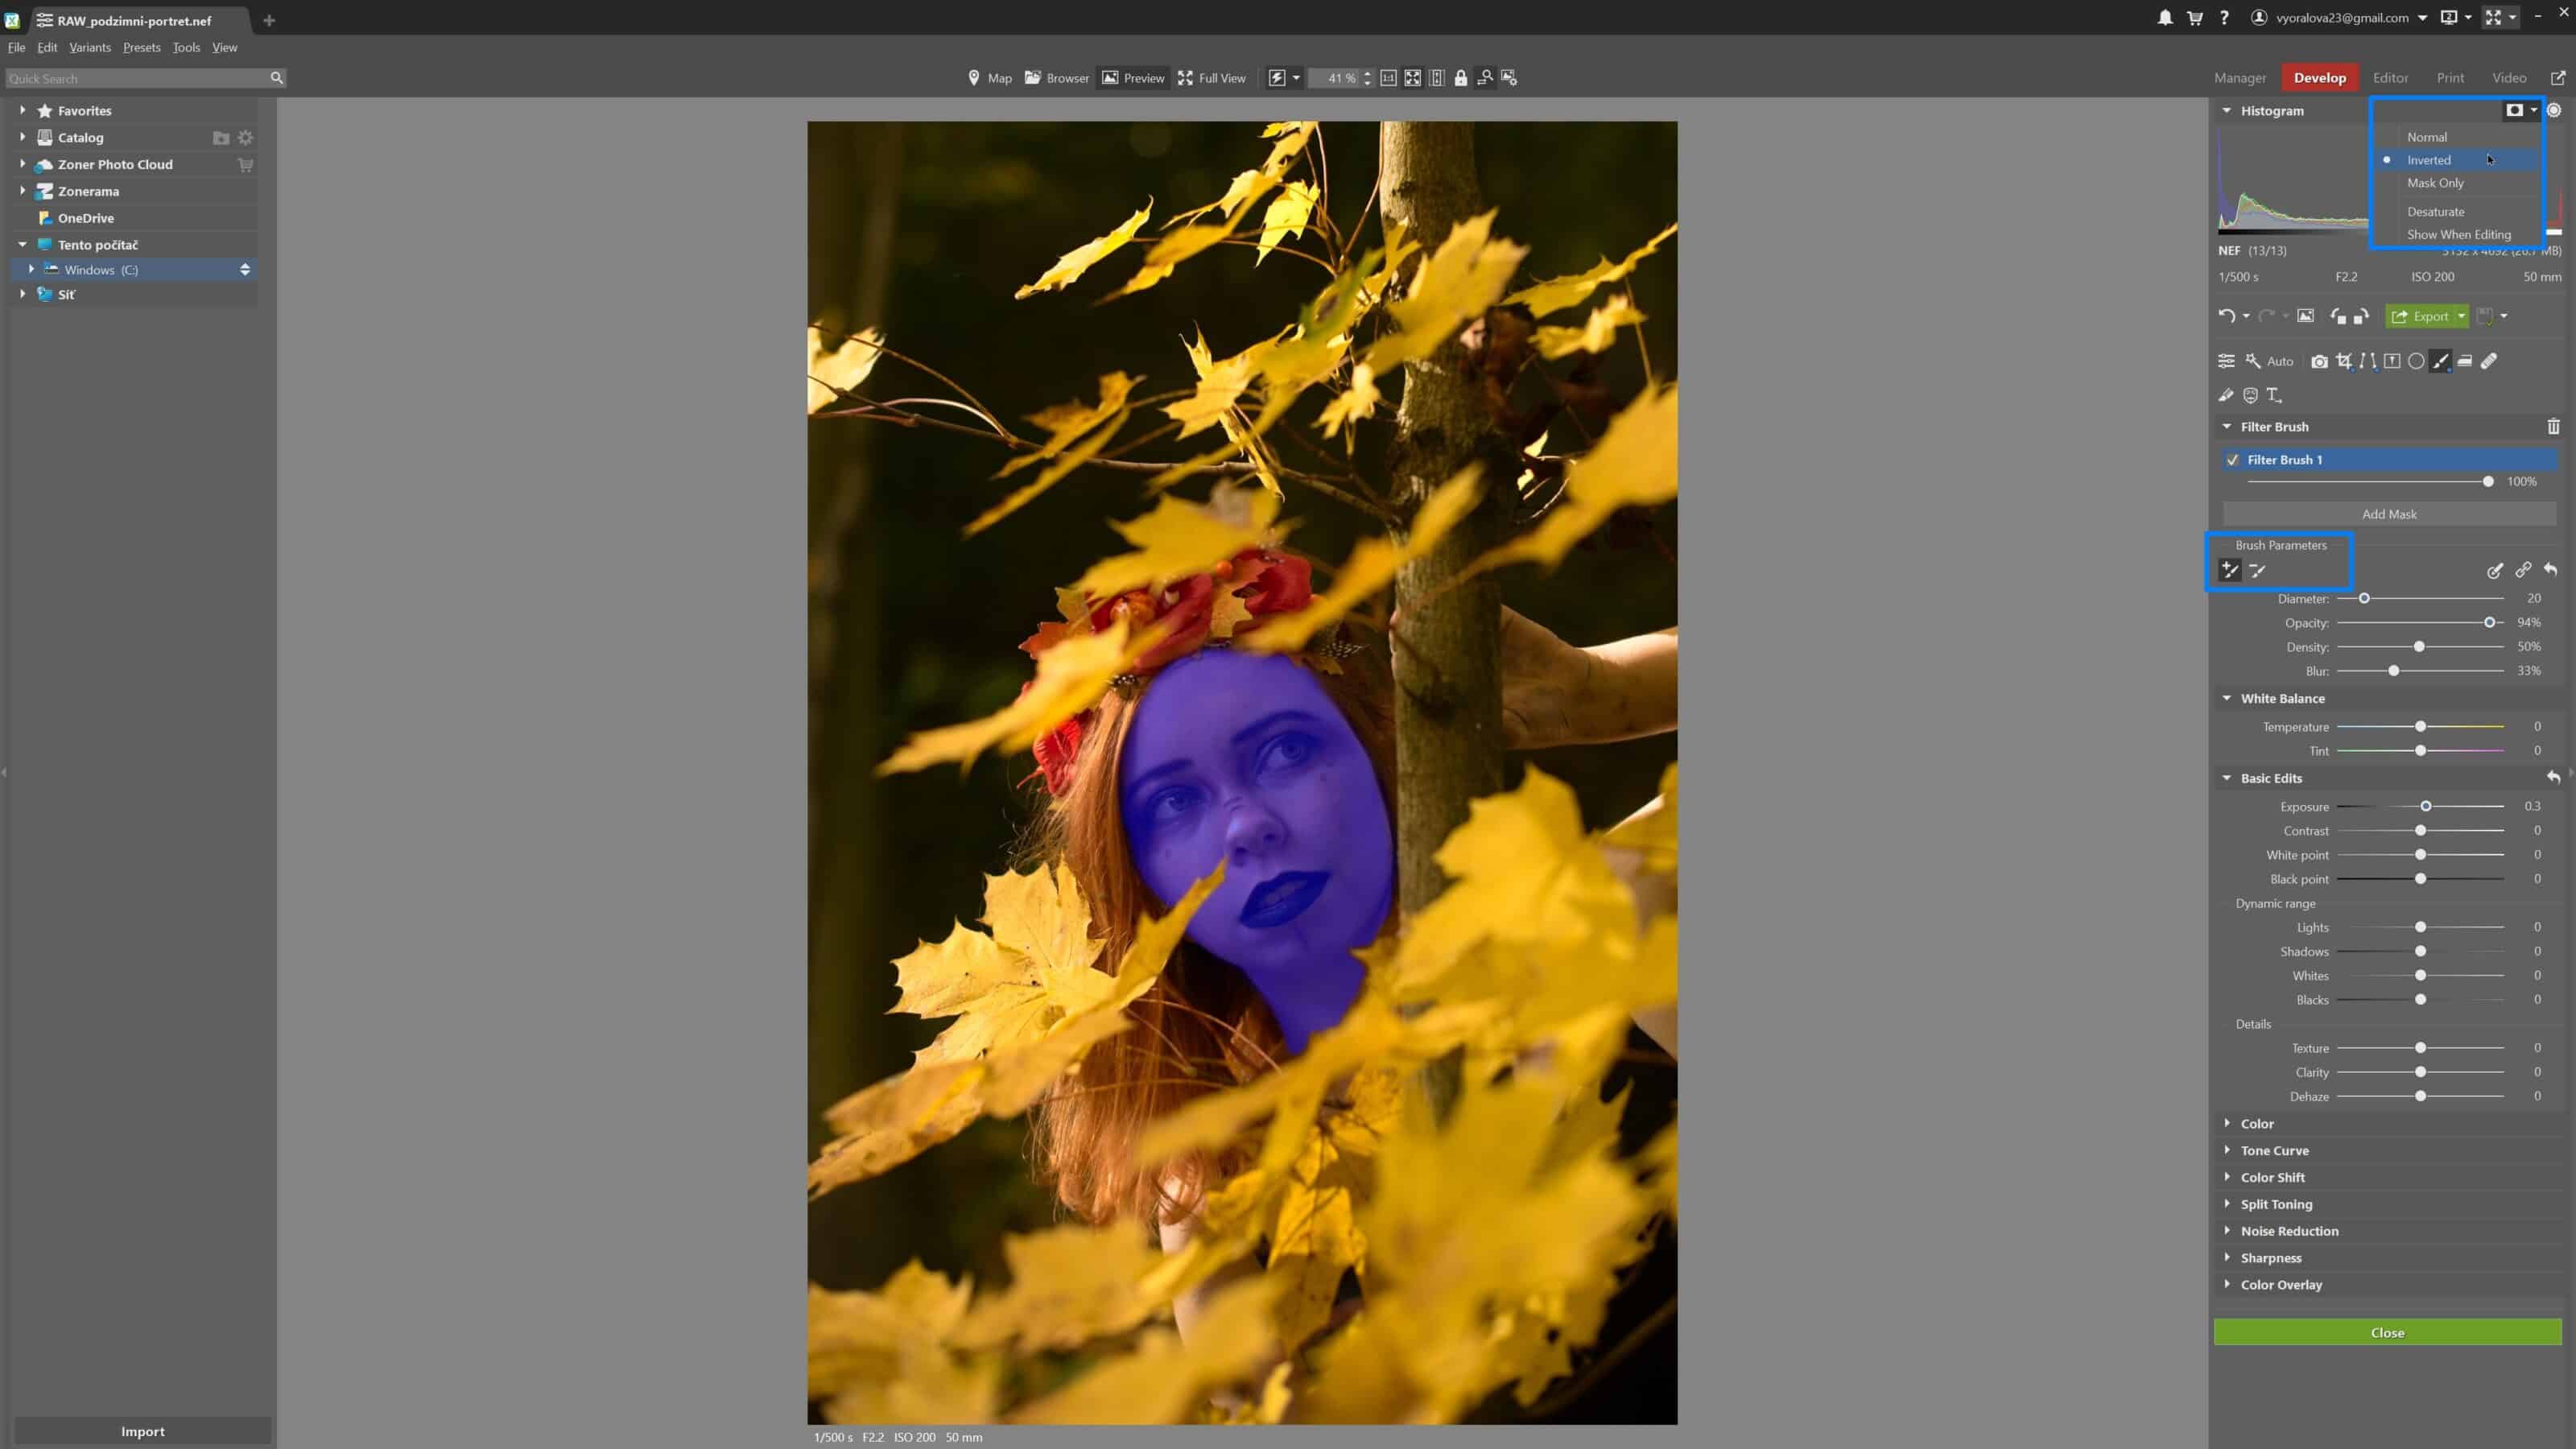
The part of a photo that you choose to brighten may vary. Your choice here strongly depends on the given situation, but in general, for portrait photos, it’s best to select the face only, while for whole-body photos, it’s best to select the whole model.
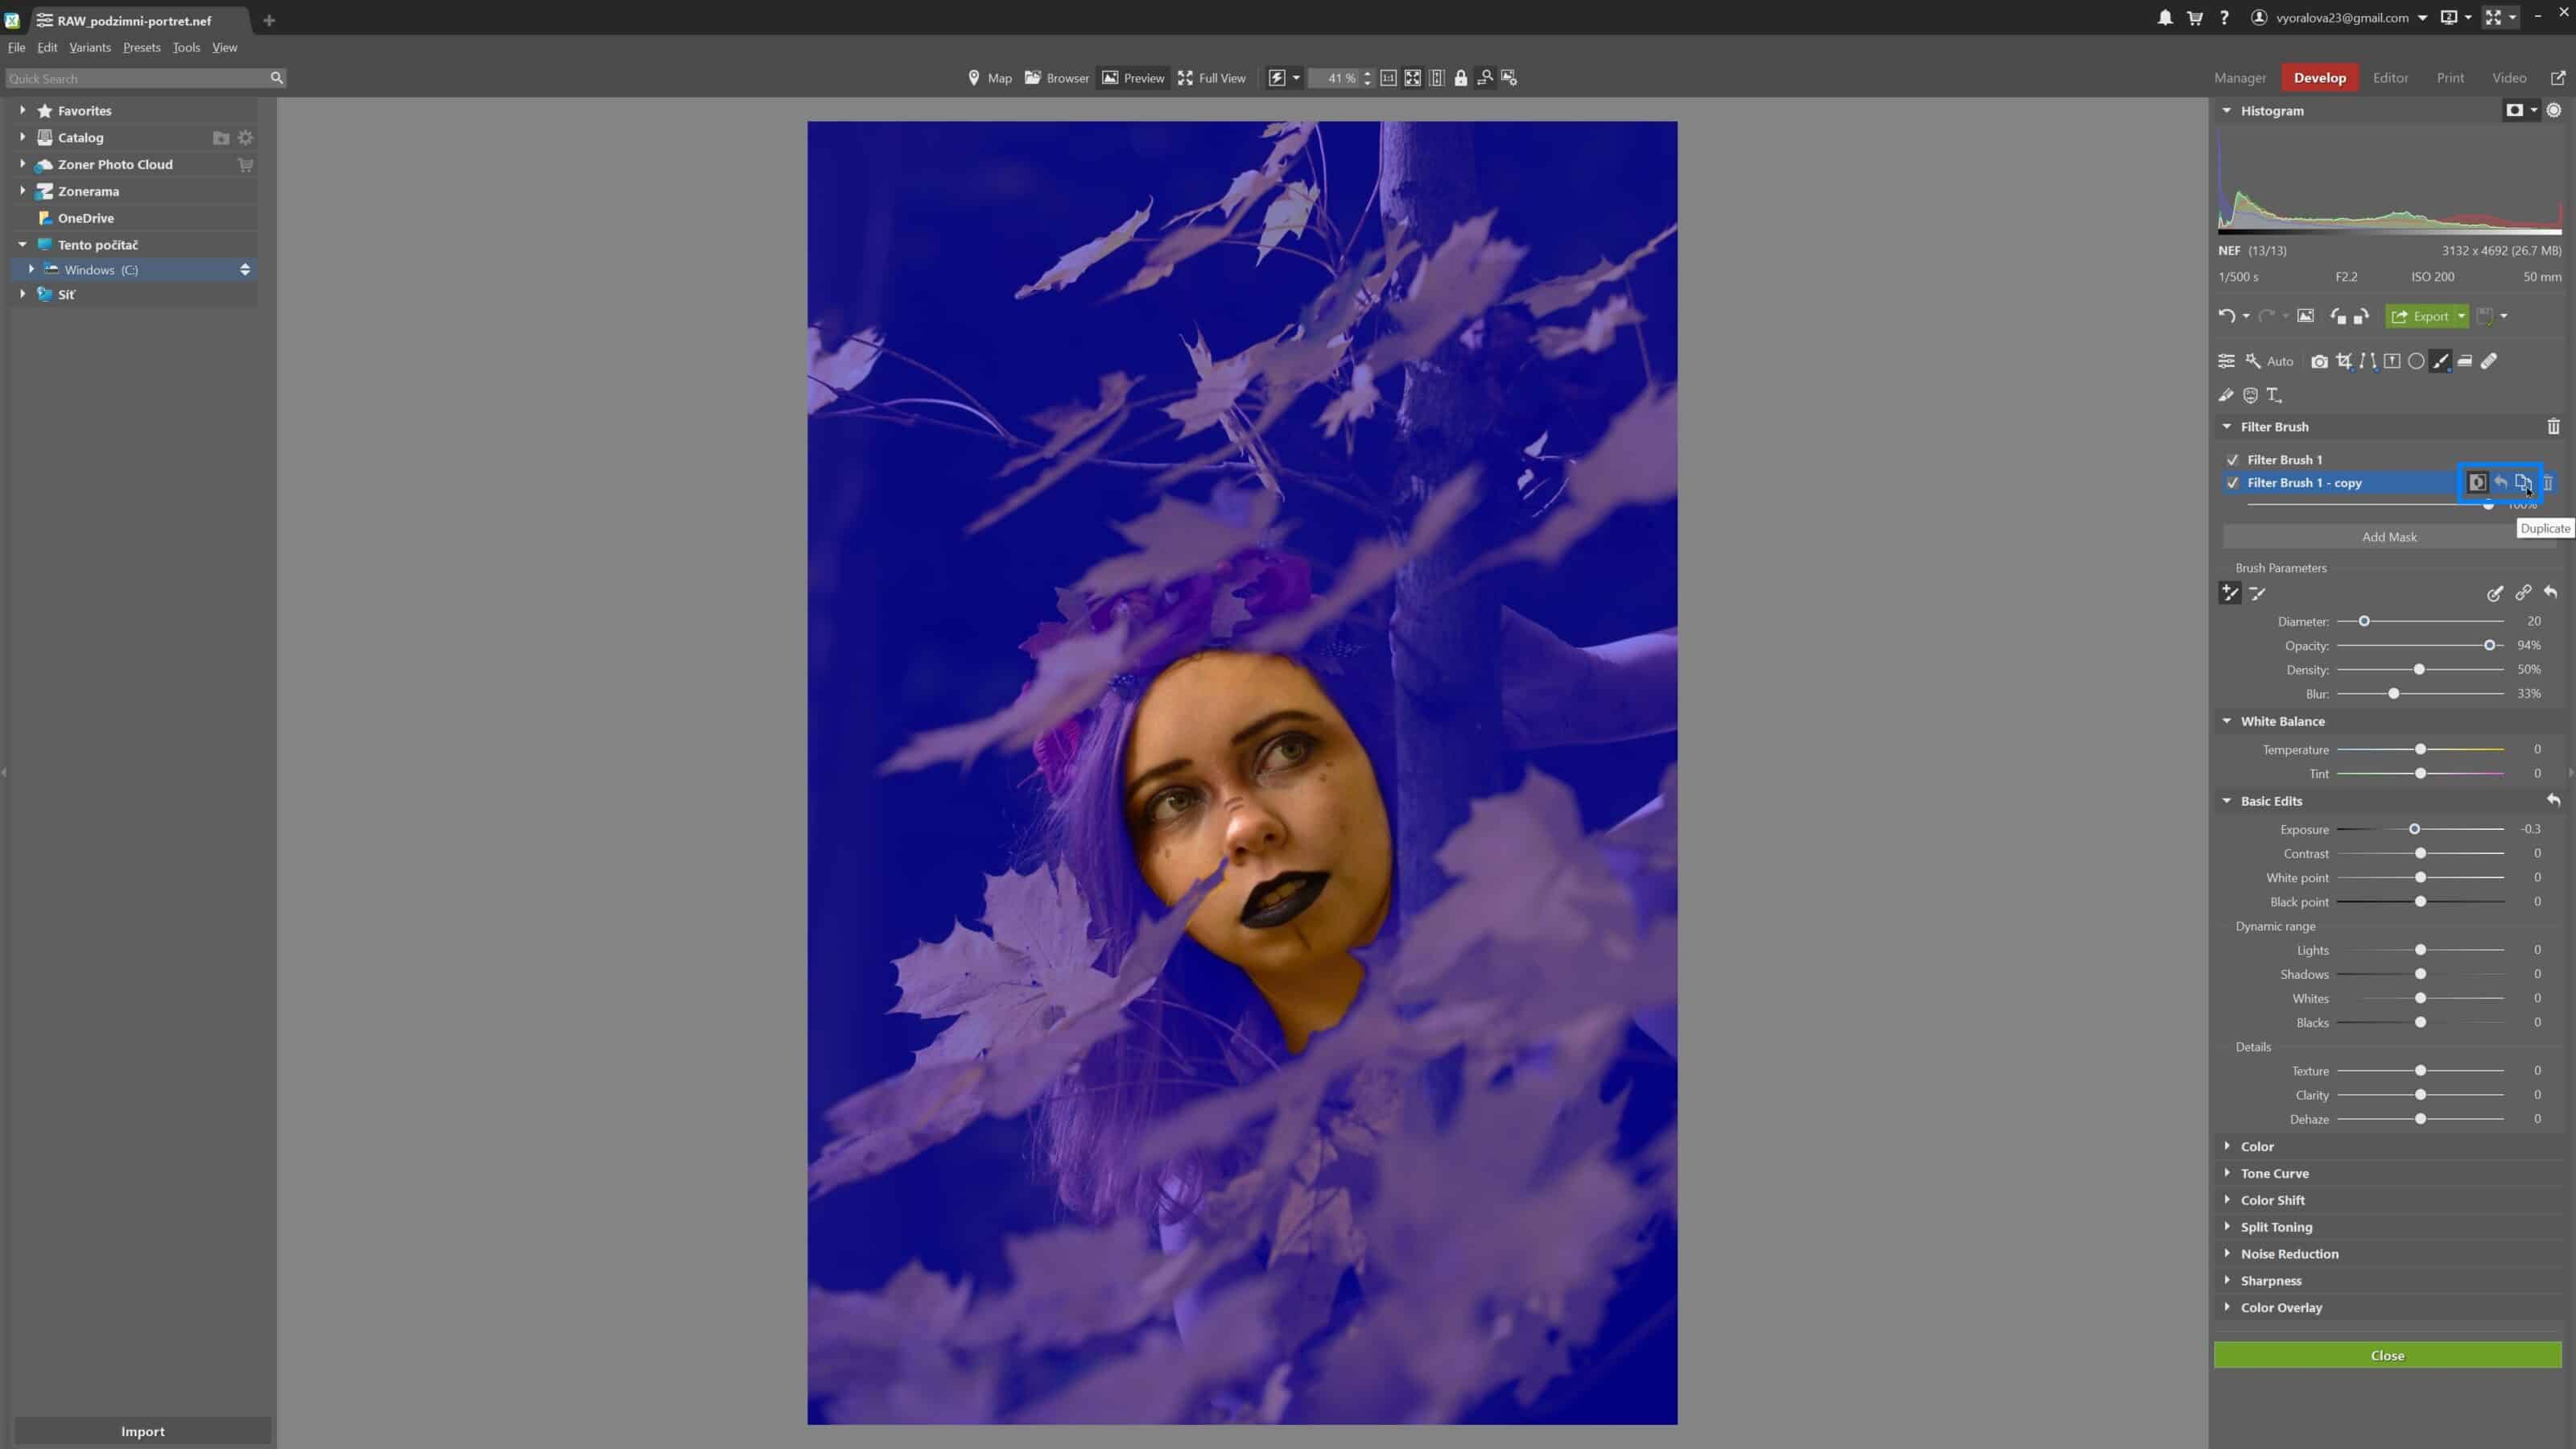
Once that selection is ready, it’s time for the brightening. You have several choices available here: exposure editing, shadow brightening, changing saturation, etc…. However, we don’t recommend making excessively large changes, because after this stage, you will also be editing the photo overall. So it’s good to slightly brighten the face using the Exposure slider and then darken the background. Darken the background by first duplicating the mask you’ve created and then inverting the mask and lowering exposure.
Exposure Edits Give the Right Atmosphere
After your work with the Filter Brush, go back to overall editing in the Develop module. You’ll first be taking a look at the Exposure settings. But always be careful—it’s not good to go to extremes. In this specific case, where you’re adjusting exposure using the Filter Brush, we don’t recommend also adjusting the overall exposure.
Next comes Contrast. For dark photos, we recommend going into the minus values here and then fine-tuning Shadows and the Black Point. Here’s an example to illustrate:
The model is wearing a black dress, but its texture and shape are hard to see. It will help if you reduce the contrast and shadows while also raising the black point. That way, black will stay dark, but any hems, lace, and pleats will be highlighted… in short, the dress will no longer be one big shapeless black blob.
Nikon D750, Nikon 50mm f/1,4 AF-S NIKKOR G, 1/640s, f/2.8, ISO 200, focal length 50 mm.
Along with our reduction to contrast, this edit has produced “fog” in the photo, but this is easy to get rid of using the Dehaze slider. It’s possible that your edits will slightly increase the picture’s saturation, but you can simply reduce it in the Color section if needed.
As far as the picture’s atmosphere is concerned, dark colors and Clarity support a dark and dramatic atmosphere. Meanwhile, increasing Lights, adding Exposure, and reducing Clarity make a photo feel more tender and joyful.
Clarity shouldn’t be overdone in either direction. Take too much away, and textures throughout your subject’s face and shapes in the whole photo will become less visible. Add too much, and you’ll have to spend more time retouching, because every minor skin defect will be easy to see.

Powerful Tools for Work With Colors
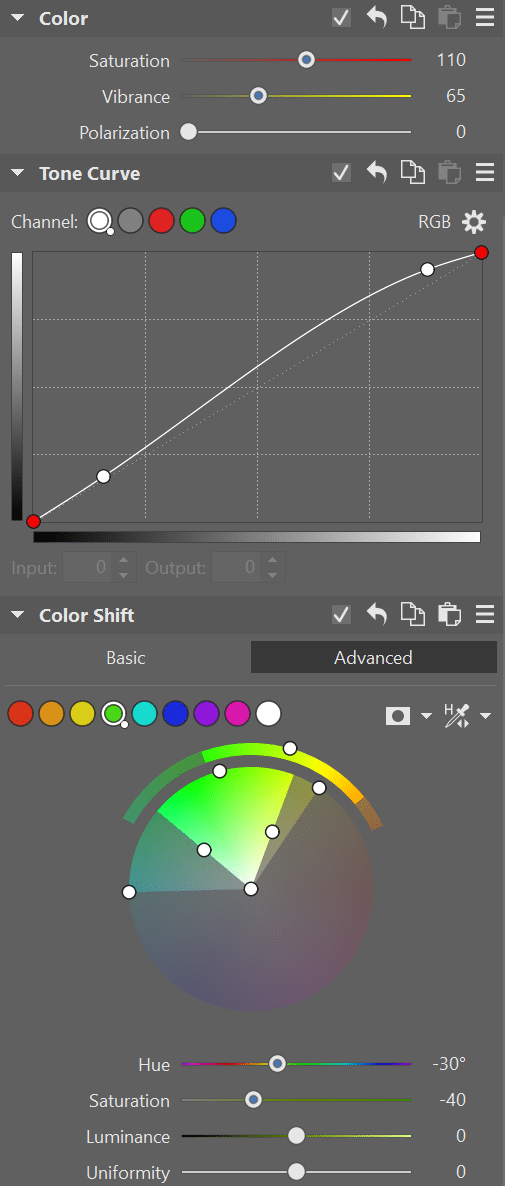
- Saturation is a powerful tool that can change things a lot. If you feel that a photo is excessively colorful, try reducing its saturation. And if its colors feel insufficient, just add some saturation.
- Clarity is less aggressive than these and can help significantly to change a photo’s atmosphere.
Another thing that also strongly affects a photo’s colors and completely changes its atmosphere is White Balance. This tool is not in the Colors section, but it does affect a photo’s colors significantly. To give a photo “cold” colors, feel free to go almost to 3,000 kelvin, which gives the photo a cold evening mood. For a warm photo, you can go all the way up to 9,000 kelvin, giving it a summery mood.
Color shifting, meanwhile, changes the saturation and hue of specific colors. Here we want to give the photo an autumn mood. The typical autumn colors are red, orange, and yellow, which are very saturated colors. So we want to add saturation while suppressing green hues.
Be careful not to change the colors in the model’s face too much! Their skin color should stay unchanged. However, if you go overboard a bit on their facial colors, you can go back to the mask in the Filter Brush and drag the Saturation slider in the Colors group leftward.
We recommend adjusting the Tone Curve only minimally. At most, we’d recommend bumping individual color channels or the overall curve—the whole RGB scale—only slightly. We’ve covered work with curves in detail in a separate article.
Vignetting and Retouching
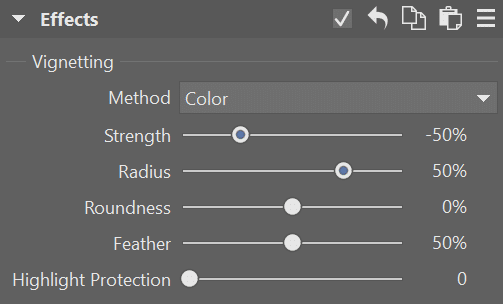
Vignetting is definitely a good tool, although you shouldn’t go overboard with it. I personally like to use vignetting using the Colors method, because it’s not as striking as the other methods. For this photo, vignetting adds depth and emphasizes the center area, where the model is.
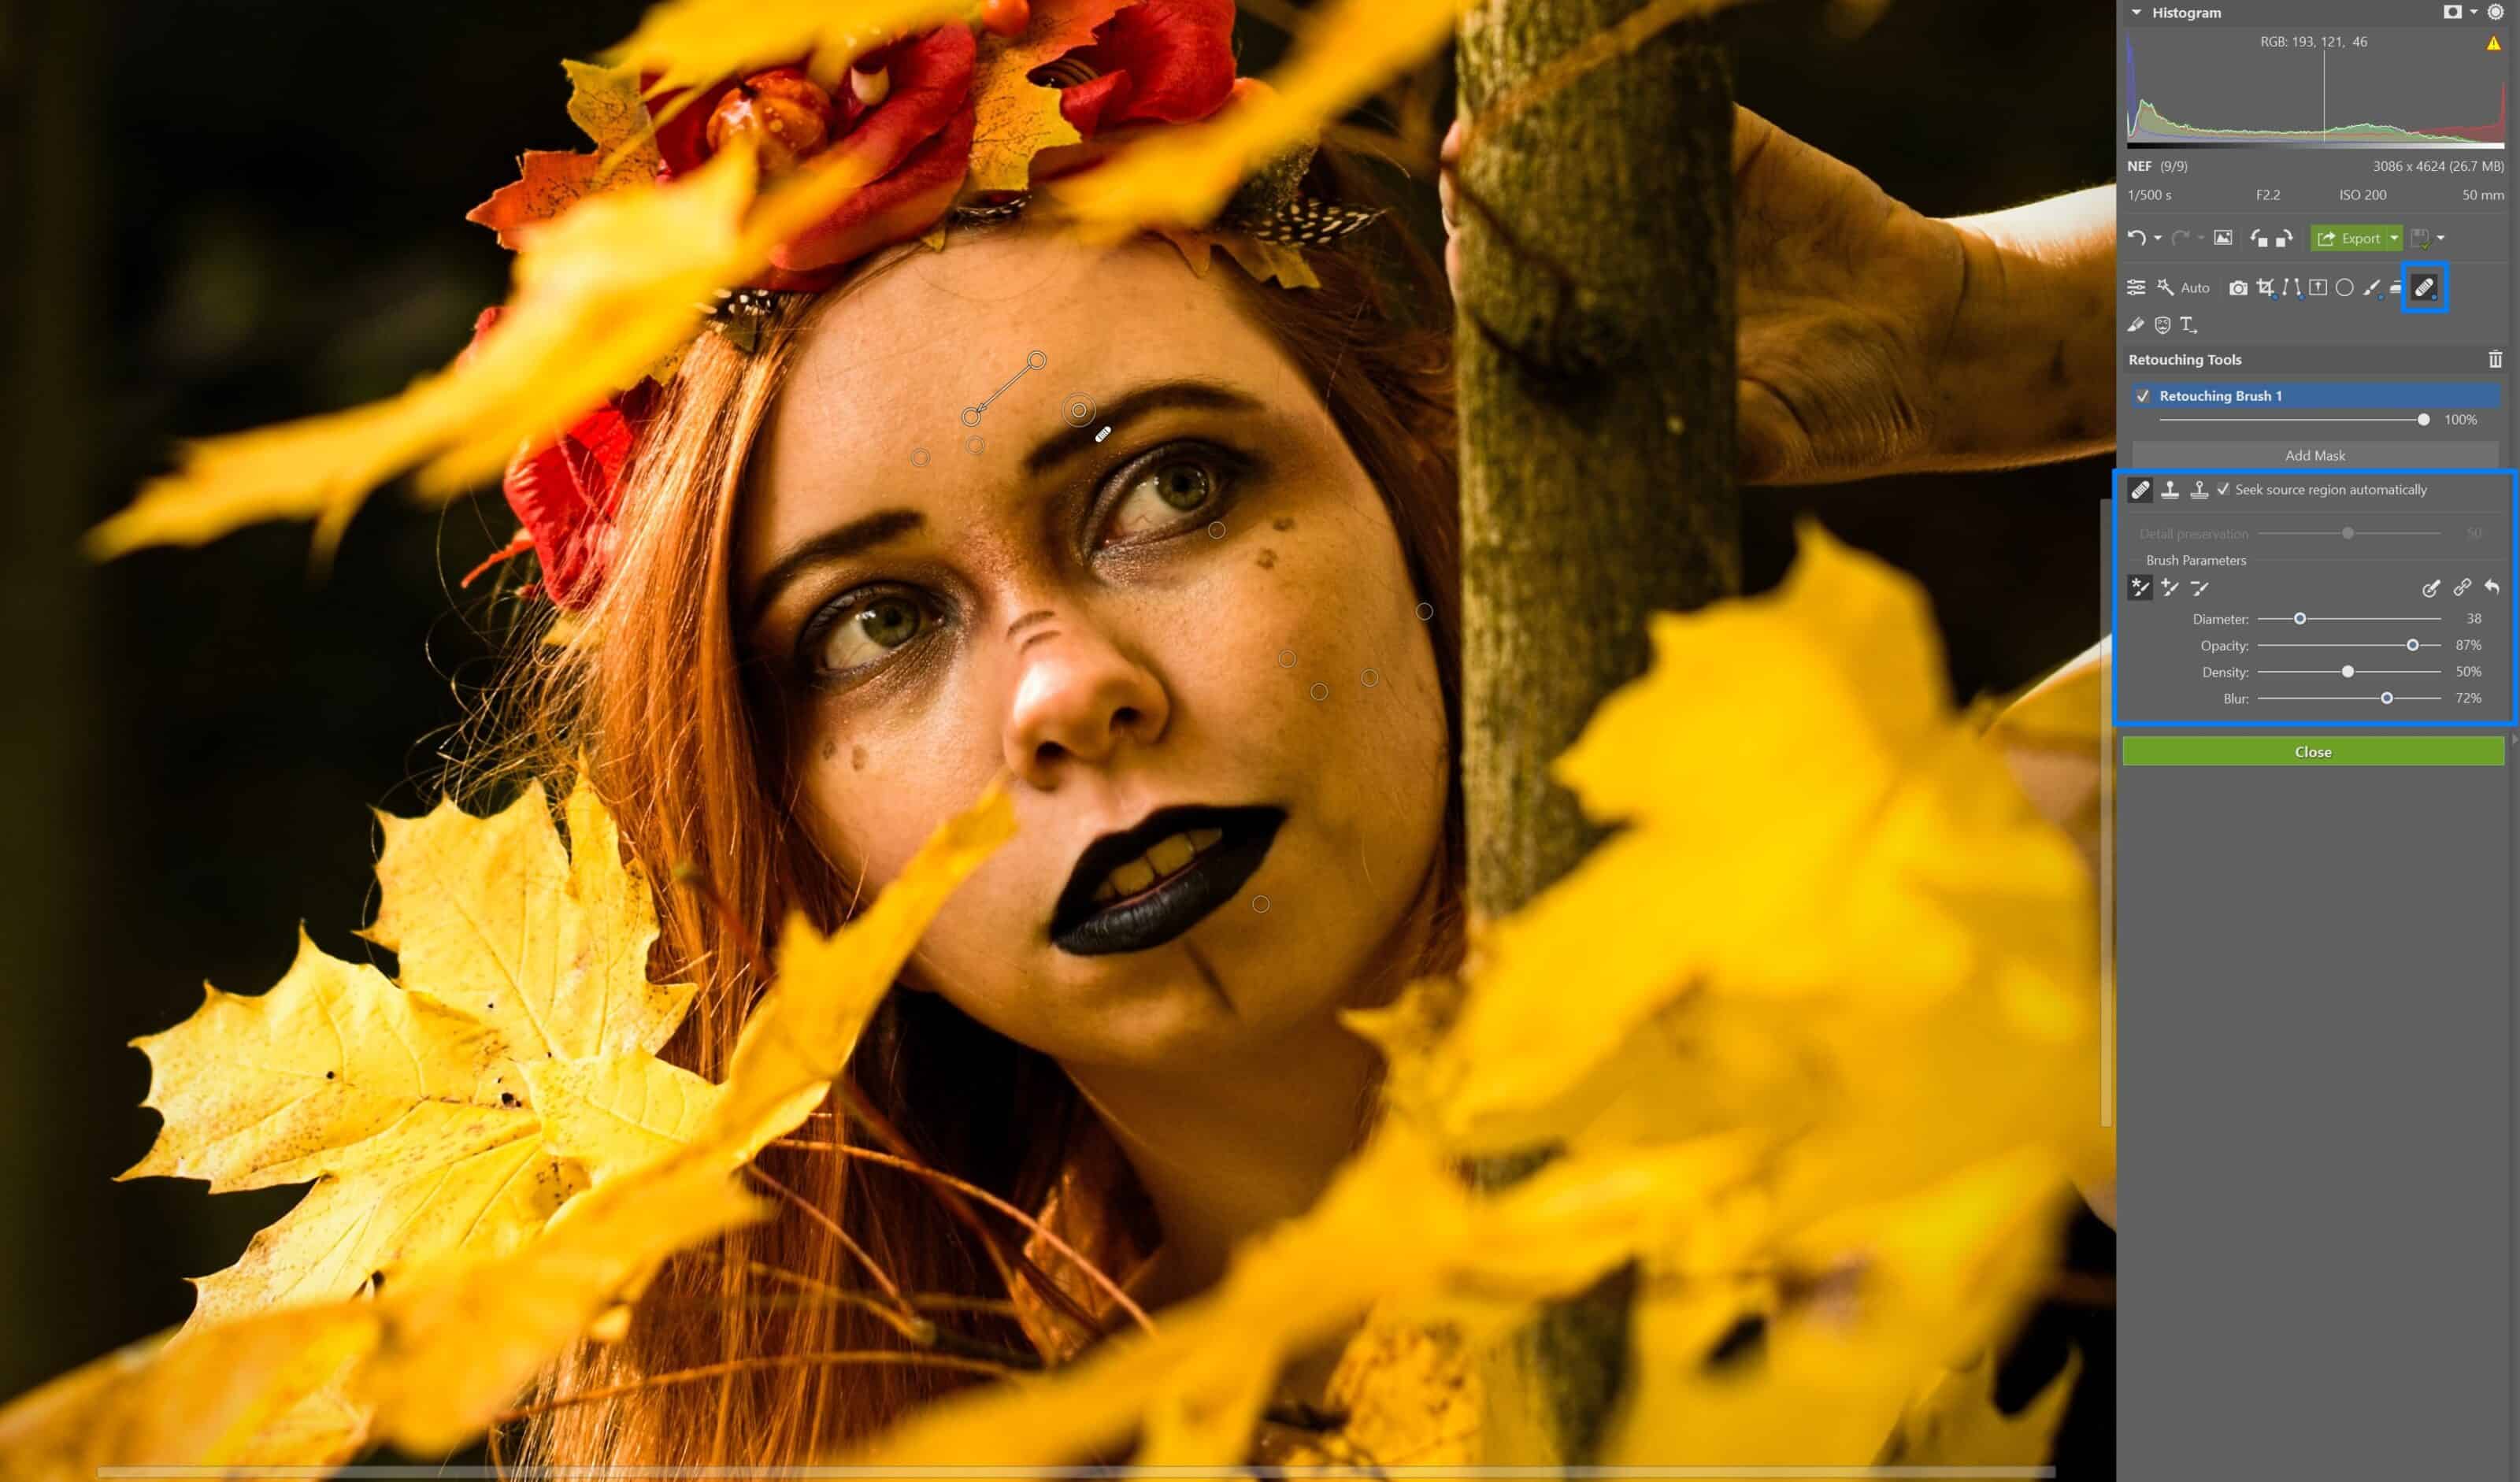
You can also use the Develop module for basic retouching. Minor specks on the subject’s clothing, acne, trash on the ground, etc.… All of these are easy to get rid of with the retouching tools.
Switch to the Retouching Brush (J) and turn on the option named Seek source region automatically. Then just click on each speck that you need to remove, and Zoner Studio will finish the work for you. It will independently find a source region, transfer texture from there to your target region, and elegantly smooth everything out. If the automatically selected source region is unsuitable, manually choose a different region instead.
And you’re done! You’ll definitely want to compare your final picture with the original. The easy way to do that is to just press the semicolon key (;).
A Few Words in Closing
These are the steps that I personally use the most often when I’m developing pictures. They should definitely be enough for a foundation for everyone, but there are definitely other possibilities too. So make sure to read articles from other authors and try their methods as well. At the same time, don’t forget to experiment and “feel” everything for yourself. Trial and error will take you far, but to keep from having to stumble too much, we’ll offer you a helping hand in our articles. We hope that you find them useful!
Download Zoner Studio and use it free for 7 days, and try all of these edits for yourself. And many other edits too, of course—you can take inspiration from places like our magazine.
There are no comments yet.