ZPS X Editing School: Try Editing a Nighttime Portrait
The article is over 5 years old. The information in it may be outdated.
![]()
We are working on its update. In the meantime, you can read some more recent articles.
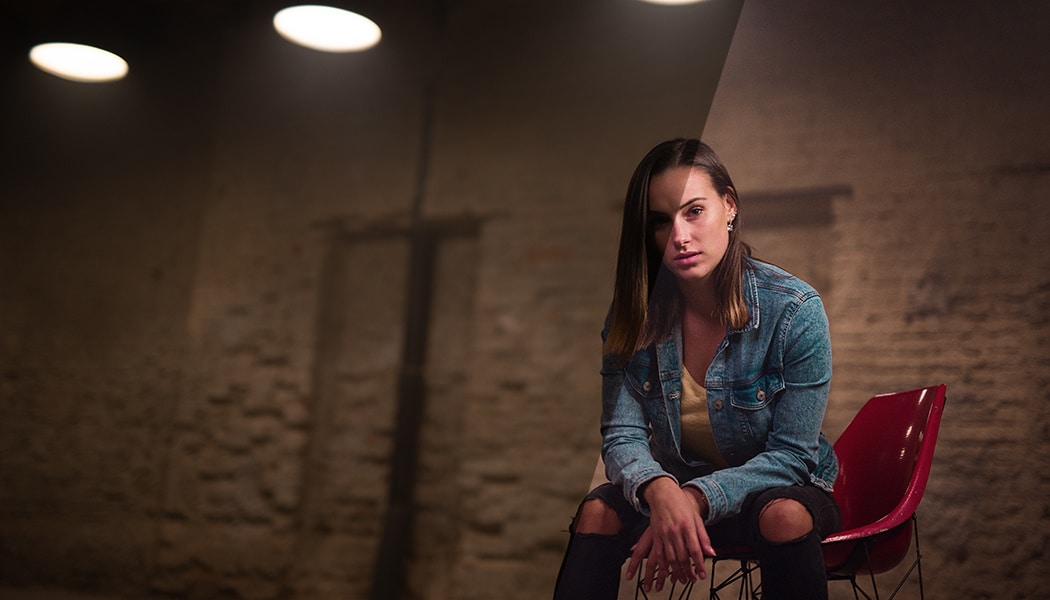
In this article I’ll show you how to edit a photo from a nighttime portrait, and I’ll give you a RAW file on which you can try out the whole approach for yourself. This time around, you’ll be concentrating on work in the Develop module. You’ll learn how to rescue night photos that turned out too dark, improve their colors, and give them some spark using effects and local edits.
For my example, I chose a picture from the set of photos for my article on shooting with a ring light. We at Zoner received a number of questions about how the photos were edited. In this article, you’ll get the answer—I’ll teach you how to create a similar atmosphere.
Download the RAW and We Can Start!
The original photo has a quite interesting atmosphere in terms of its light, but the RAW straight out of the camera isn’t quite presentation-ready. Read on for a look at the edits I made to get the maximum out of it.
Open It Up in the Develop Module
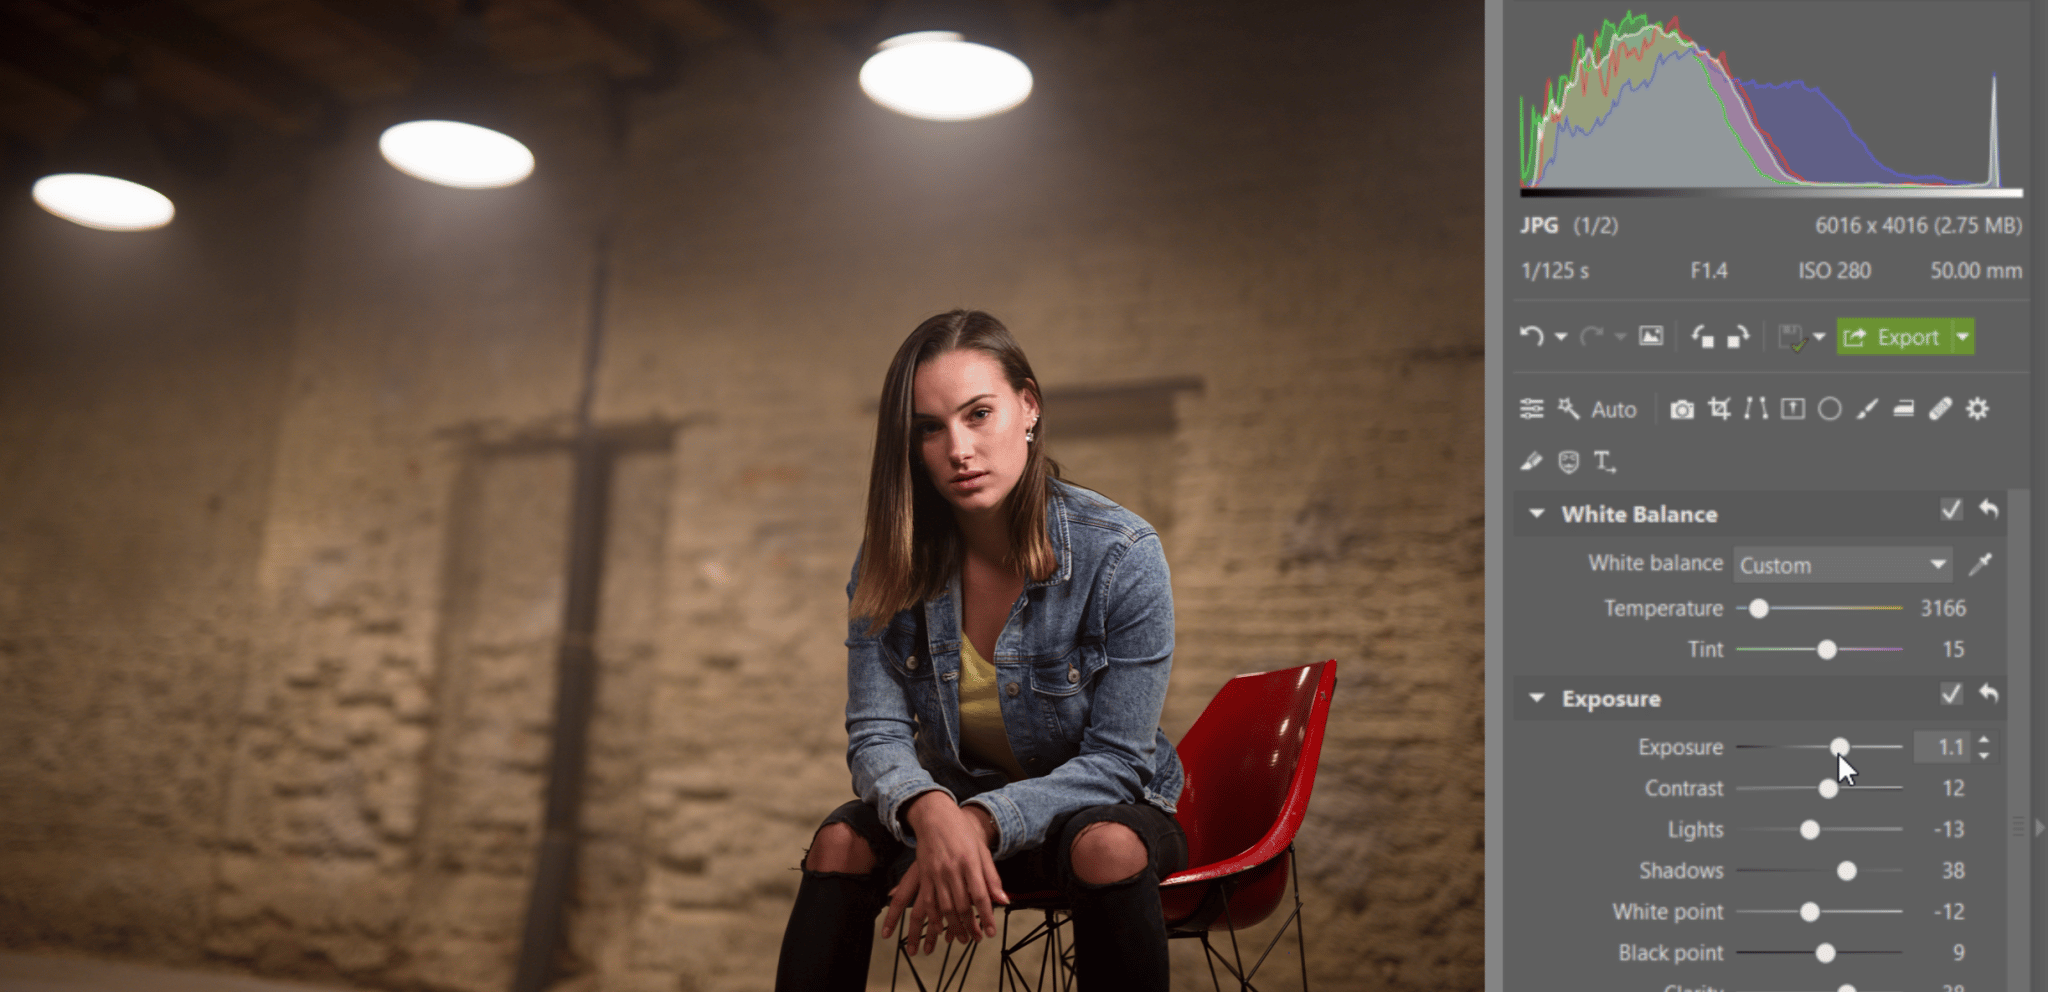
You’ll be working in the Develop module in Zoner Photo Studio. It’s clear at first sight that this photo is quite underexposed. The Histogram shows very low exposure values.
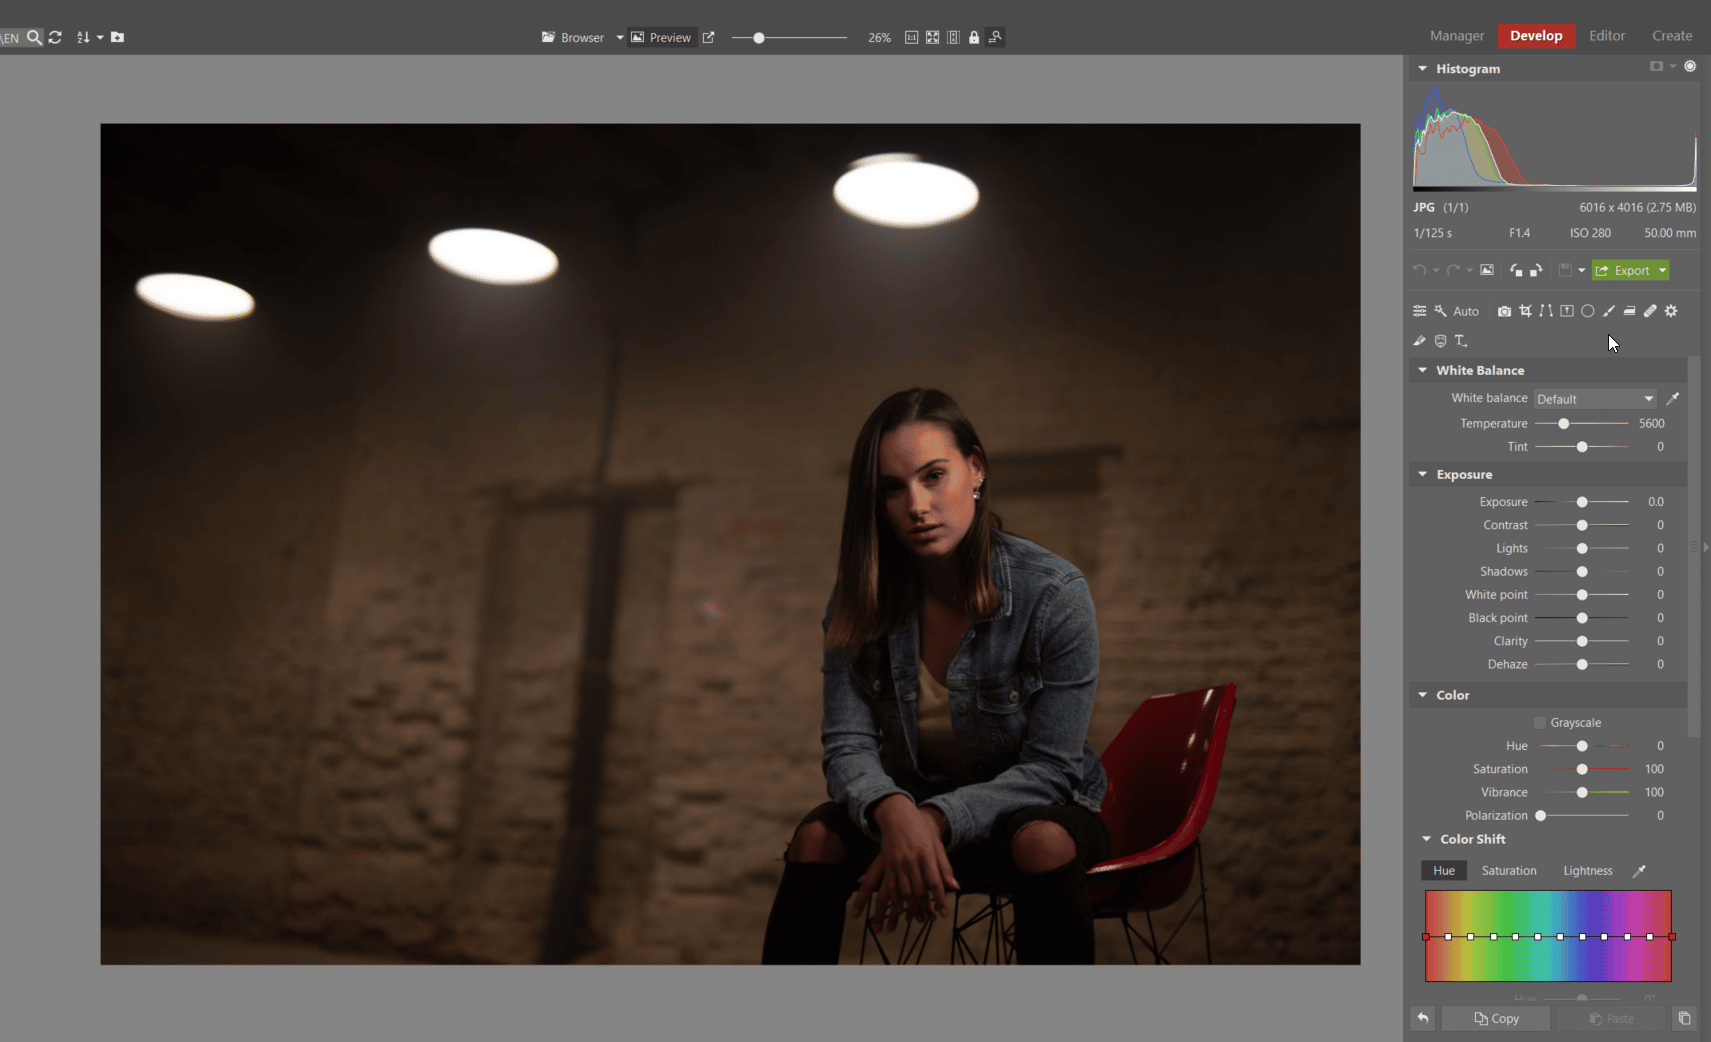
Start With the Exposure Tools
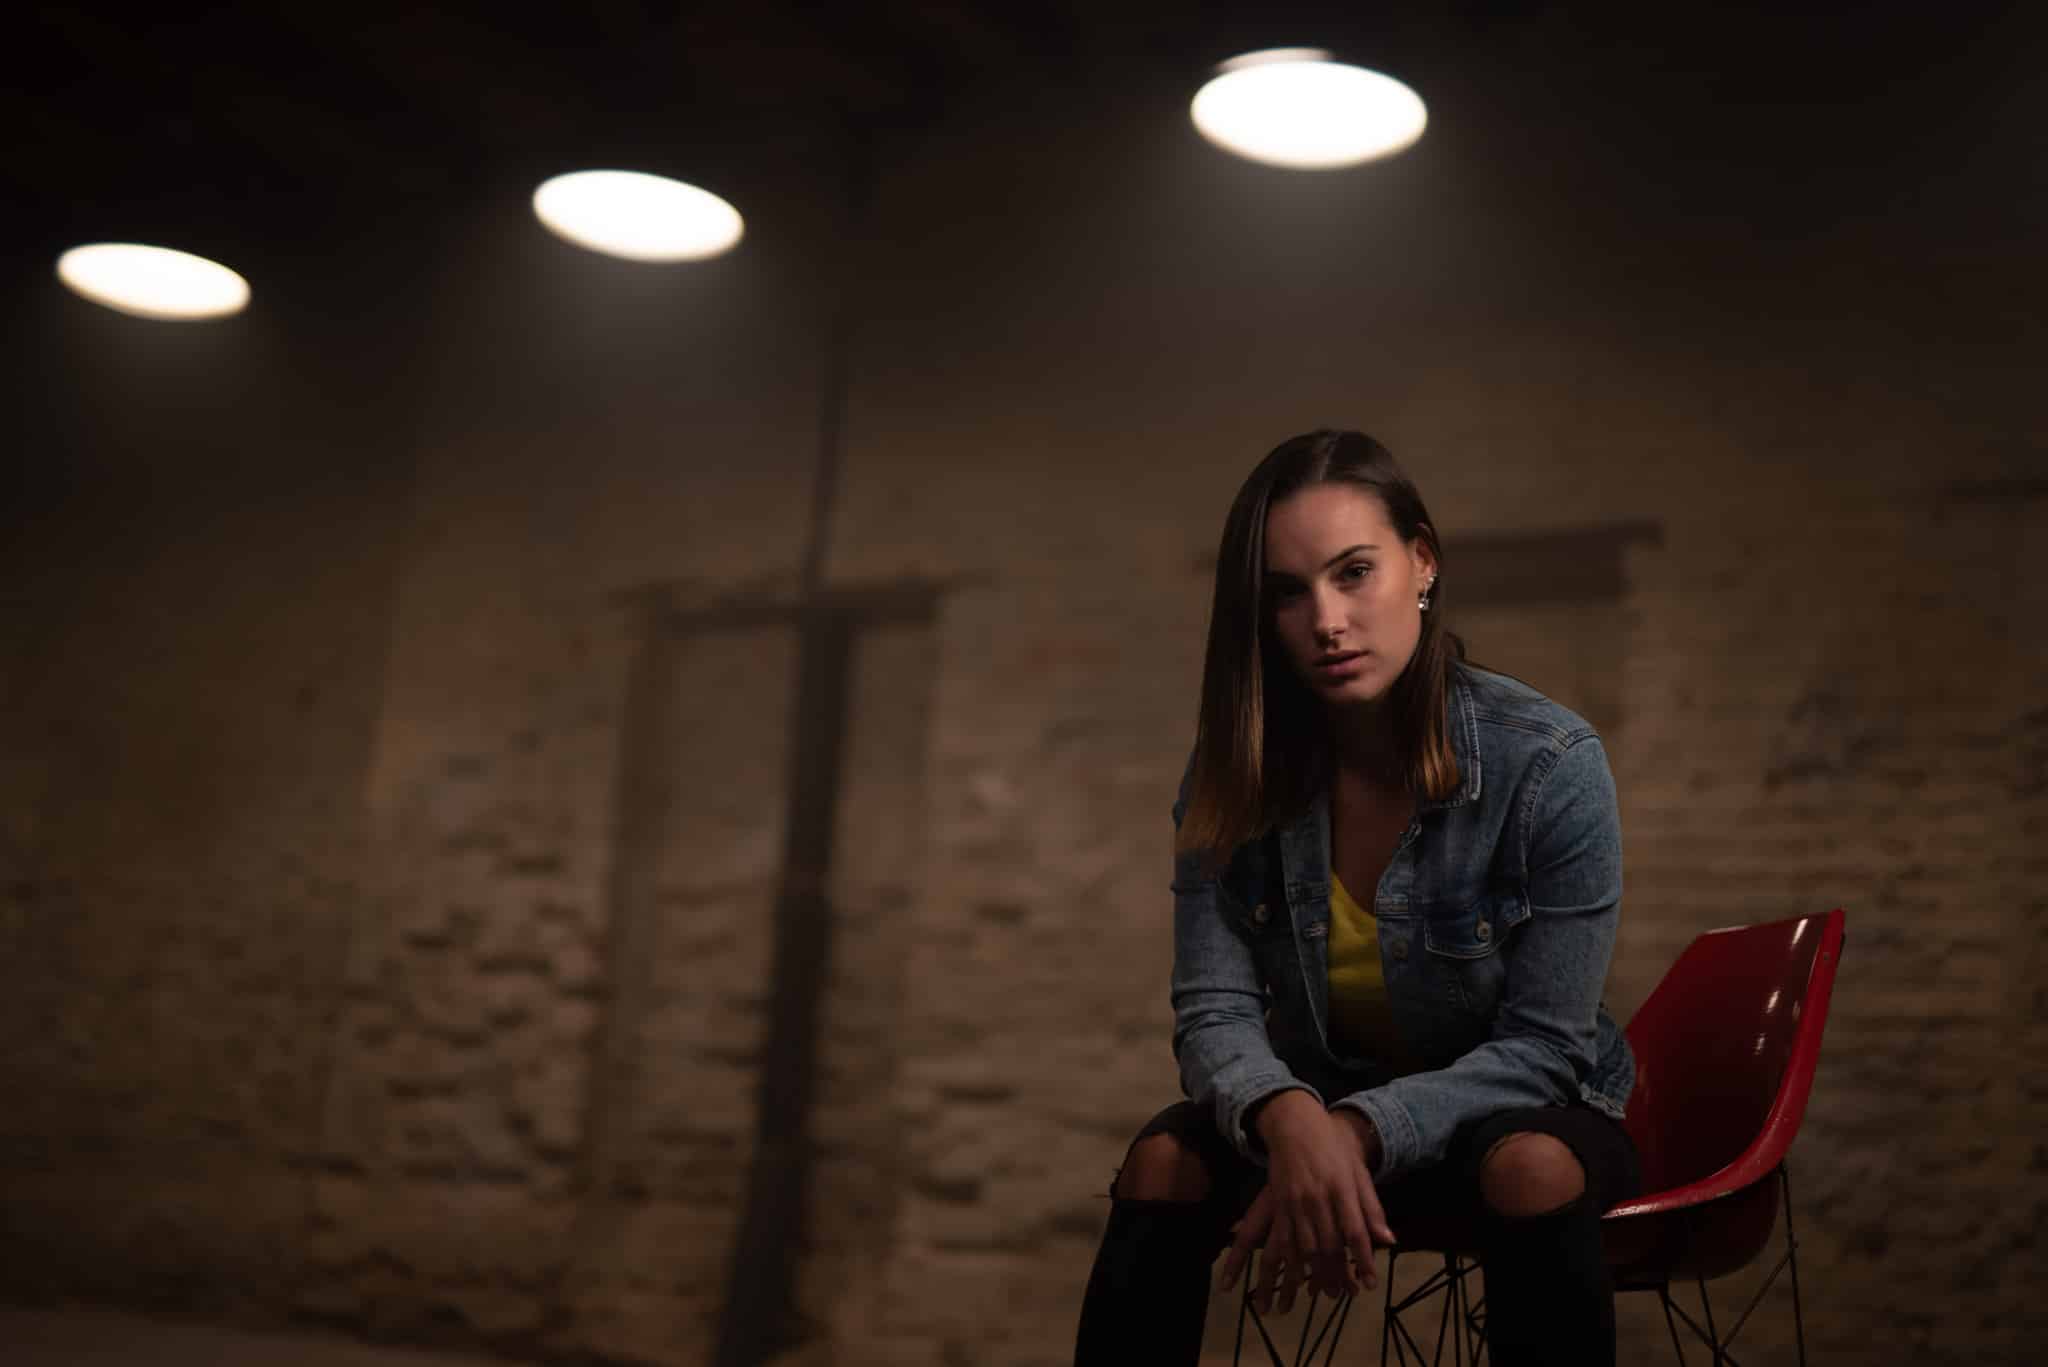
Your adjustments in Develop should always begin with White Balance. While there are no hard and fast rules for achieving proper white balance, I do recommend that you set it in a way that gives the most natural skin color possible. Next go to the exposure tools and add some Exposure, Shadows, and Clarity. With this, you’ll have the most dramatic changes relative to the original RAW out of the way.
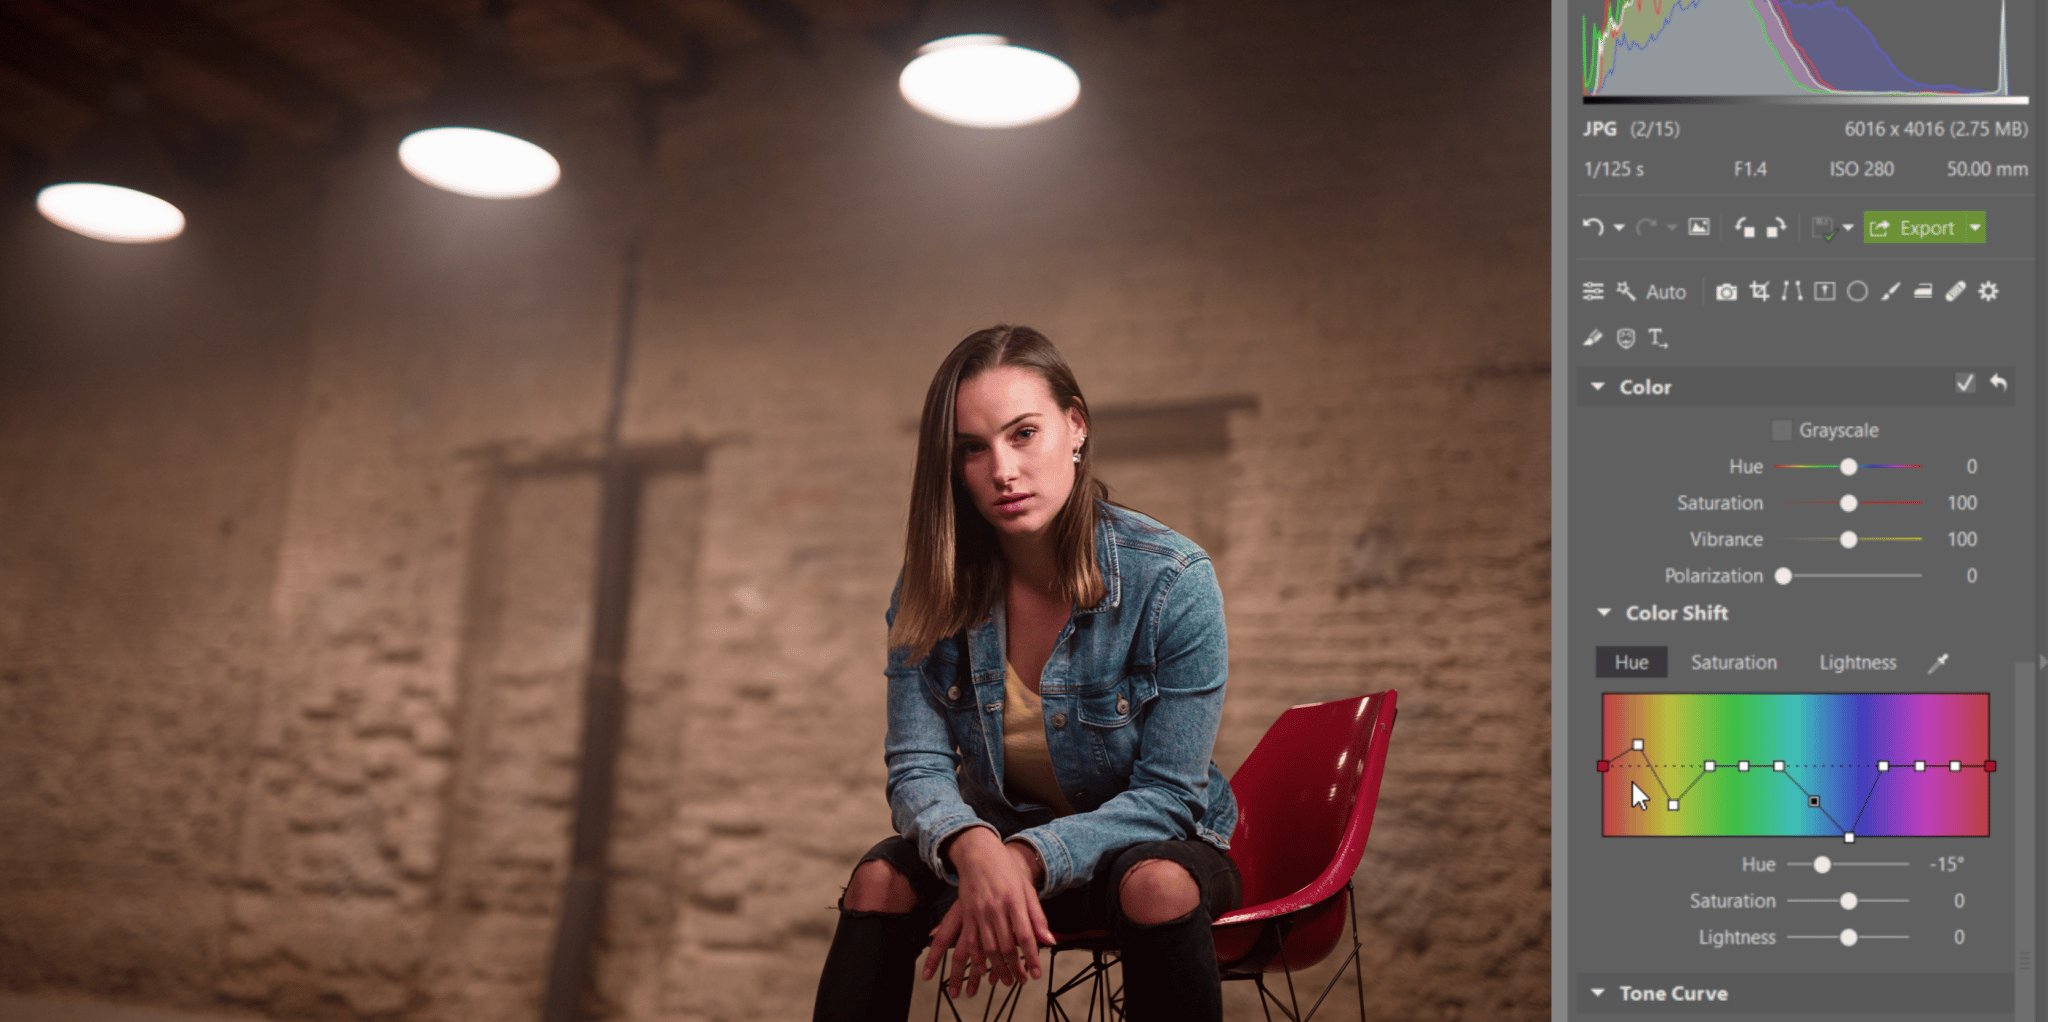
Adjust the Colors
Now let’s move on to the Colors group. I first increased the Vibrance and slightly reduced the Saturation. I then moved on to the Color Shift controls, where I corrected certain colors. I often move colors in Hue into the minuses, because for certain colors, this can make them more interesting. But for skin tones, this edit moves them too far towards red, and so I bring the orange back to a more natural hue. I’ve shifted the blue to give the jeans jacket a light tinge of turquoise.
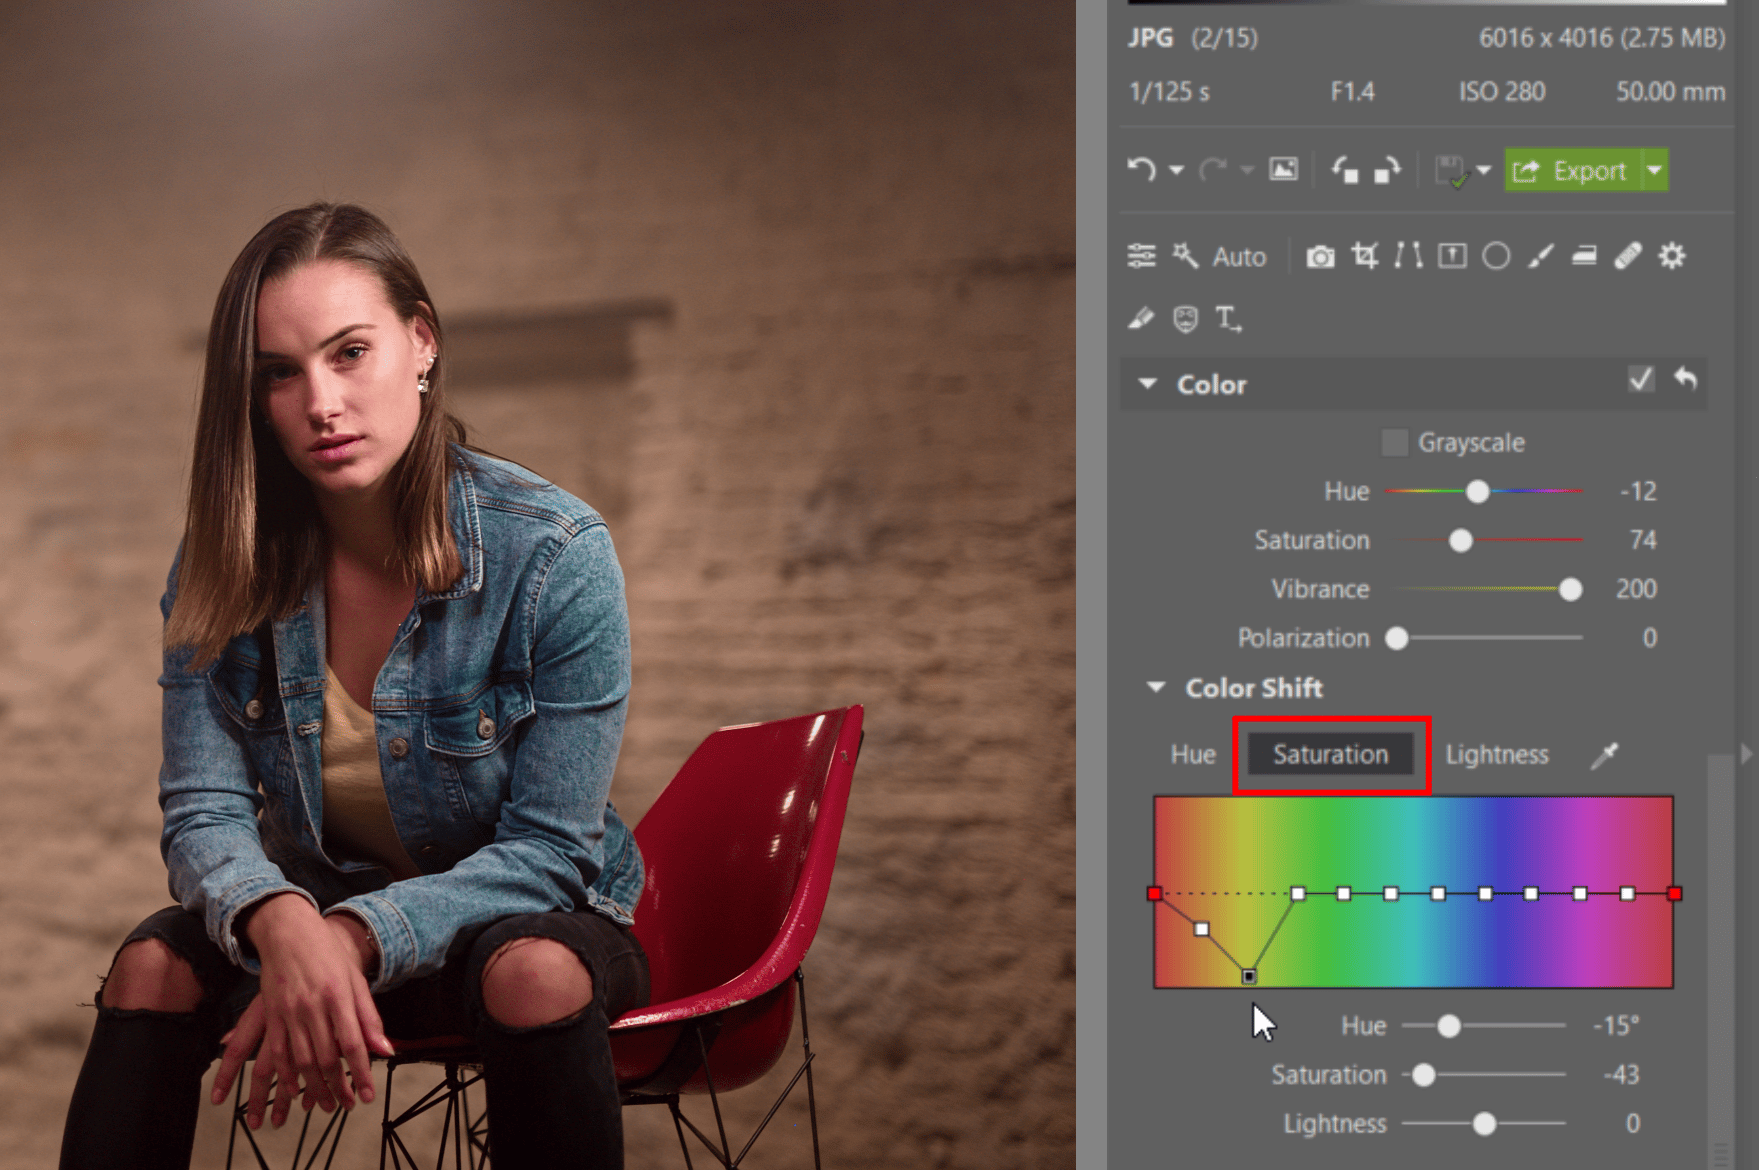
I then switched to the Saturation tab—the place for adjusting individual colors’ saturation. This picture’s background is dominated by yellow, so reduce its saturation to make the rest really shine.
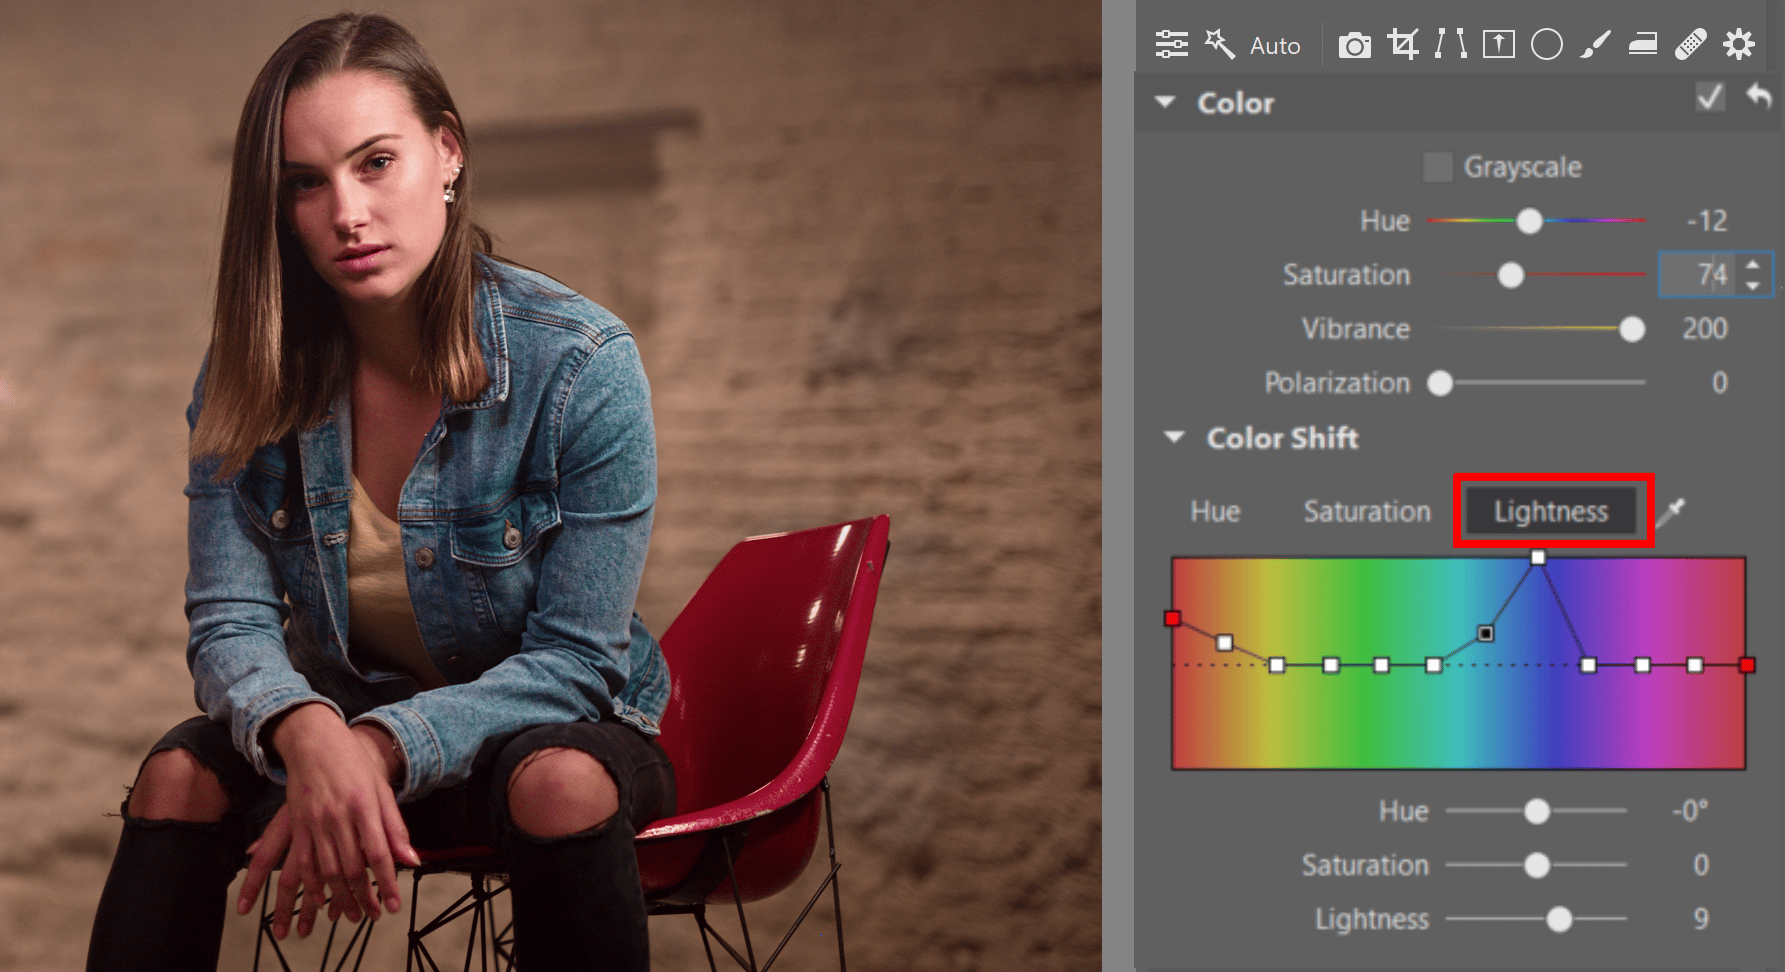
The third tab in Color Shift is Lightness. Use it to slightly bring the skin tones and the blues to the fore, so that the model’s skin and her jean jacket are more visible.
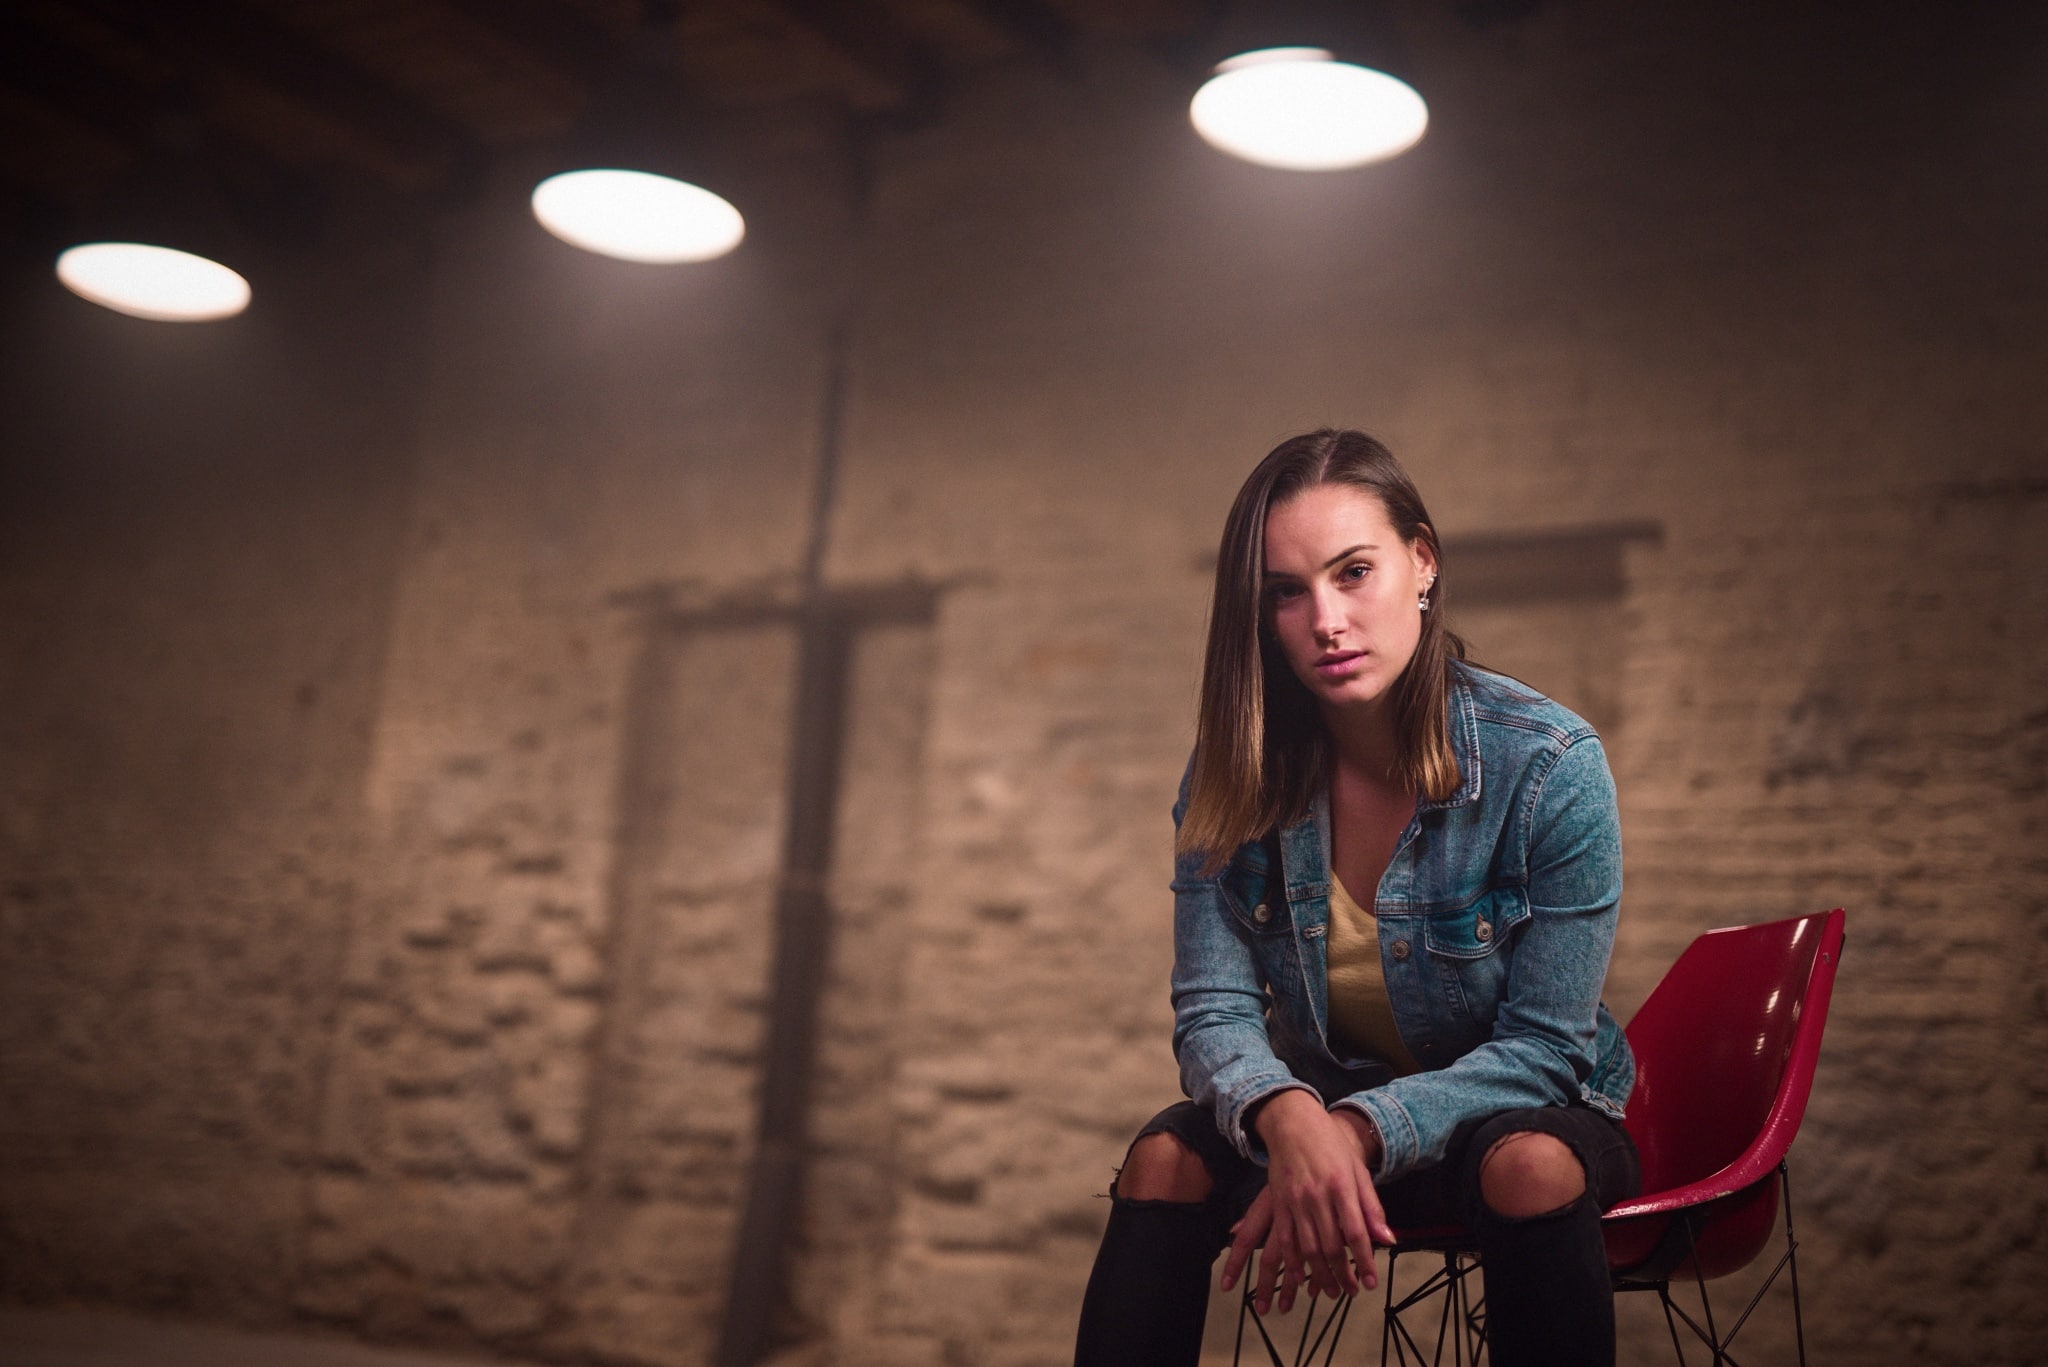
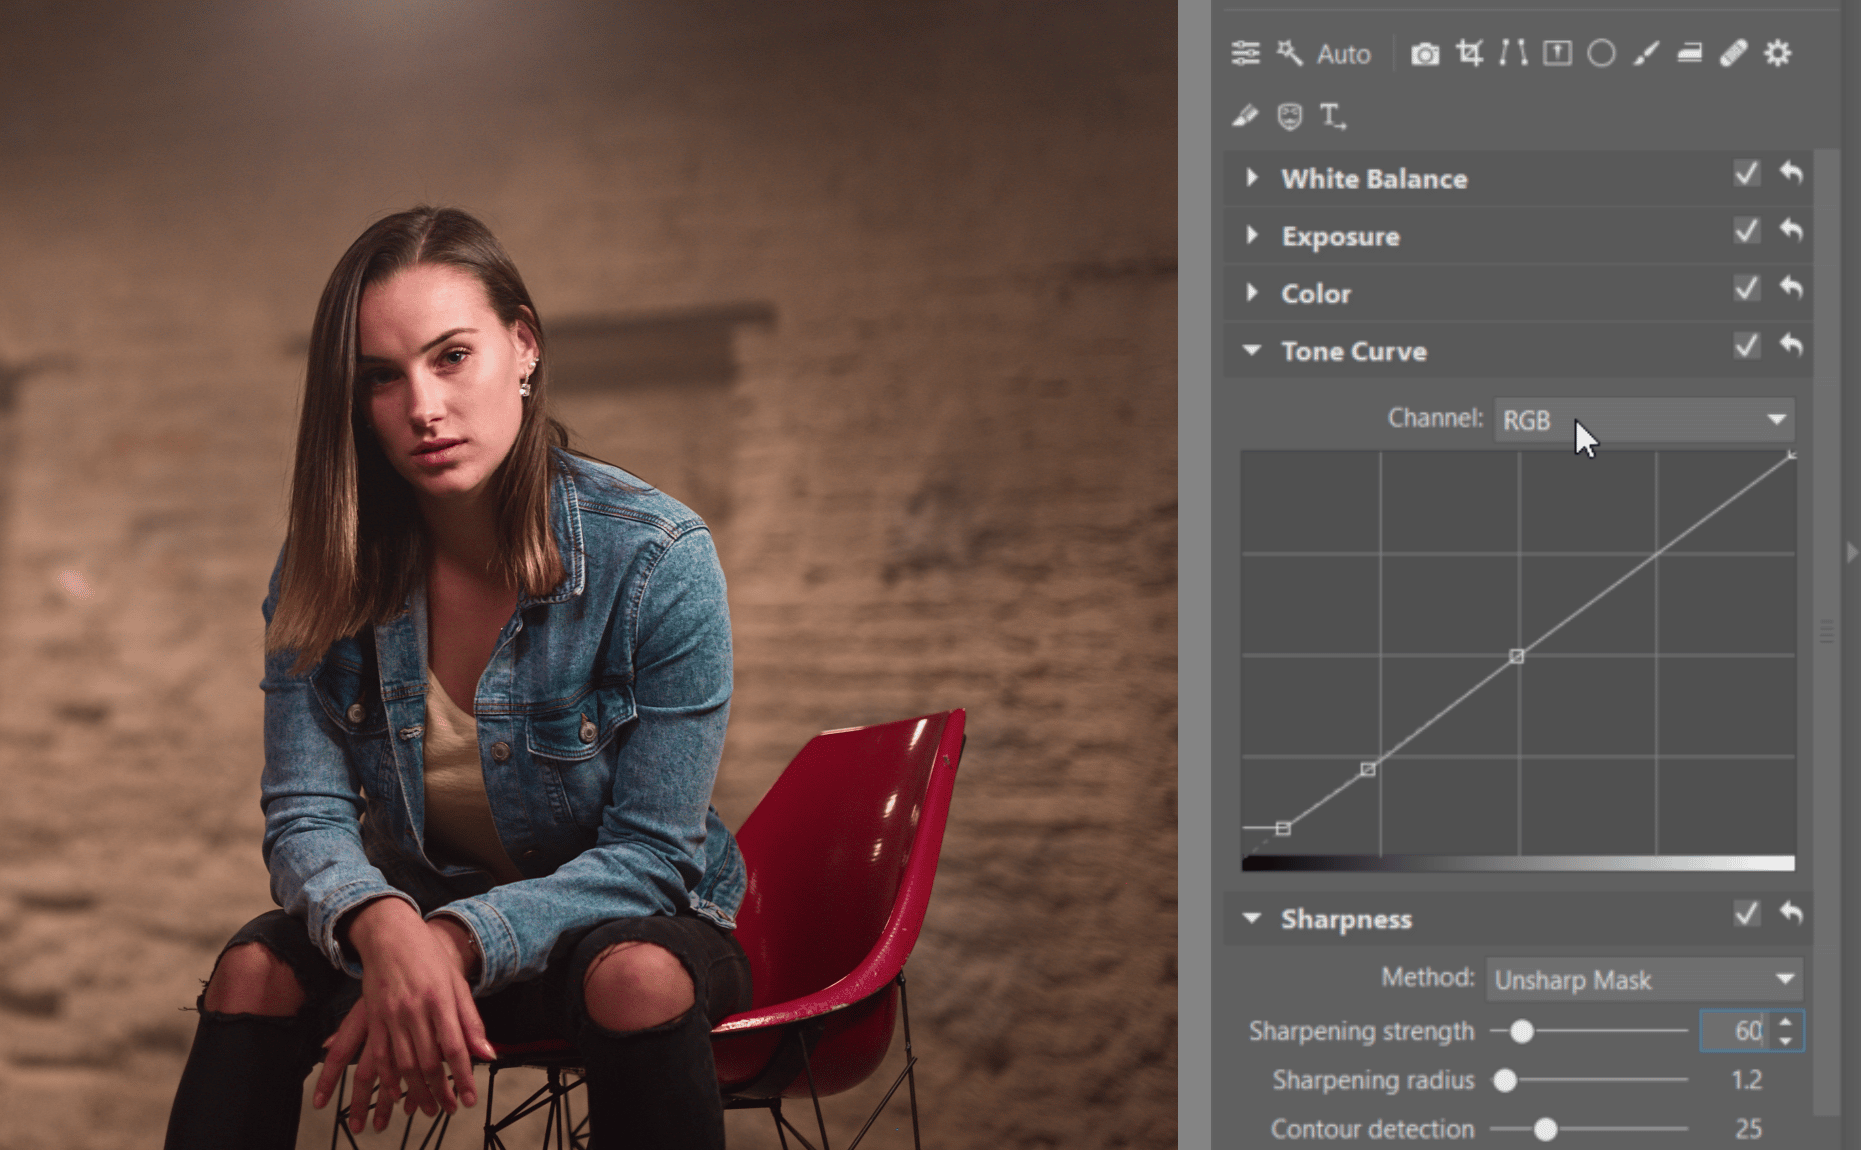
Adjust the Tone Curve
Now work with the tone curve, but be careful. You can get things very wrong if your adjustments here are too large. Here I only used RGB curves to slightly crop the red by moving it upwards.
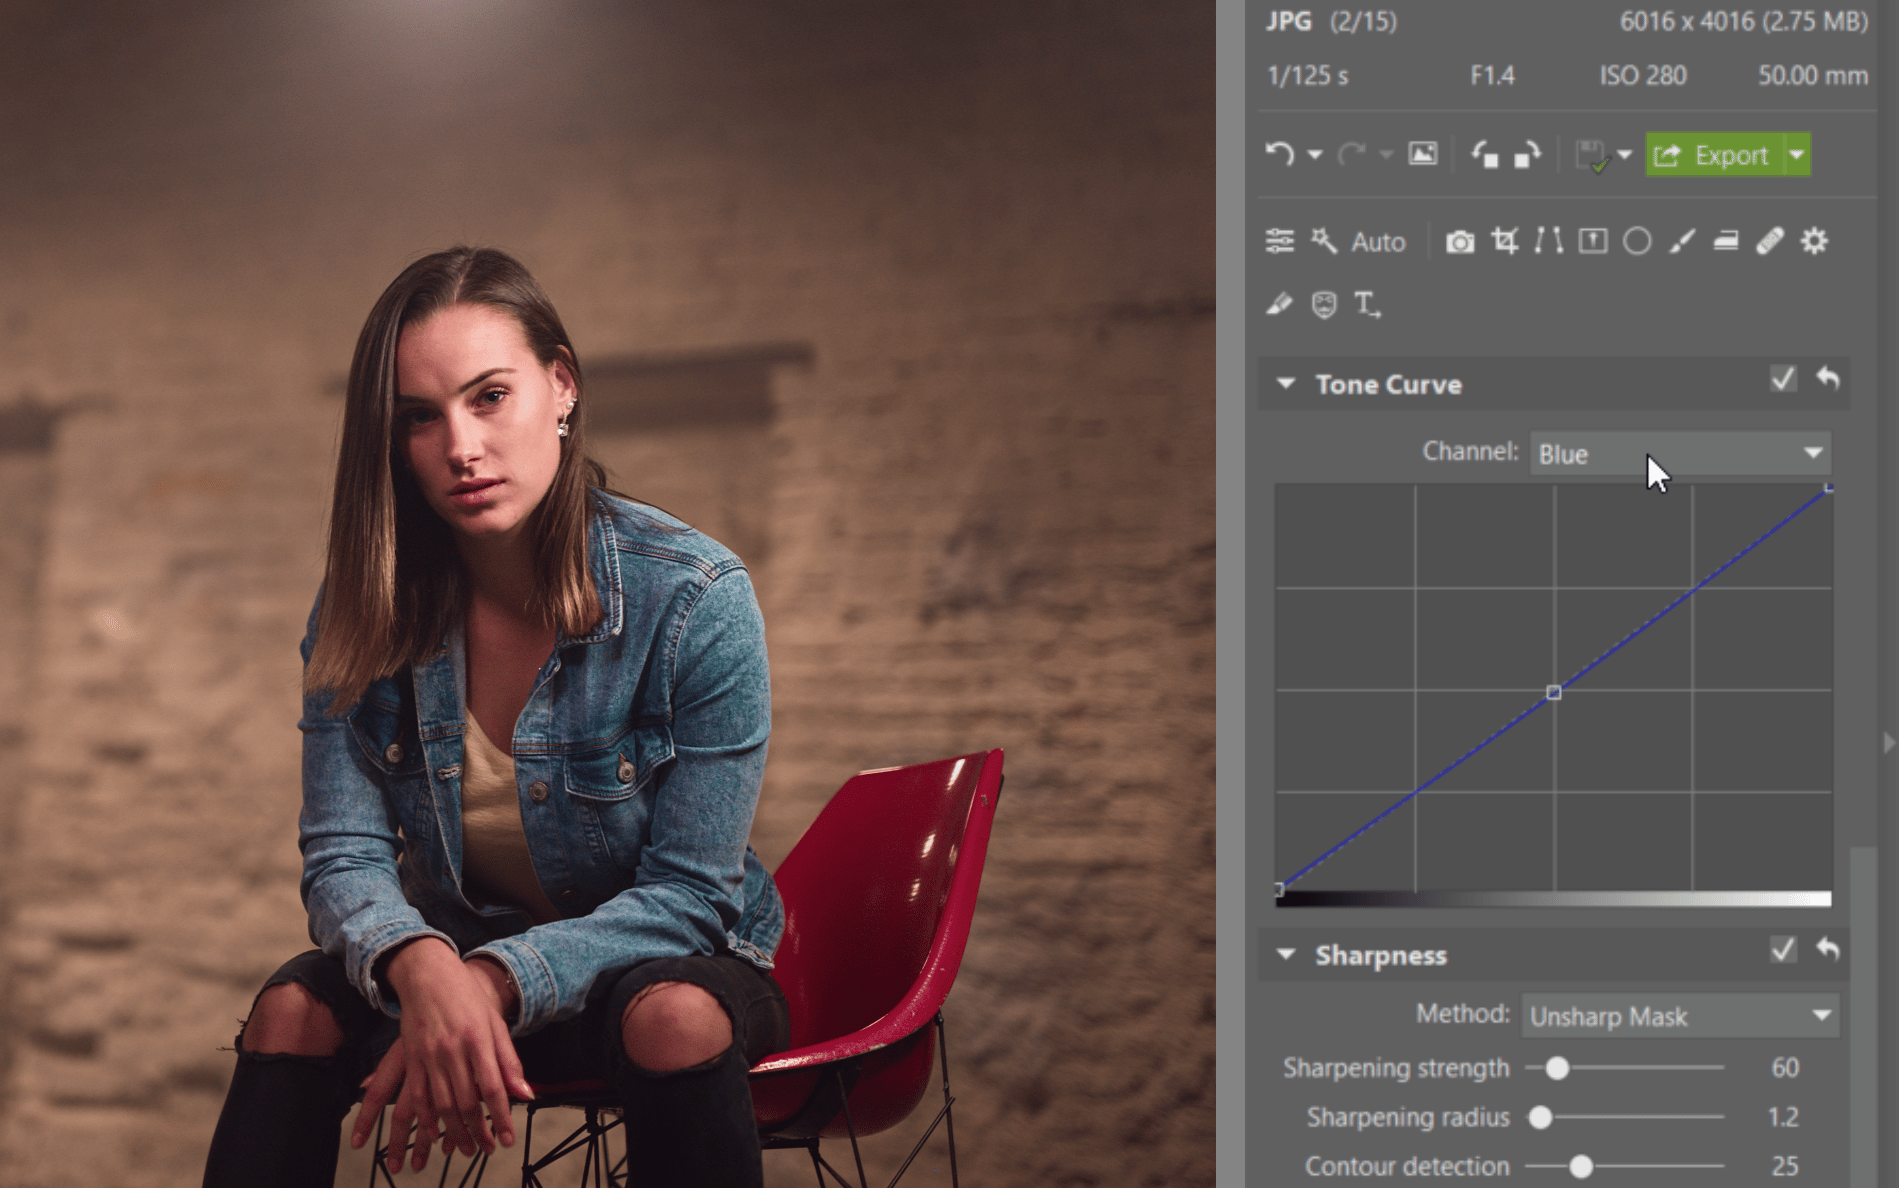
Then for the blue curve I made a very similar edit to give the shadows a slightly bluish tinge.
Fine-tune With Effects
Last but not least, I’ll adjust a frequent favorite: vignetting. Shifting the shadows here slightly to the left darkens the picture’s edges, making its central portion feel more distinctive. But be careful with vignetting, it’s not good to overdo it. I just added a very slight amount of grain, because it is a good fit for dark photos like this. But once again, don’t overdo it—it should be only slightly noticeable that you added this effect.

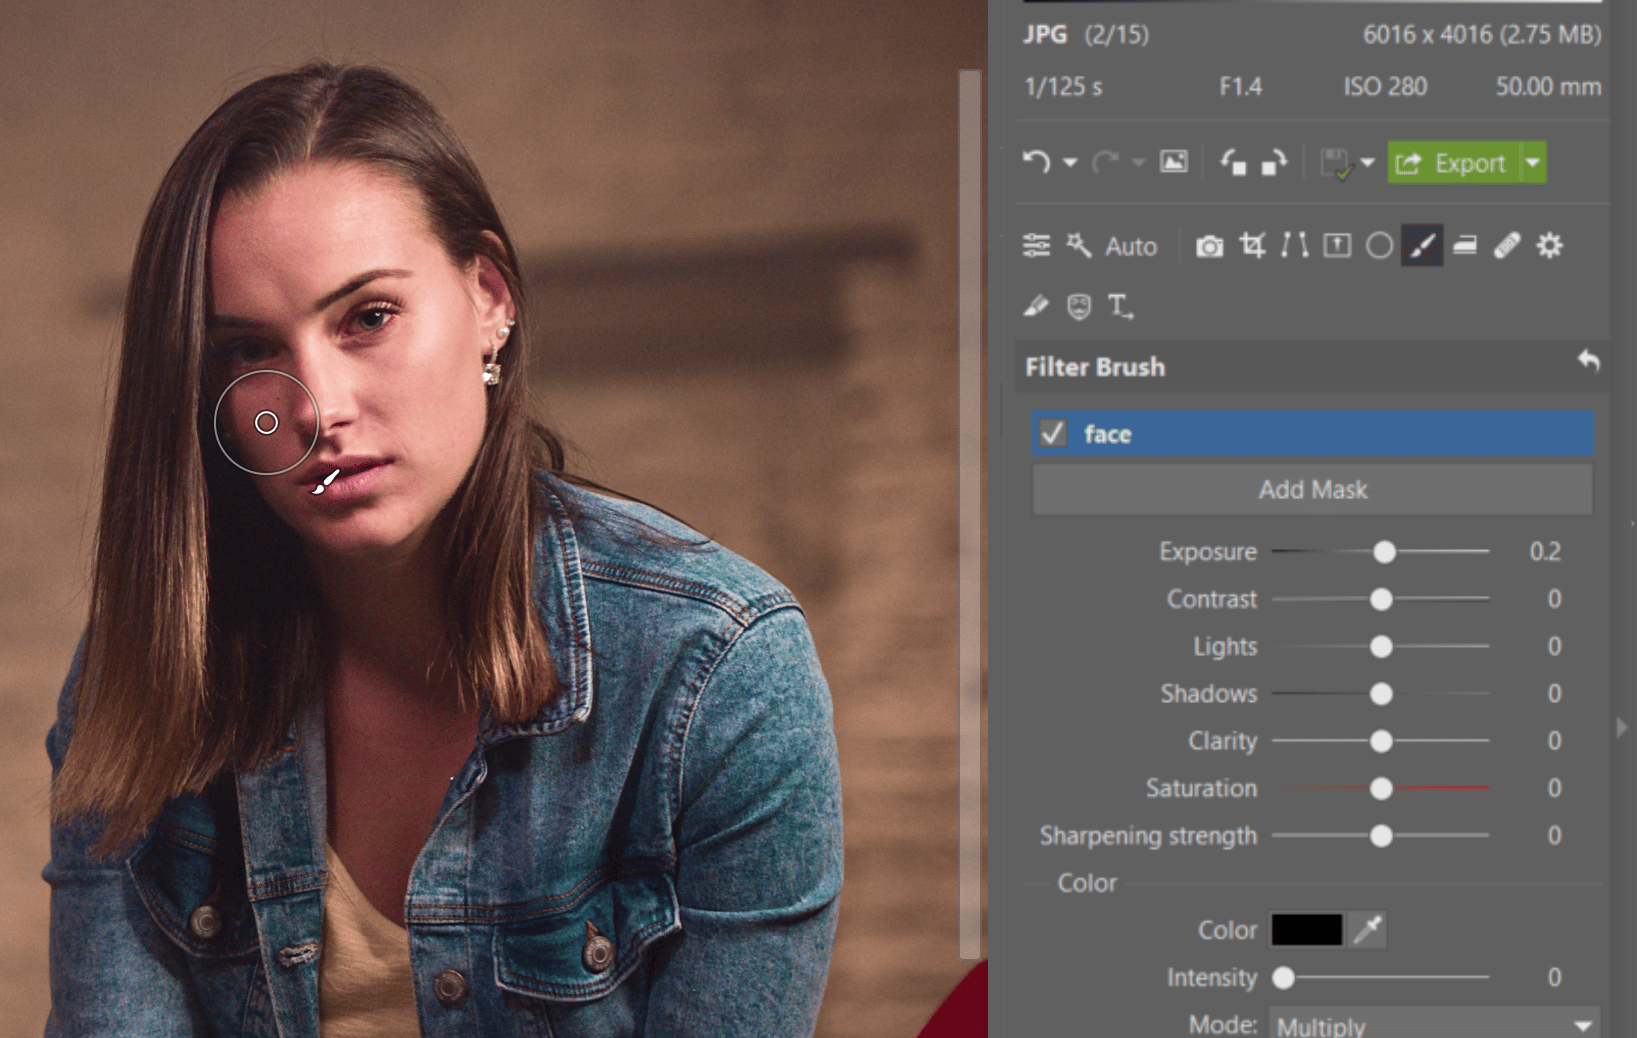
Use the Filter Brush
The last thing that I did was to slightly highlight the left part of the face using the Filter Brush (B). I brought the exposure into the pluses to highlight the model’s face.

Like the results? Have this style at hand whenever you want! Download the preset that we created based on the edits in this guide.
Try out this edit for yourself.
Now you know how to do it! Download Zoner Photo Studio X, try it free for 7 days, and try out this and many other edits.
There are no comments yet.