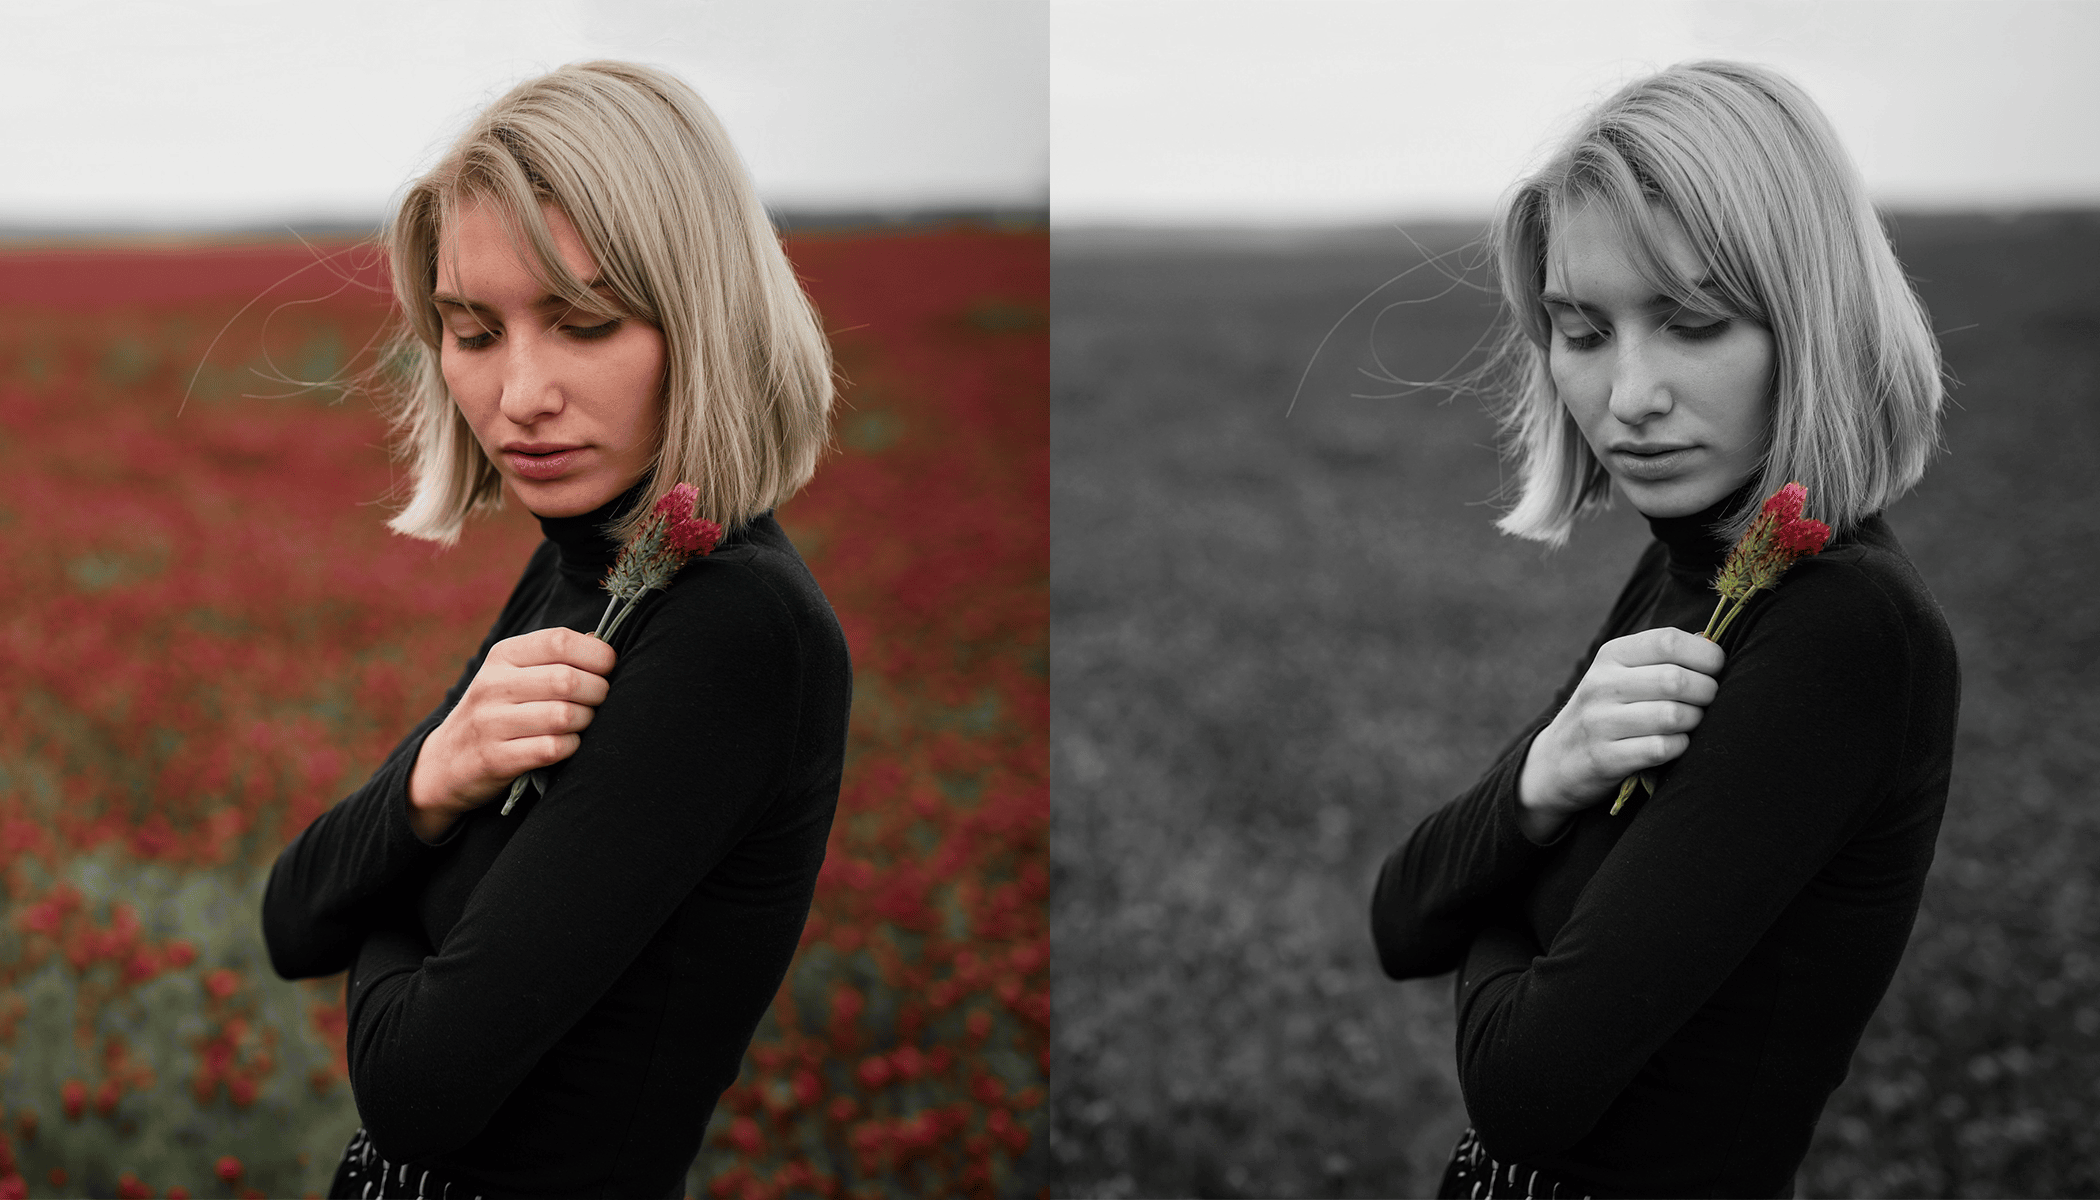
Selective color consists of desaturating some colors in your photo. In the past, it was a very popular edit, especially in its extreme form where one object (such as a red rose or yellow taxi) remains in color and the rest of the photo is black-and-white. Let’s learn how to do this edit, as well as its less-dramatic version, which plenty of photographers use to subtly emphasize the main subject.
The article is over 5 years old. The information in it may be outdated.
We are working on its update. In the meantime, you can read some more recent articles.
Selective color consists of desaturating some colors in your photo. In the past, it was a very popular edit, especially in its extreme form where one object (such as a red rose or yellow taxi) remains in color and the rest of the photo is black-and-white. Let’s learn how to do this edit, as well as its less-dramatic version, which plenty of photographers use to subtly emphasize the main subject.
Today, many photographers consider this edit a classic photography cliché and harshly judge those who use it. However, in its partial or subtle form, we avoid making it an over-the-top, thoughtless edit. Even if in the end you choose not to use selective color, it’s a good idea to know the basic principles behind its use. We will show you several different methods of selective color in this article.
We will use this photo to show several different methods of selective color.
Desaturate only certain colors
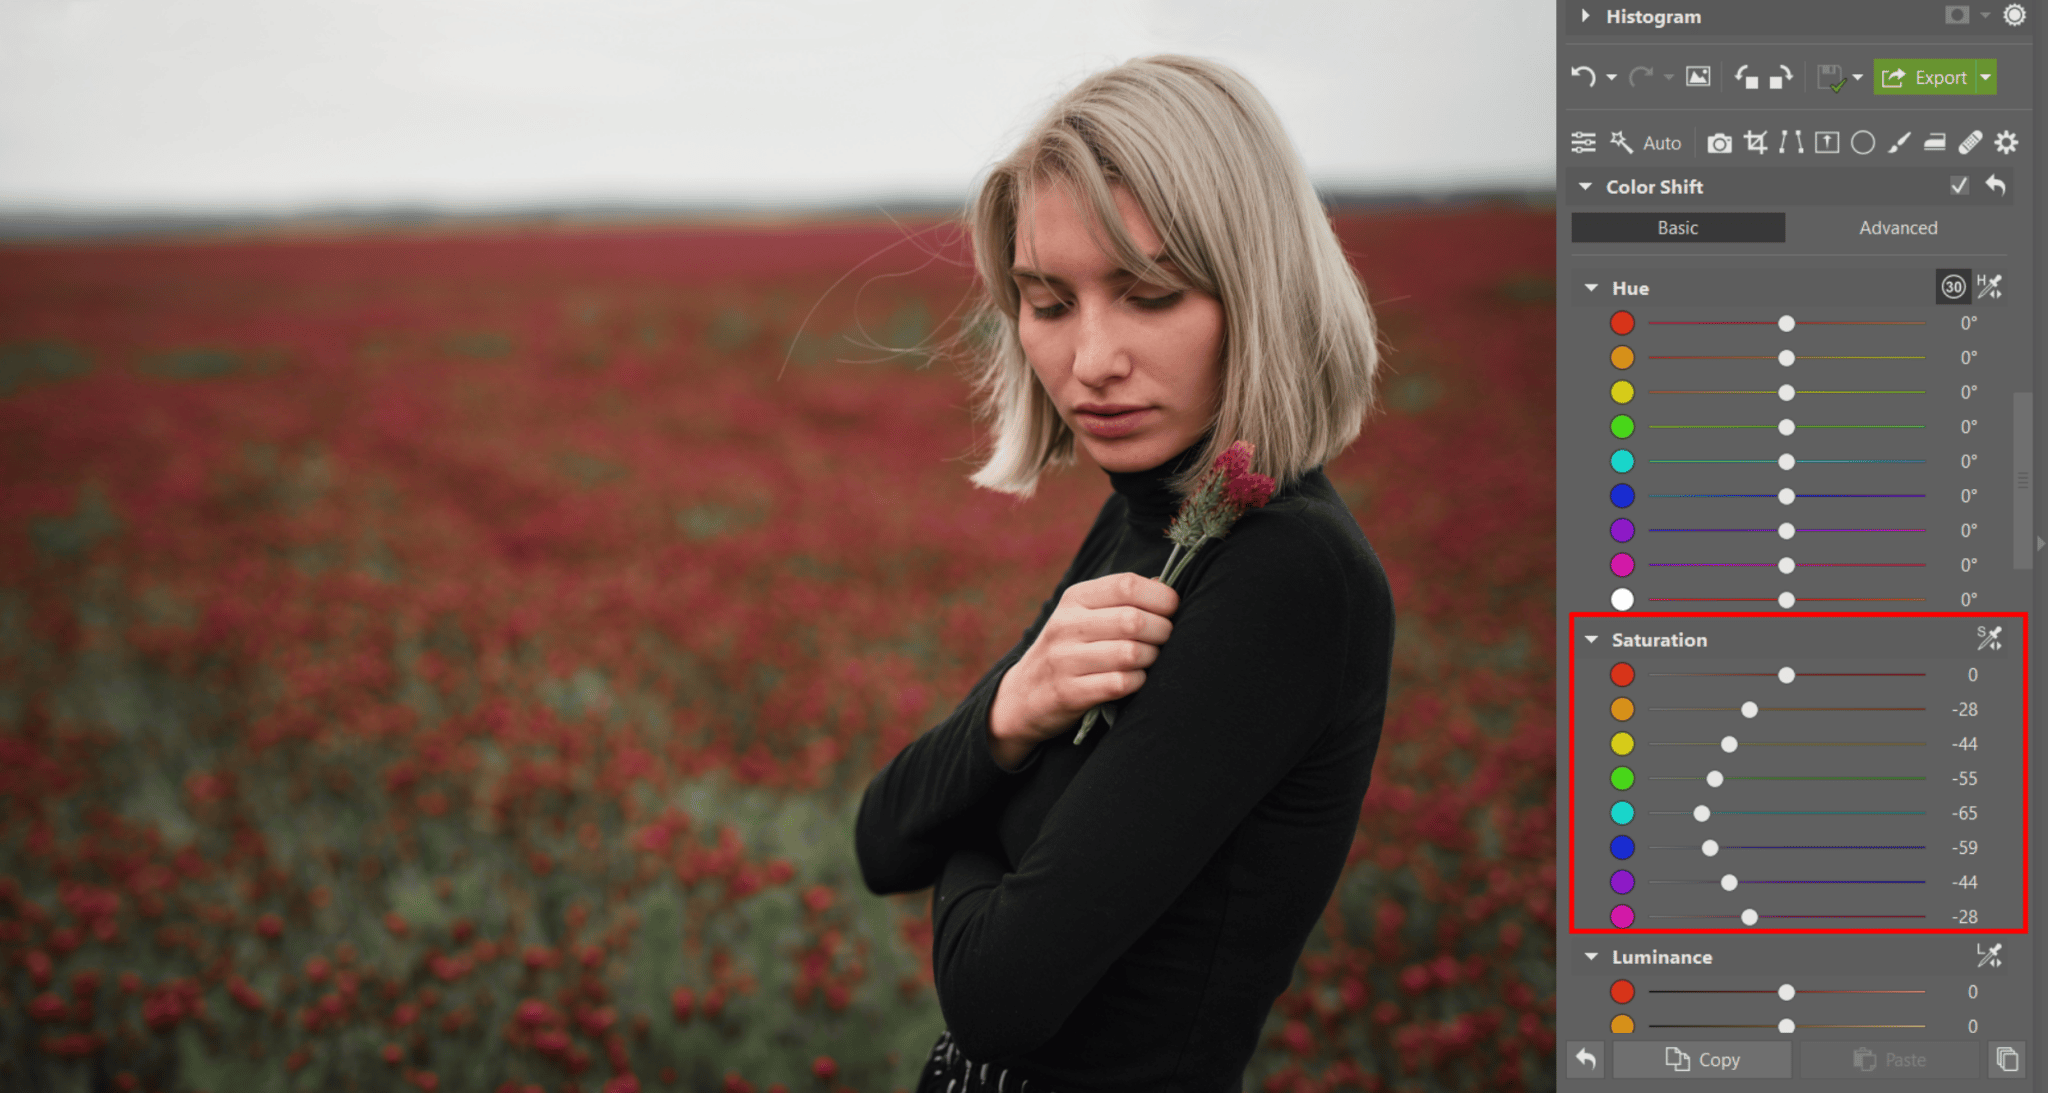
The first and most subtle type of selective color lowers the saturation of some of the less important colors. Frequently in photos of people, we mute green in order to make other parts of the photo more vivid.
This edit is very simple. Open your photo in the DevelopModule in Zoner Studio. In Color Shift, click Saturation. Lower the colors you want to be muted. The Adjust Saturation eyedropper on the right side of the Saturation panel can also help you by allowing you to click directly in the photo and drag to lower the saturation.
Muting the greens in the photo gives it a more somber look.
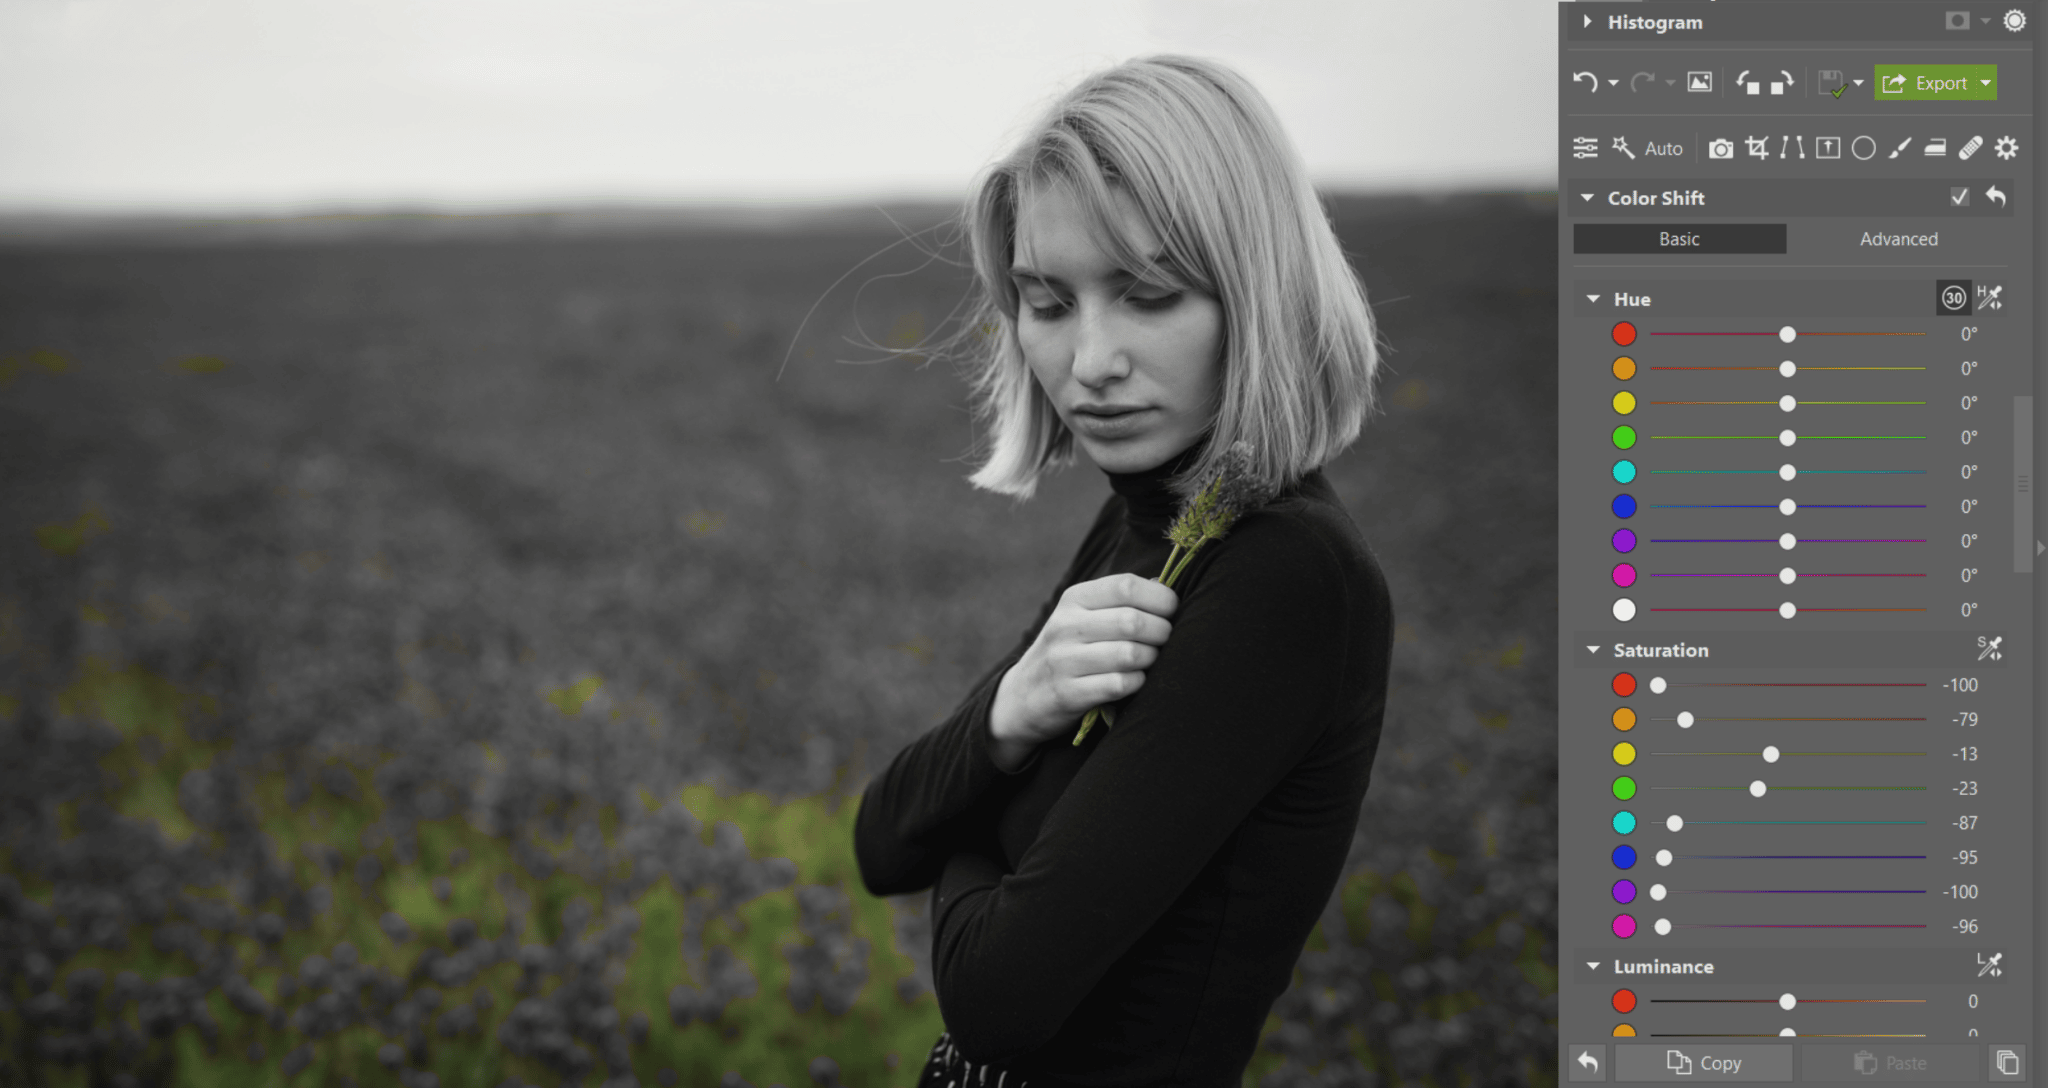
Lower all colors but one
Another option for selective color is only allowing one color to remain in the photo. All you have to do is lower most of the sliders in the Saturation section in Color Shift to zero while leaving the others. In this particular case, it works only with green because the red of the thistle is also found in the skin tones. Therefore, it wouldn’t look right if we were to do a global color correction.
All but one color remains in the photo. It may not be the most artistic of edits.
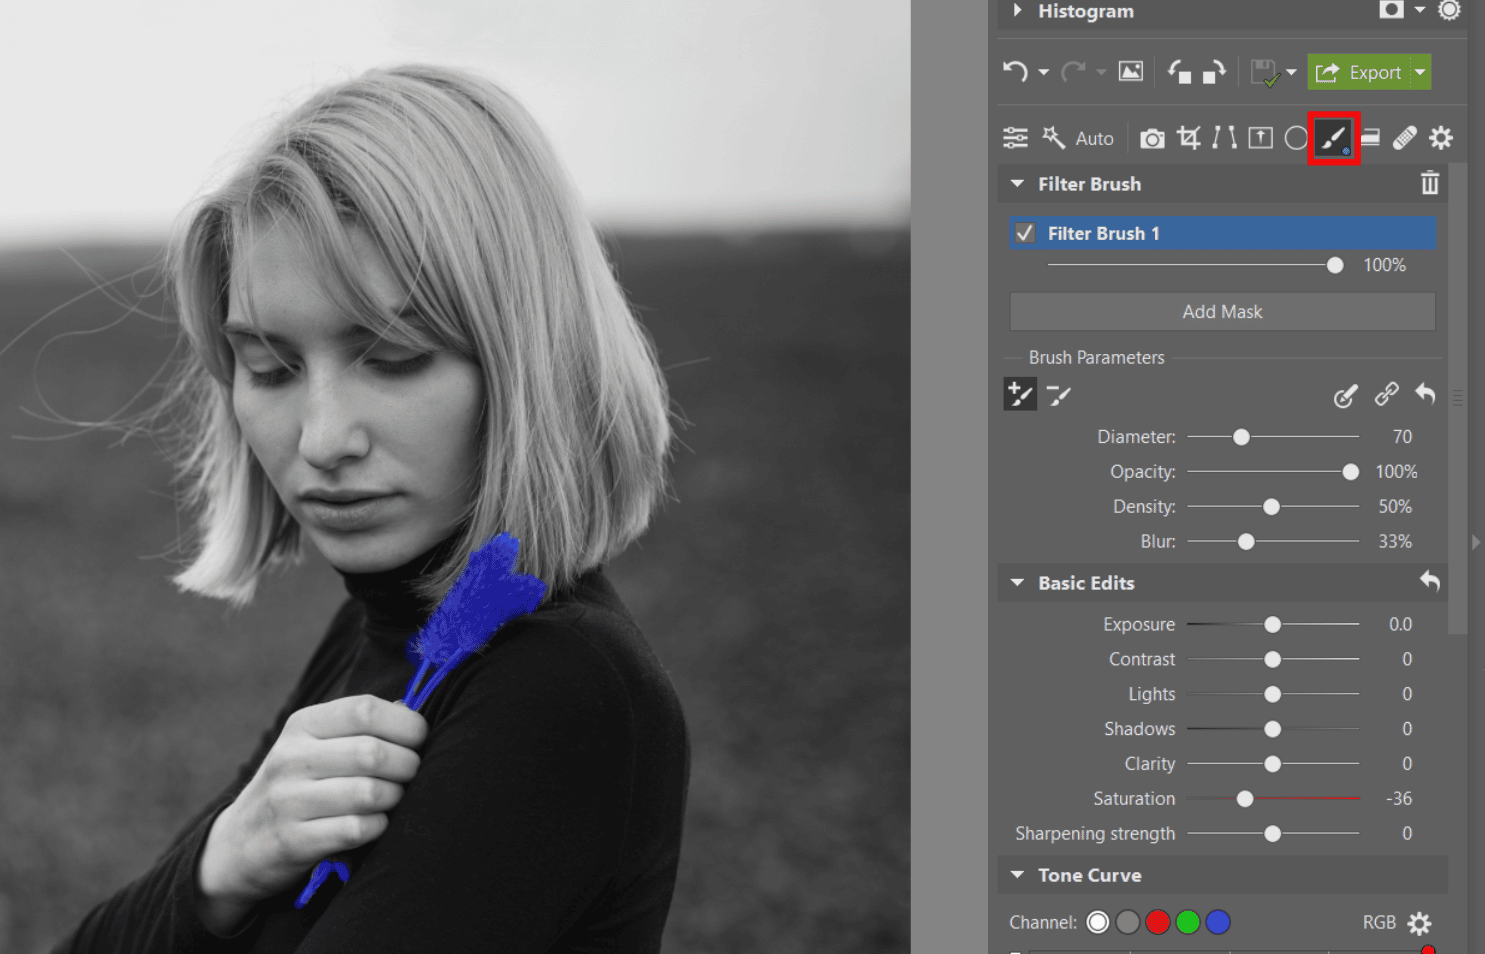
Keep only one item in color
What if you want to make use of the red in that thistle? Or even more dramatically– you want just the flower itself to be in color? In this case, you’ll need local editing tools. Your best choice is the Filter Brush(B). You use this tool to select the object that is to remain in color.
Use the Filter Brush (B) to select the object.
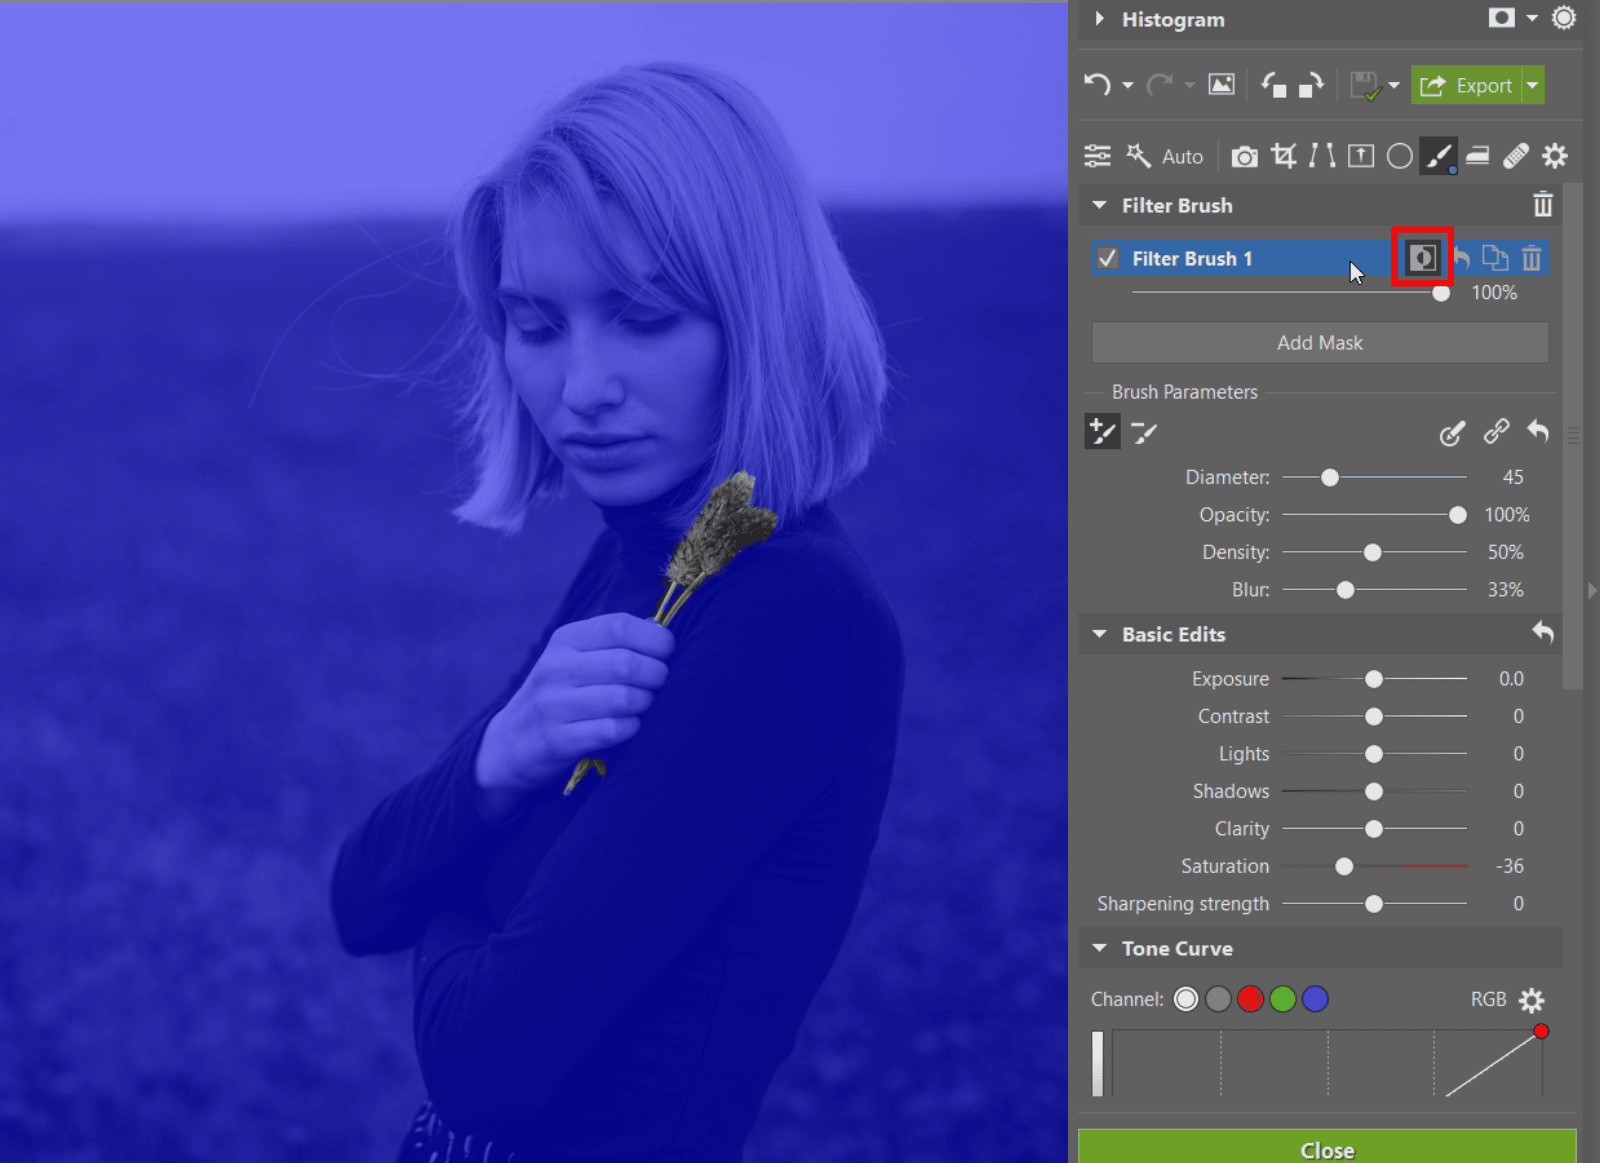
You will now work with only the part of the photo you’ve selected. However, it’s the rest of the photo that you want to desaturate. Use the icon for Invert Mask to invert the adjustment brush mask. After clicking this icon, you edit the entire photo apart from the selected object.
Invert the adjustment brush mask.
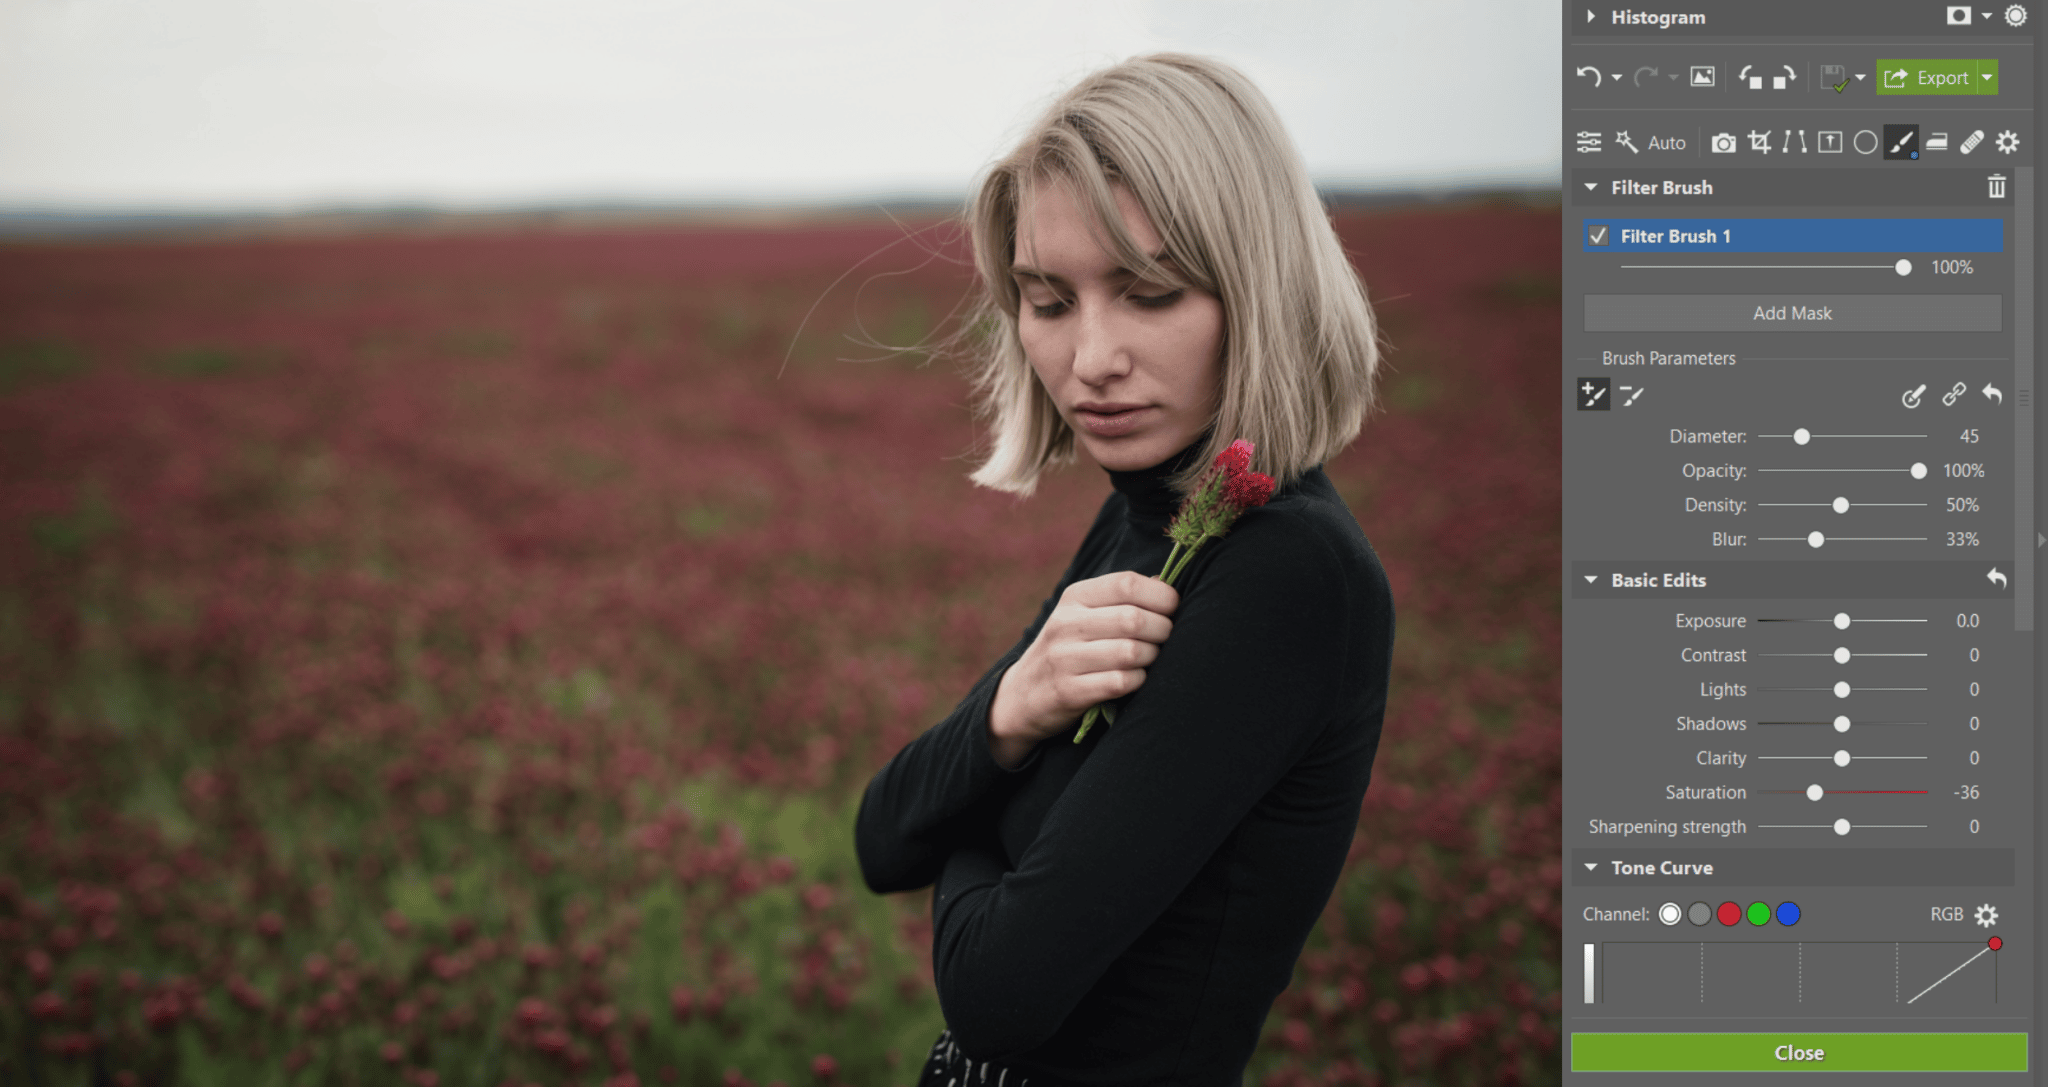
In the last step all you need to do is lower the Saturation slider to zero. This will give you the quintessential and hotly-debated selective color with a single object in color.
A classic example of selective color, which we don’t recommend you use.
Subtly emphasize the main subject
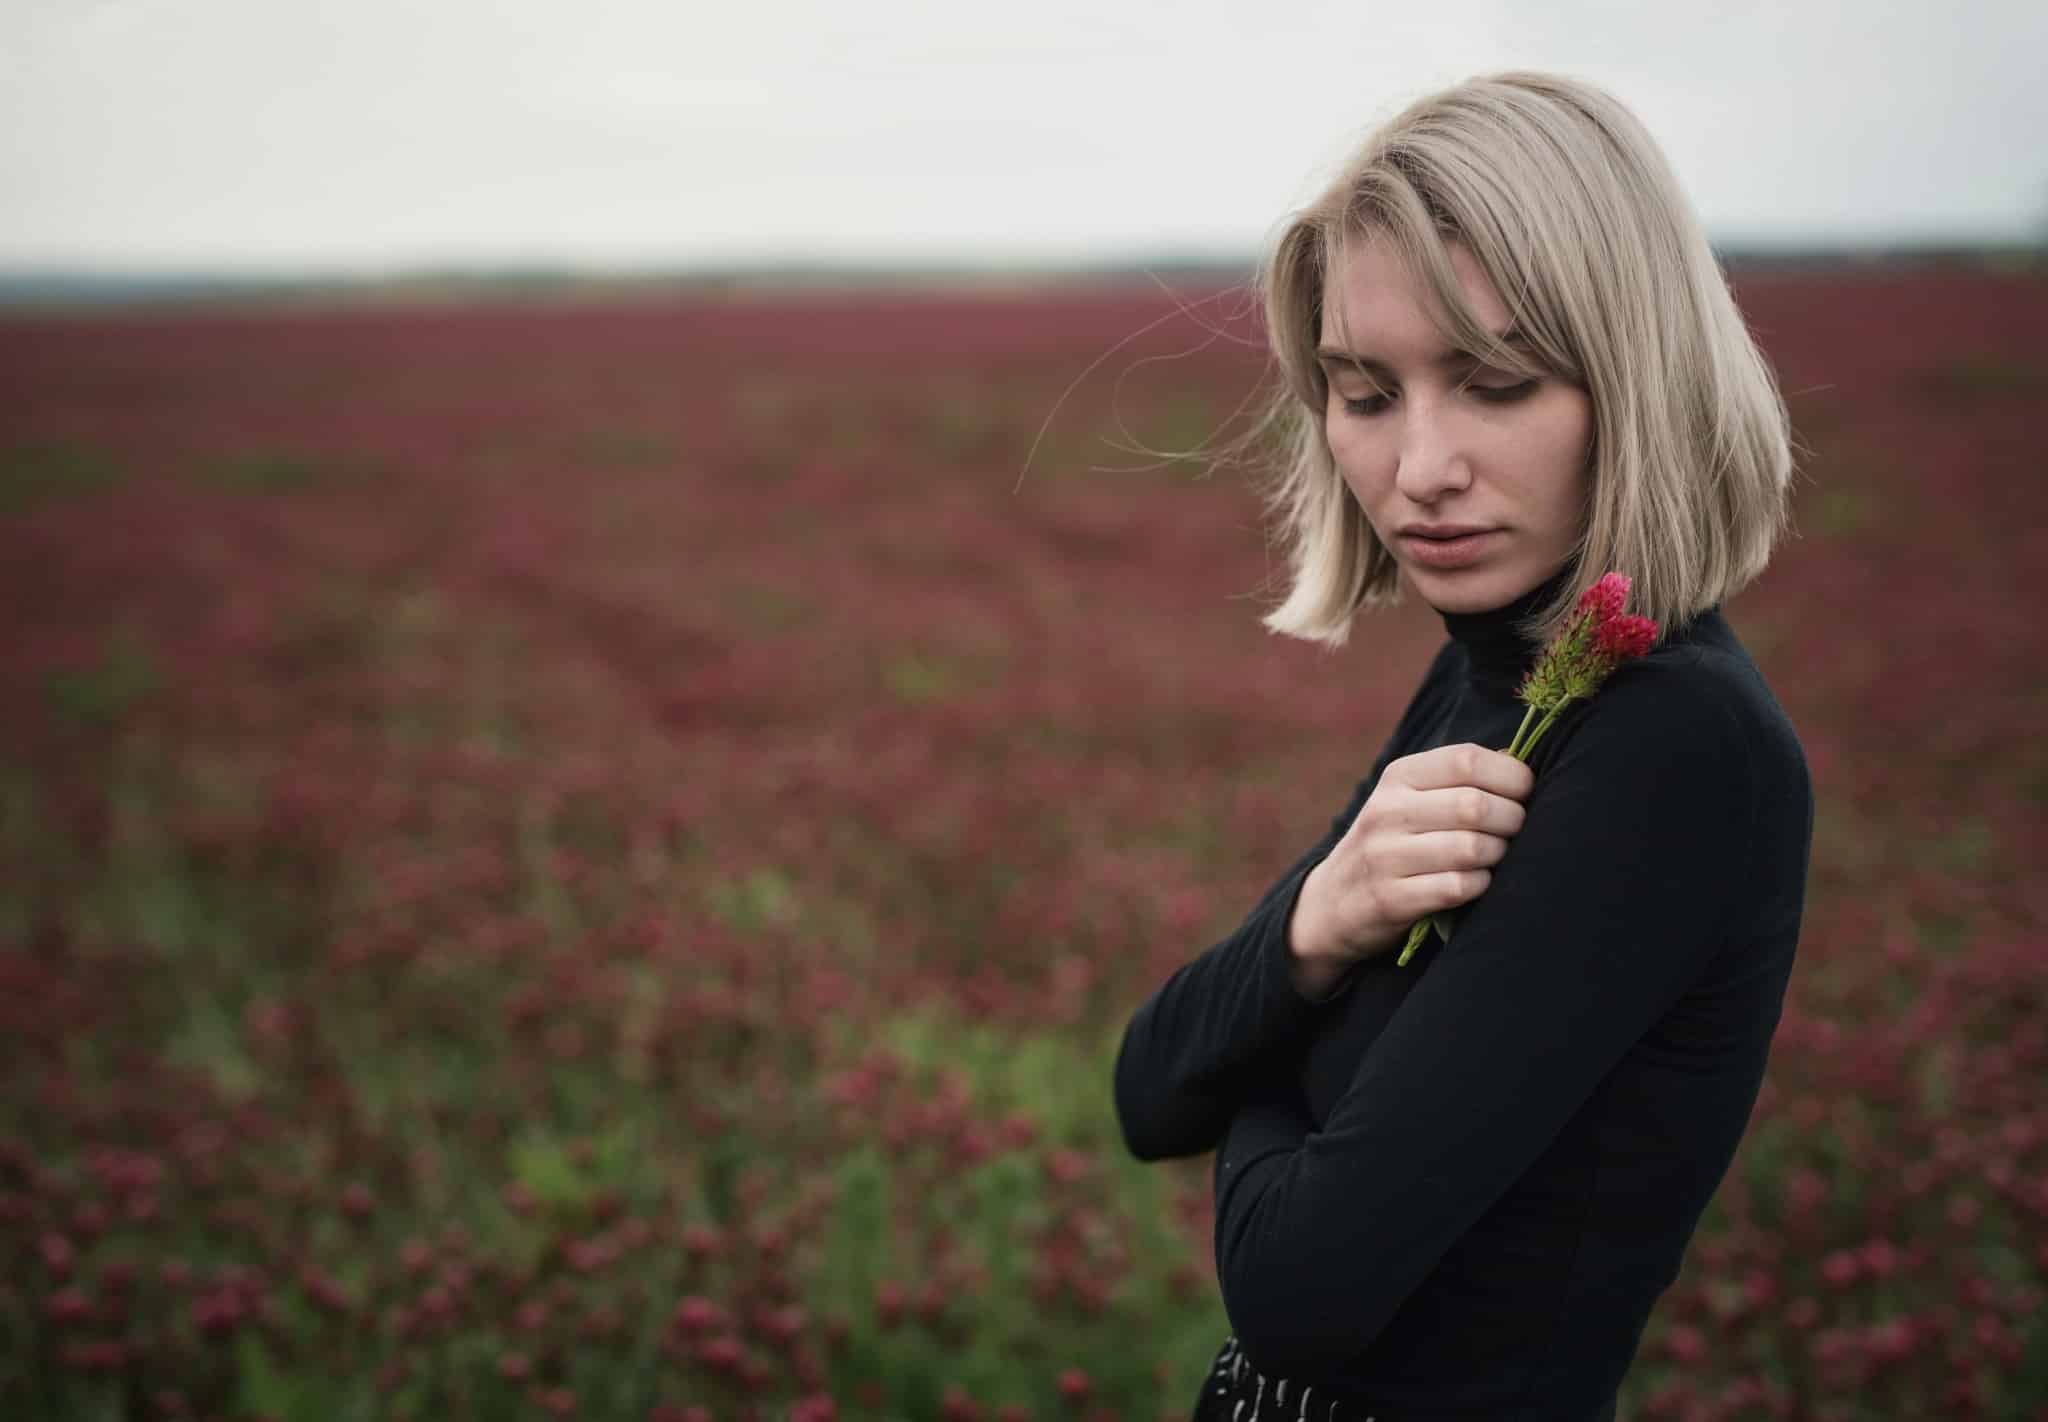
Just like in the first example with partial coloring, the last edit is also more subtle. You don’t need to lower saturation completely. By lowering it by only a few percent, the result can end up being quite striking.
Lower saturation by only a few percent. This way, you’ll subtly make the main subject stand out from its surroundings.
We are most inclined to use this last method of selective color. With this edit, you desaturate the colors to make the main subject stand out from the background. If you do this edit delicately, it can benefit your photograph. It’s a frequently-used edit and it’s a good idea to know how to use it.
A more subtle method of using selective color.
Whether you’re a fan of selective color or not, you can download Zoner Studio free for 7 days and try out this simple edit yourself.
Receive our weekly newsletter to stay on top of the latest photography trends
Subscribe to receive the best learn.zoner.com has to offer
By confirming the subscription, you consent to the processing of your personal data for receiving newsletter. Learn more in our privacy policy.
I most love taking pictures of people. Weddings, portraits, graduation photos, balls... I am always in search of backlight, but I enjoy various types of lighting and mostly like to use shorter lenses. I love my Nikon, my guitar, and a kebab. You’ll find my photography on my website or on Facebook.


There are no comments yet.