Editing to Highlight Your Subject
The article is over 5 years old. The information in it may be outdated.
![]()
We are working on its update. In the meantime, you can read some more recent articles.
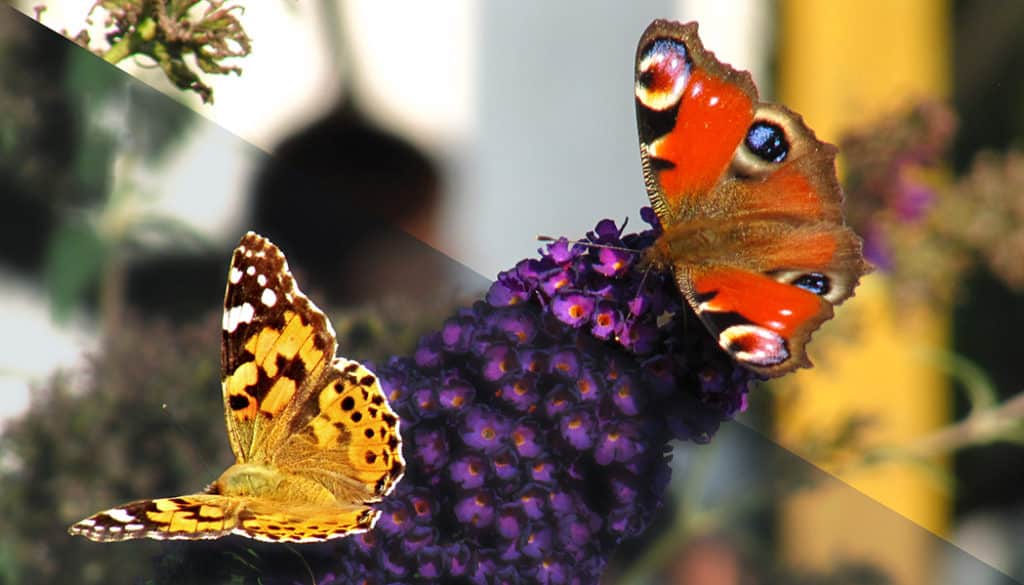
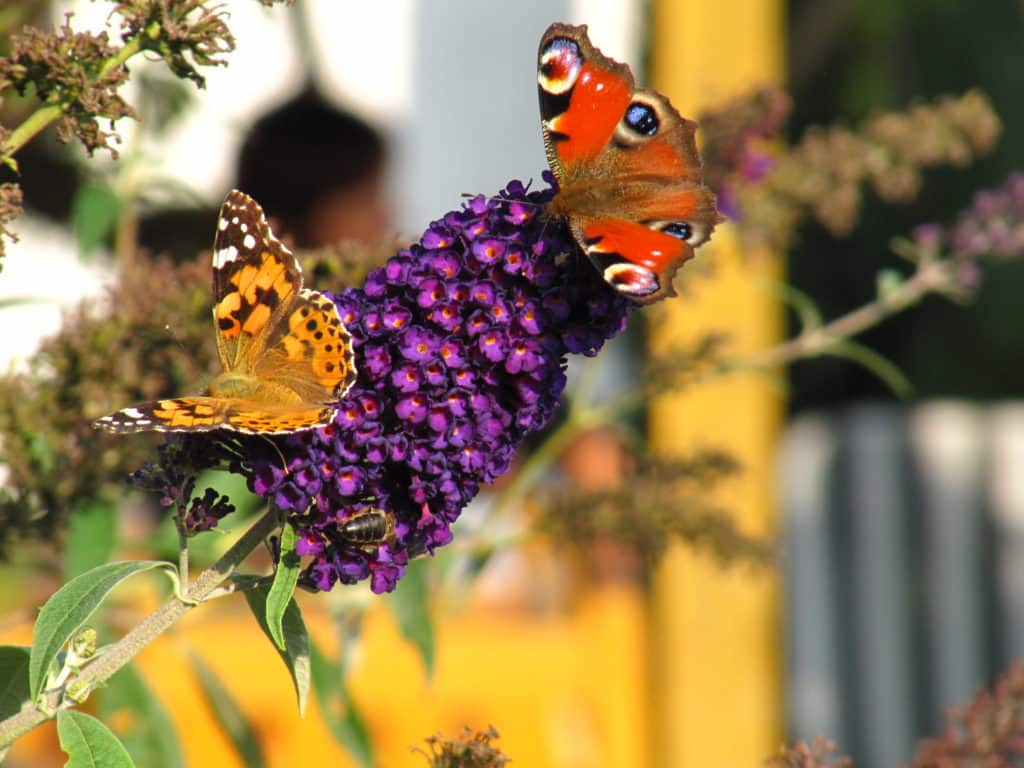
Today we’ll once again be taking a look at fixing a specific picture—to help you bridge the gap from theory to real-world work on fixing real-world photos. This shot was taken in poor light conditions—under hard light. We’ll be softening the light to get a picture that’s easier on the eyes. We will use Zoner Studio for all the needed edits. You’re very welcome to follow along with us—just download the photo above and then imitate our steps.
First, an Analysis
This will be a major edit. The subject—the butterflies—needs to stand out more against the background, and it also needs to look “more natural than in real life.”
That is: the original picture was taken in very hard light, which is a poor fit for photography. The photographer should have used a diffuser to soften this light. That would have made the picture feel much more natural. The diagonal composition is interesting, but the picture contains superfluous areas on the bottom and on the right. Ideally, a shot angle yielding a less distracting background should have been used.
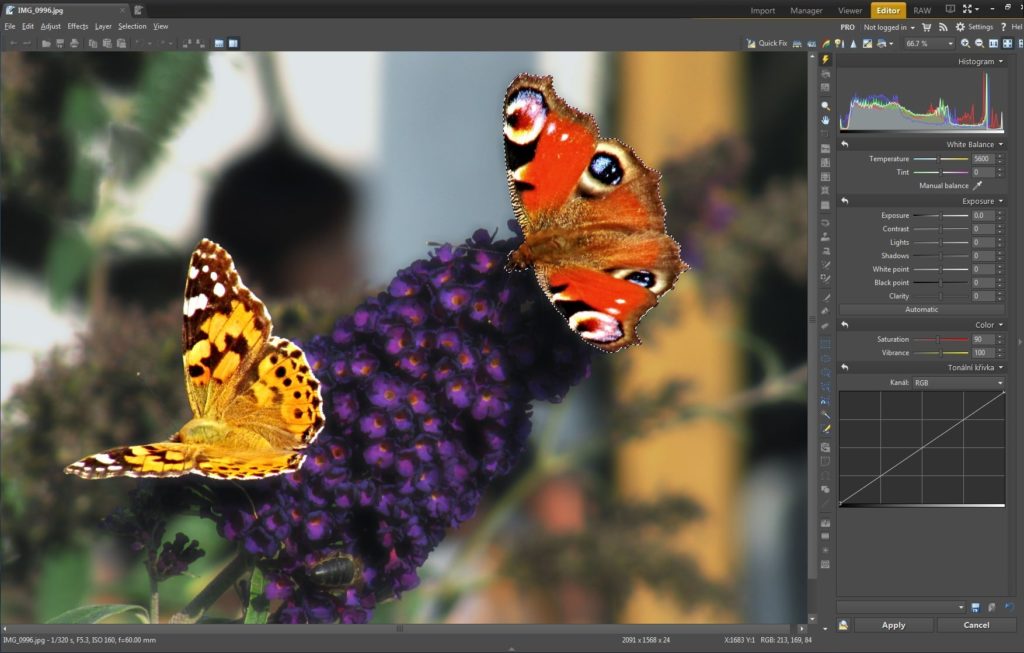
For this edit, we’ll be using the following tools: Crop (C), Lasso (L), Quick Edits (Q), and Magnetic Lasso (A). (The letters in parentheses are their shortcut keys.) The buttons for these tools are in the Toolbox towards the right of the Editor. We’ll also be using some menu items: Selection > Fill with Surroundings… (Shift+Del), Selection > Save Selection…, Selection > Deselect (Esc), Selection > Load Selection…, and Selection > Invert Selection (Ctrl+Shift+I).
Want to learn more about the different selection tools and how to work with them? Read our article on selections.
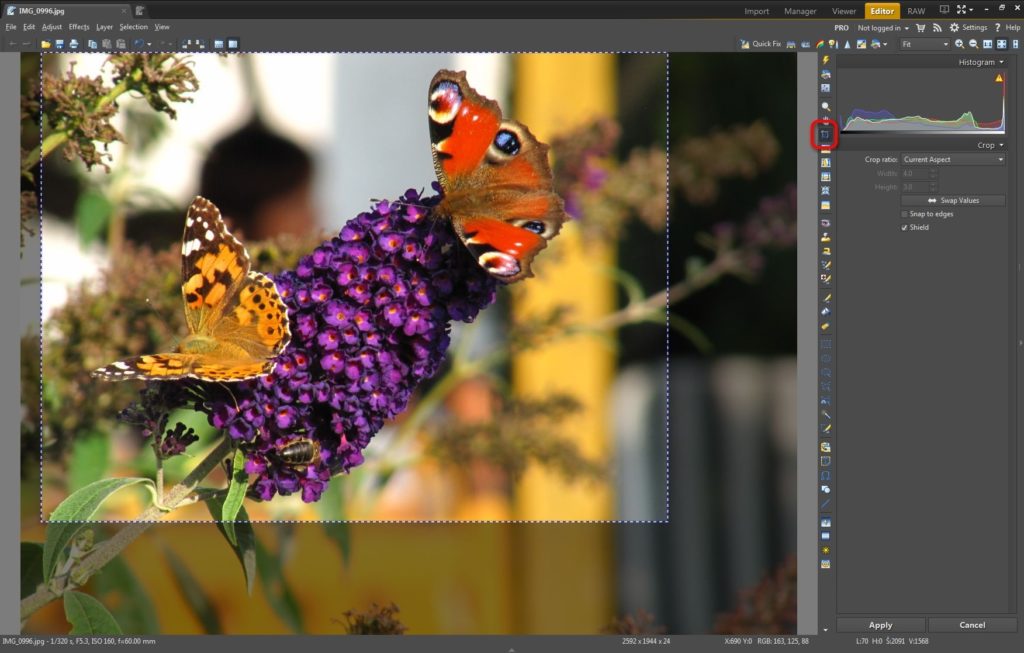
Enhancing the Composition
The tool to use for improving a picture’s composition is the Crop tool. We used a crop that eliminated the picture’s uninteresting spaces, one that would make the diagonal composition shine through, fit the two butterflies into the Golden Crop, and optically join those butterflies via the diagonal of the flower that they’re resting on.
Now we want to eliminate the most distracting element in the picture: the relatively sharp branch at the top left. It’s drawing too much attention to itself. We first select the area with the branch using the Lasso tool.
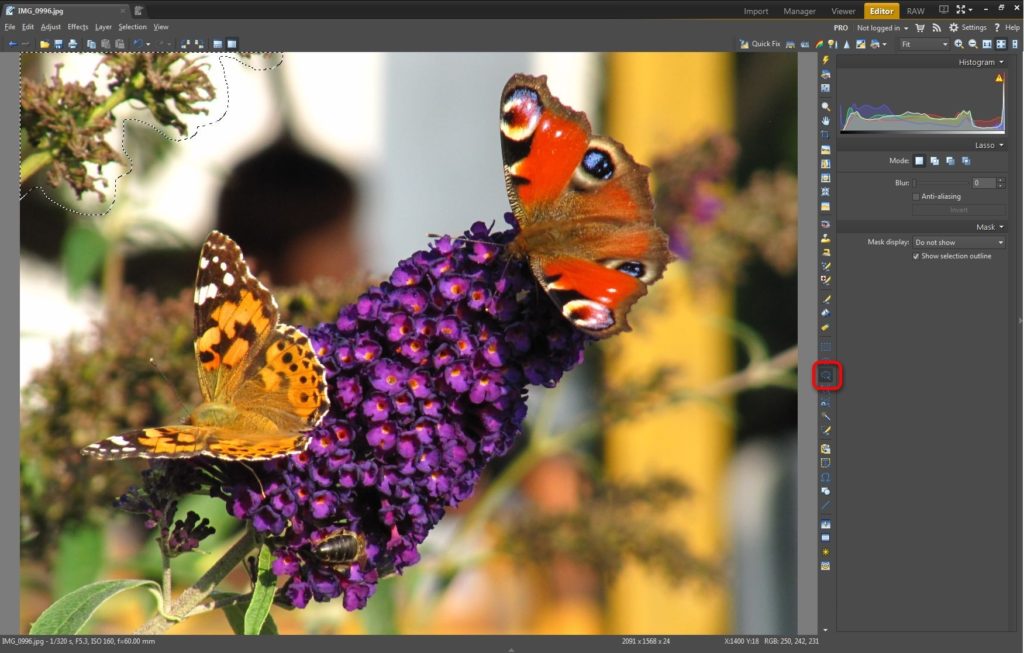
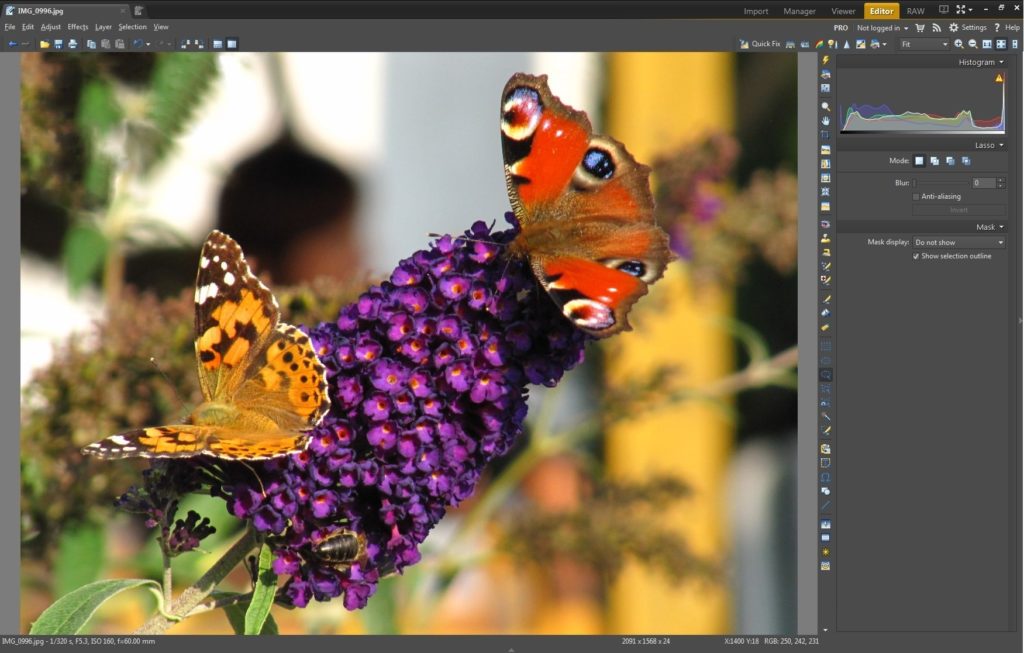
Then we remove the branch using the Fill with Surroundings function: Selection > Fill with Surroundings….
Making Selections
In order to edit the subject and the background separately, we’ll need to select parts of the picture—we’ll need make selections. We’ll be using the Magnetic Lasso to make them. We select one of the butterflies and then save that selection using Selection > Save Selection… Then we press Esc to cancel the selection (we could also use Selection > Deselect for this) and we repeat the whole process for the second butterfly.
Now we load our two saved selections using Selection > Load Selection…. This shows the Load Selection window, where we choose “Add to Selection.”
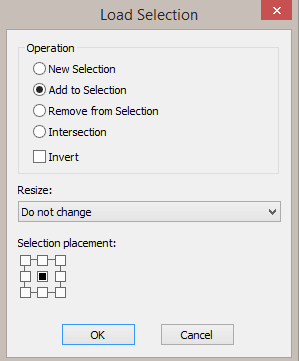
This combines the two selections into one. Next we use Selection > Invert Selection to invert the selection. That way, the edits we’re about to make will affect only the background—the butterflies will stay untouched.
Removing Background Distractions
Because of how the human eye works, it’s attracted more by sharp images than by blurry ones, more by light regions than dark ones, and more by warm tones than cool ones. Take advantage of these facts when retouching pictures with highly visible, noisy backgrounds!
That’s what we did here—we activated Quick Edits and reduced the background’s contrast by setting the white point to -50 and the black point to 40. We then blurred the background by reducing the Clarity to -100. And then we slightly desaturated bright colors by setting Saturation to 80. To darken the background, we worked with the tone curve, which we bent downwards.

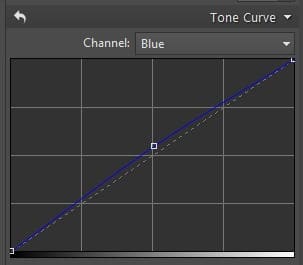
To shift the background towards cooler tones, we work with the red and blue channels in Curves. We move the red channel slightly downwards and the blue channel slightly upwards.

Emphasizing the Subject
To emphasize the subject, we’ll use the opposite approach as we did for the background. First we invert the selection using Selection > Invert Selection, and then we activate Quick Edits. We increase the butterflies’ contrast by setting the white point to 25 and the black point to -25. We increase the saturation of their colors by setting Vibrance to 120, and then we brighten them by adjusting the tone curve.
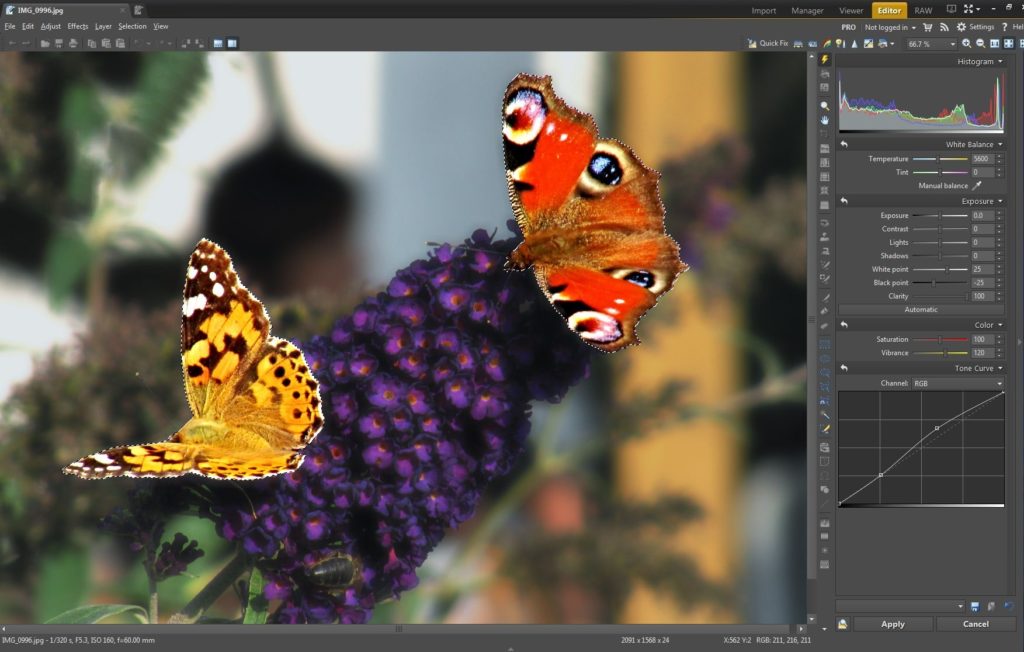
We then finish up with some mild adjustments, which we make to the red butterfly only. Red is a rather problematic color in digital photography; it becomes oversaturated more quickly than blue and green. Because of this, extremely red areas often lack detail. To restore detail here, we use Selection > Deselect and then use Selection > Load Selection… to load back in our earlier selection that covered the red butterfly only. Then in Quick Edits we desaturate it by moving Saturation to 90.
Conclusion
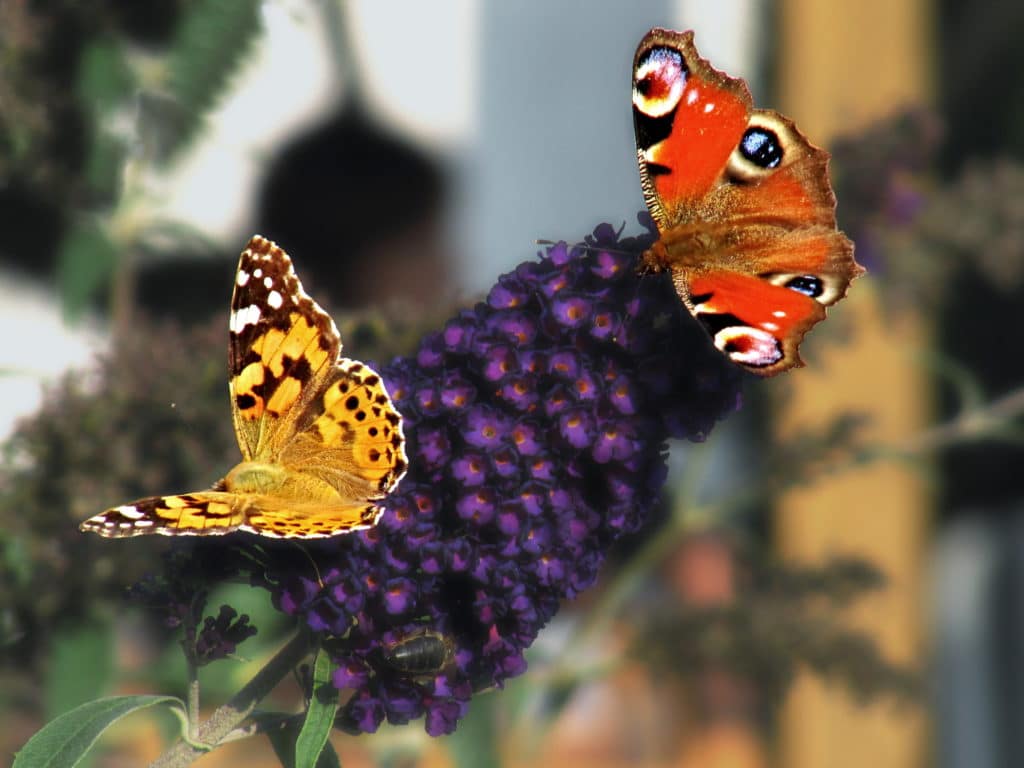
Thanks to the power of local edits, we’ve been able to emphasize some parts of a photo while suppressing others. Nevertheless, some problems are better resolved from behind the camera than from behind a computer screen. For example in our photo today, it would have saved trouble and given a better final picture (even after editing) if the shot had used softer lighting and a less distracting background. If you can’t find a shooting angle with a distraction-free background, then don’t hesitate to use a man-made neutral background. This can even be something as simple as a scarf.
In closing, here’s a comparison of this photo before and after edits:
Like What You See? Download Zoner Studio and use it for free for 7 days to improve your photos.
Andre
Excellent !
This is the kind of article I like (and I need) to get further on with editing in ZPS
Zoner
Thank you Andre, we’re happy it’s useful for you!
Dan Hensley
I hope to be able to follow the steps discussed in the artical.
Zoner
It varies picture to picture, but we hope as well it’ll help you!
Vorchek
“You’re very welcome to follow along with us—just download the photo above and then imitate our steps.” However, the photo at the top isn’t the source picture, but one heavily modified. Is there a link I’m missing? I really want to try out this.