How to Create an Infrared Photo Effect in Zoner Photo Studio X
An infrared photograph communicates something unique that can be lost in an otherwise ordinary image. You need special equipment to create this effect. Wondering what your photos would look like with an infrared effect but don’t have the necessary equipment? Try getting this unique look using Zoner Photo Studio X.
What exactly is infrared (IR) photography? IR photography captures only the infrared part of the light spectrum on the camera sensor or film. Although it’s not visible to the naked eye, it is all around us all the time.
All light sources emit infrared radiation. This radiation reflects off objects and can be captured on camera using special equipment. The resulting images have a very distinctive look and are popular with many photographers.

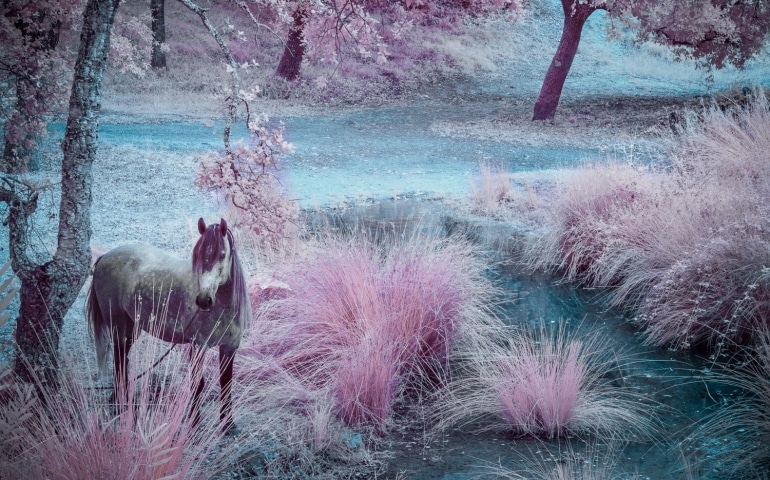
Have you seen the works of photographer José L. Dinize?
You can find IR photography in fields other than art. For example, telescopes like the James Webb Telescope and the Hubble Space Telescope use technology to capture the invisible part of the light spectrum (i.e. infrared and ultraviolet). By processing light at these wavelengths, they can see much further into space than if they only process the visible spectrum.

IR imaging technology is also used in medicine, archeology, and the military.
Equipment requirements
The good news is that you don’t have to own a telescope to take infrared photos. Both film, which is sensitive to infrared radiation, and infrared filters for digital cameras, are commonly used. IR filters are attached to the lens just like any other filter. They allow only infrared radiation to pass through the camera and filter out other wavelengths of light.
Post-production
If you don’t want to get an IR filter but want to see what your photos would look like in infrared, Zoner Photo Studio X can help. The results won’t be the same as using infrared equipment, but still interesting and a good way to test out the infrared look. All you need is the Develop module.
Choose the right photo
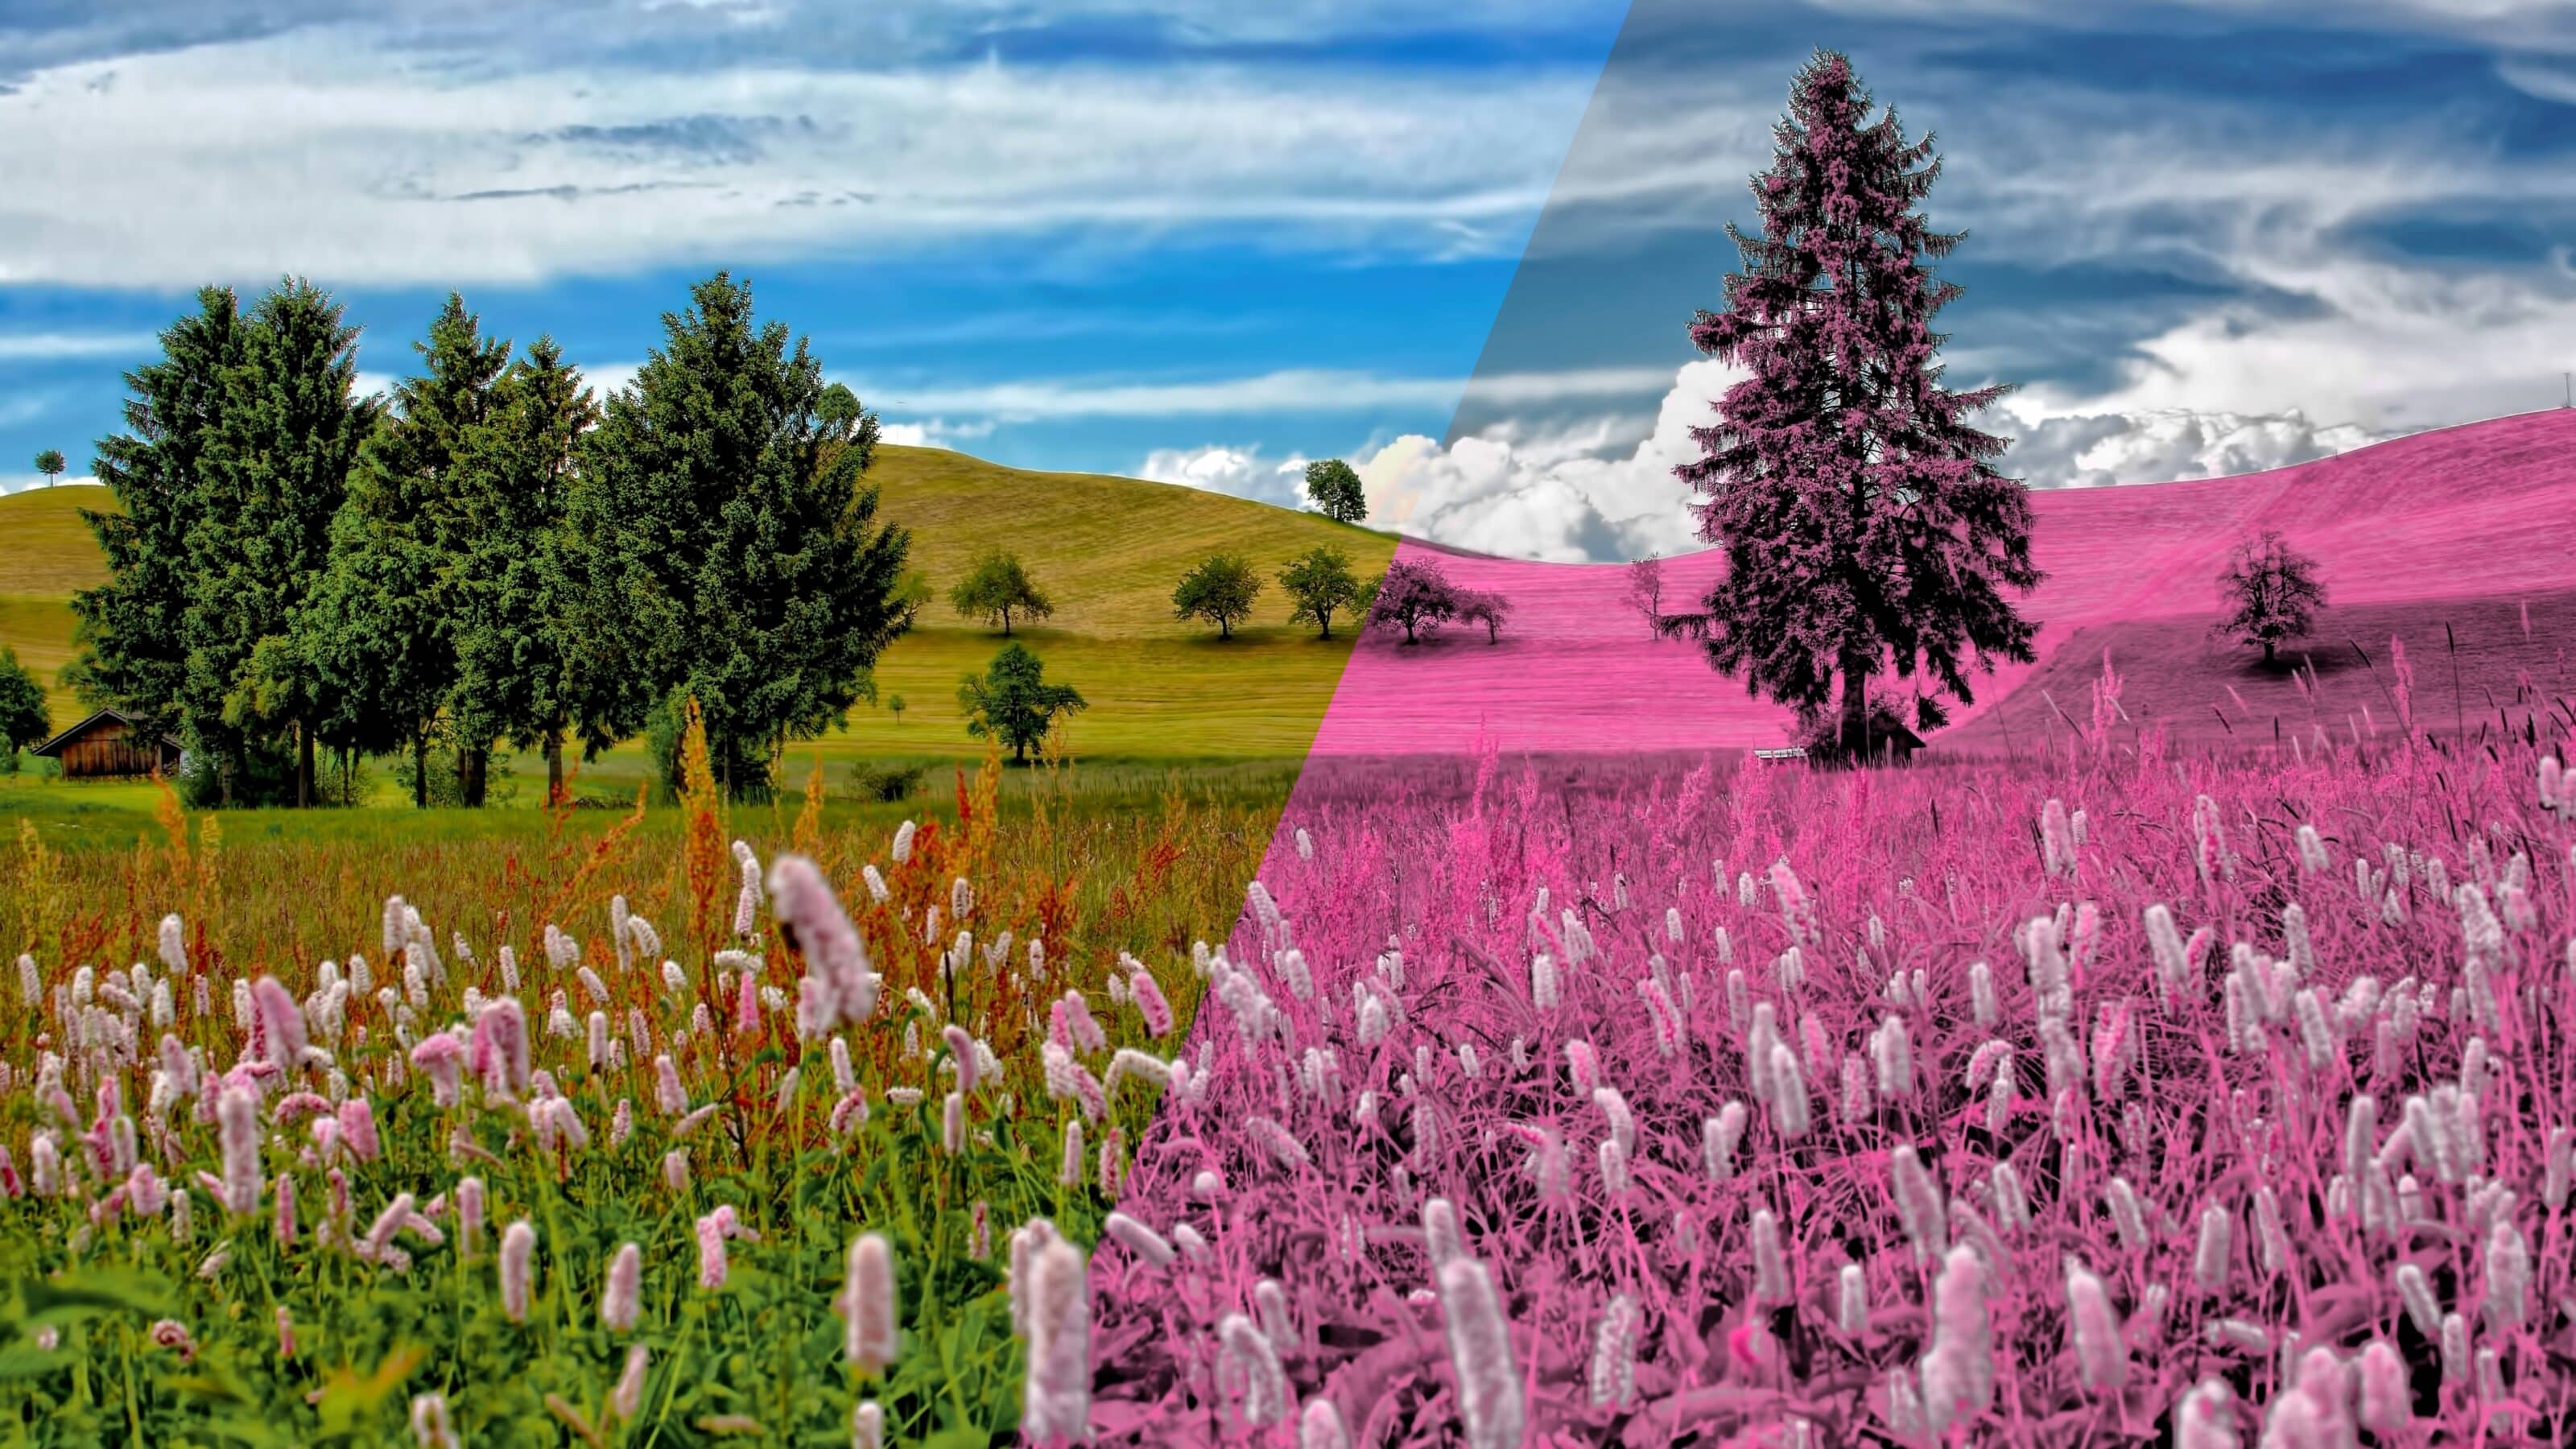
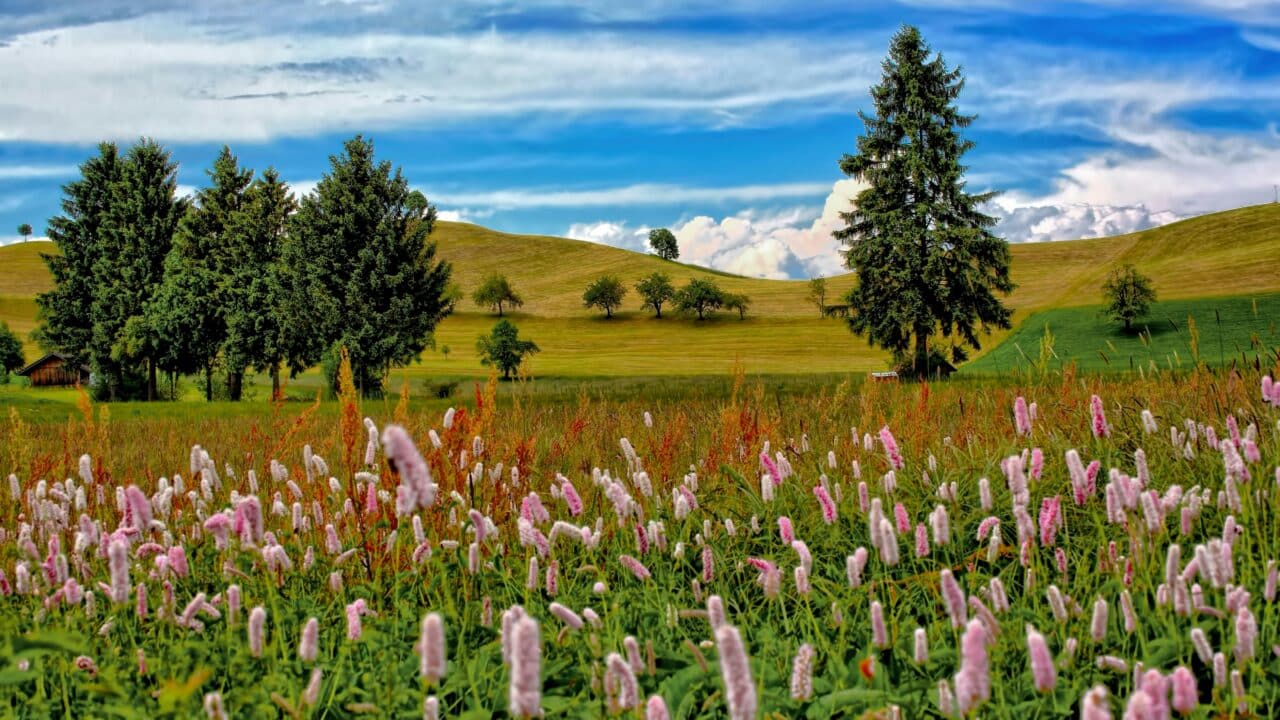
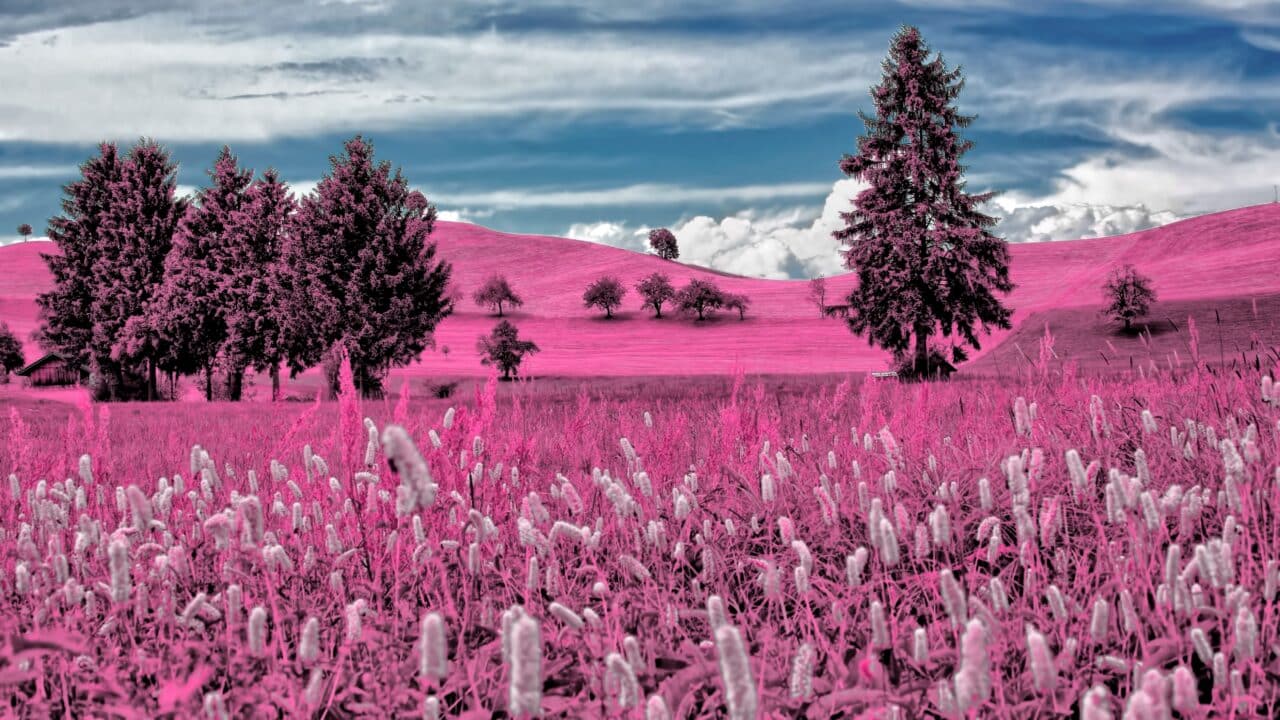
First, you need to find the right photo. Landscapes are very popular with IR photographers. This is because certain materials, including organic material like foliage, reflect more IR radiation than others. The foliage takes on a light pink color, while the sky is dark and desaturated. A landscape photo with both foliage and a blue sky is perfect for an IR effect.
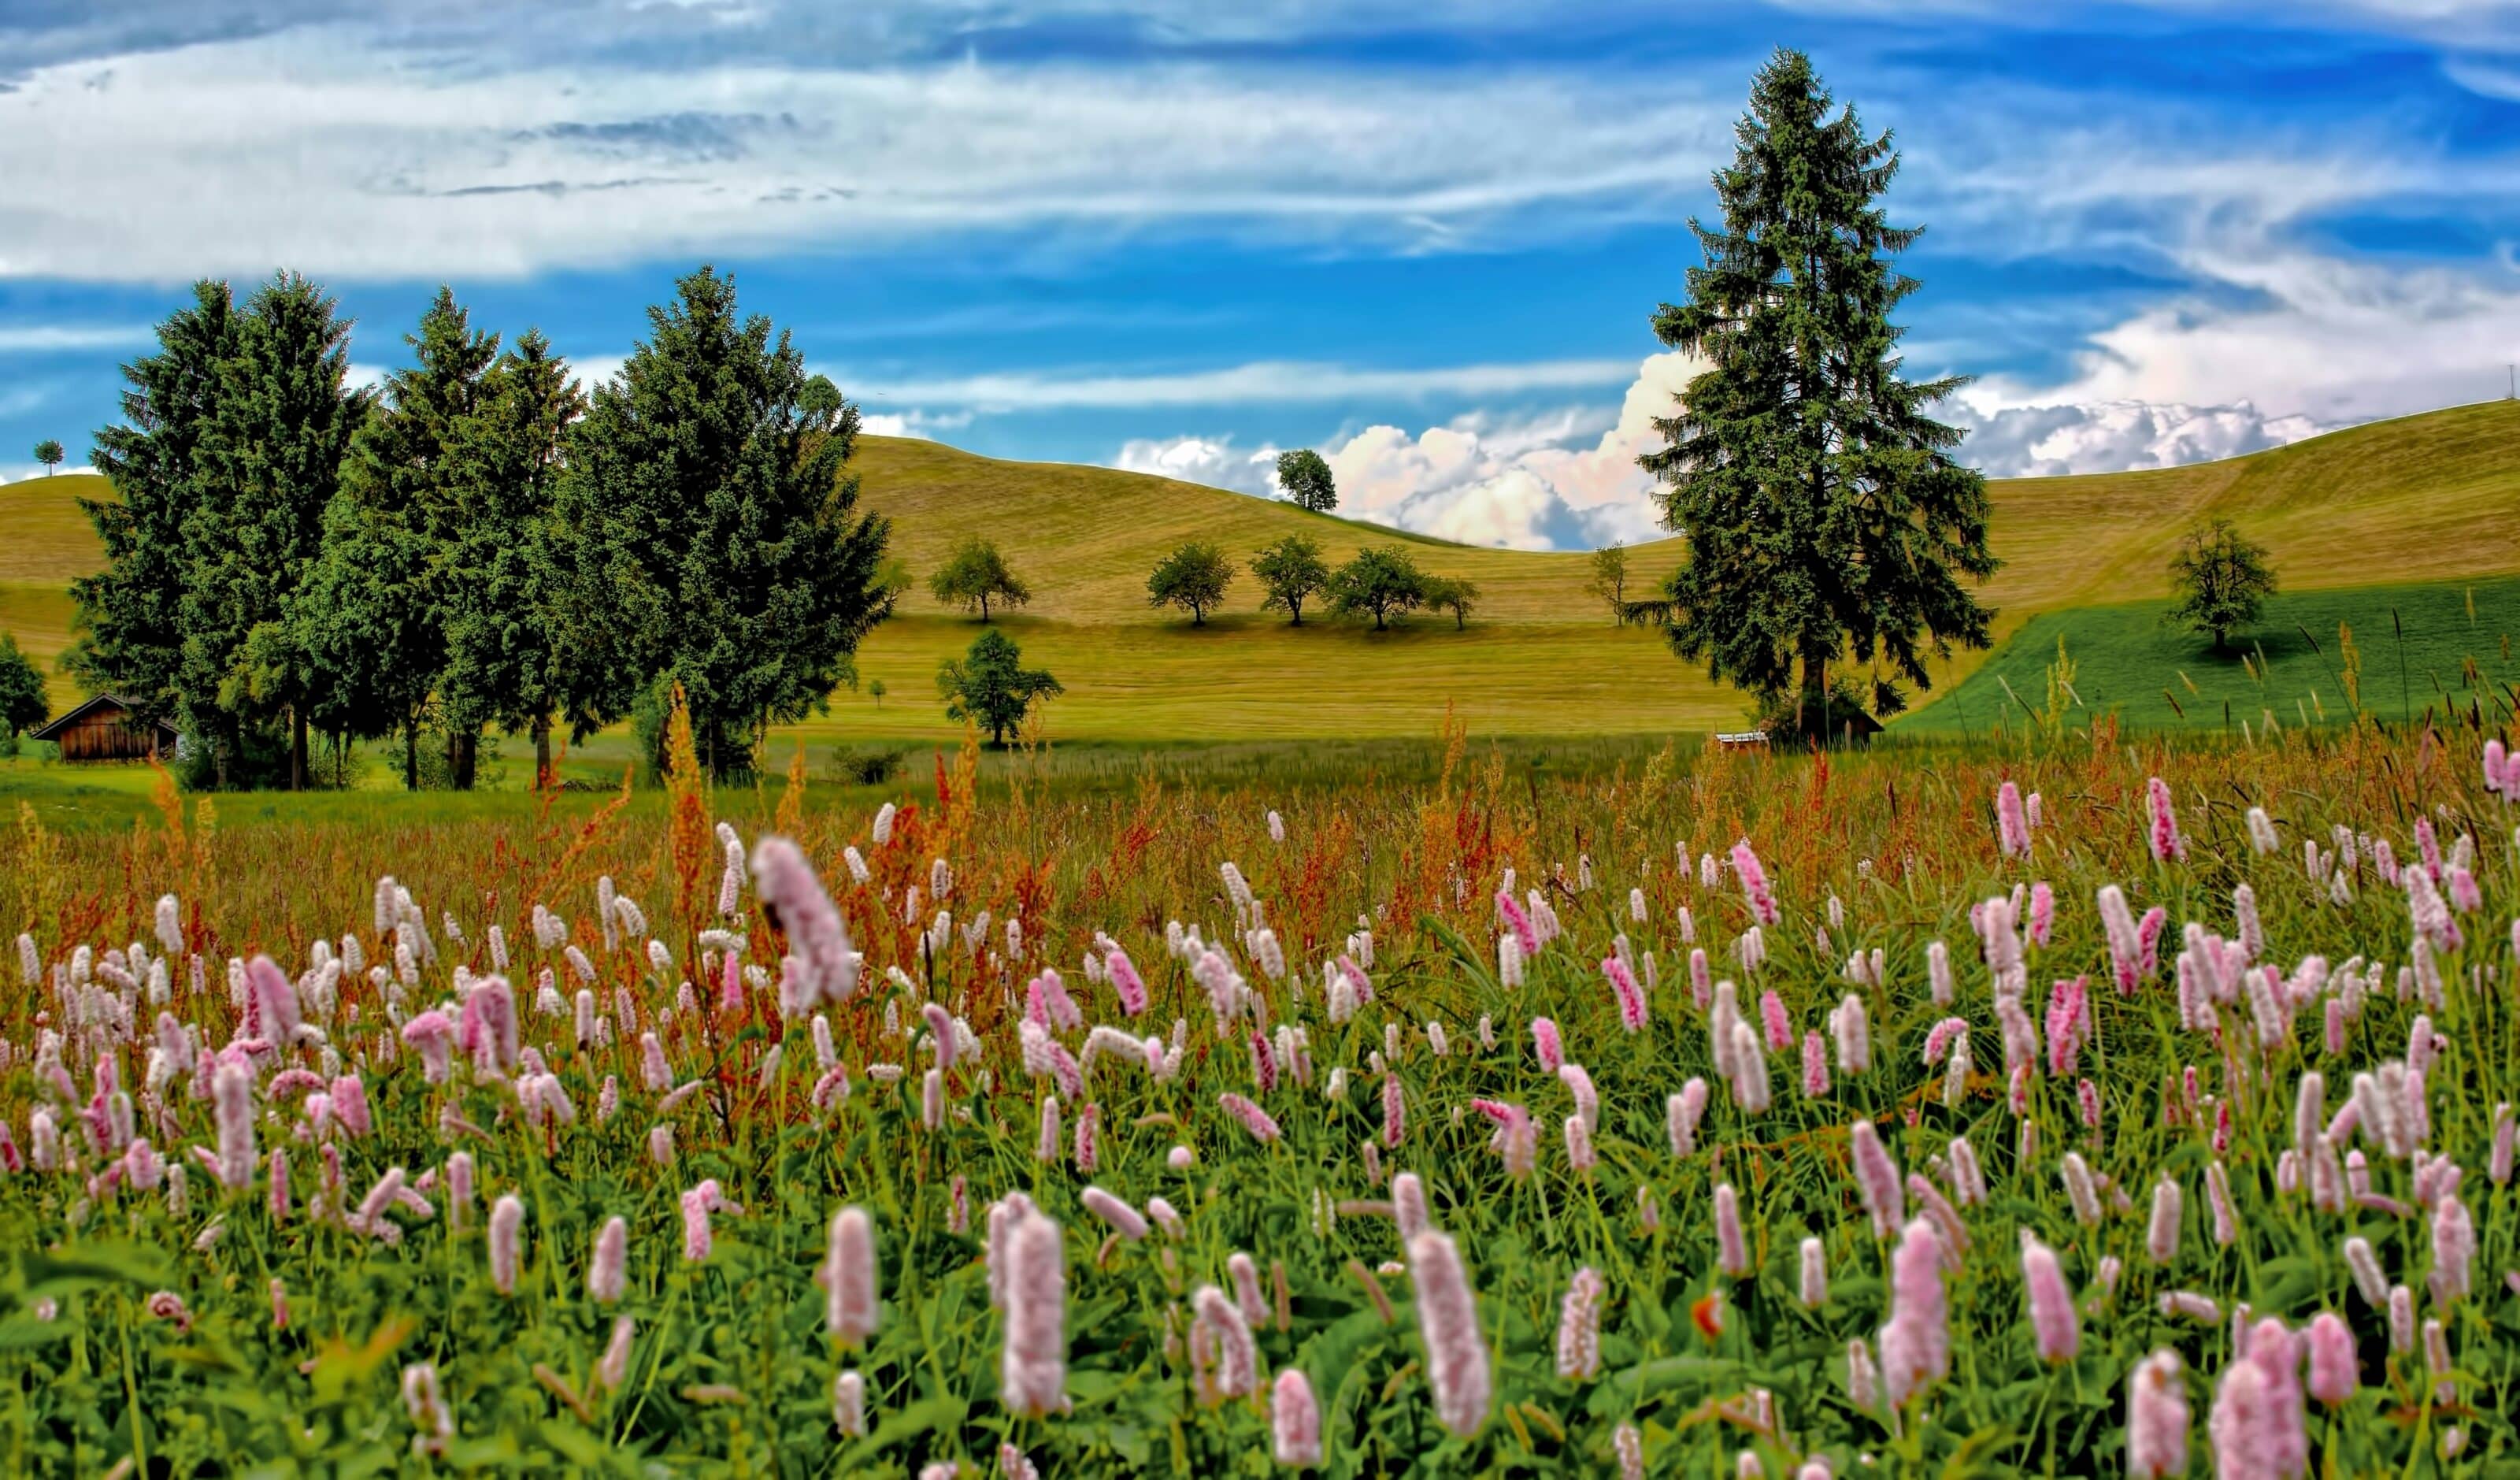
Since I’m not a landscape photographer, you won’t find landscape photos in my portfolio. That’s why I downloaded the demonstration photo from a stock photography site. Once you have your landscape photo ready, open it in the Develop module of Zoner Photo Studio X.
Use Color Shift
We are going to use Color Shift to do two things:
- Mask all the greenery in the foreground and change the color to pink
- Mask the sky and adjust its Saturation and Luminance
If we are successful, these two adjustments simulate the look of an infrared photo.
TIP: If you are unfamiliar with Color Shift, read the article Color Shift: Get Absolute Control Over Your Photos‘ Colors. This article explains all the basics you need to know.
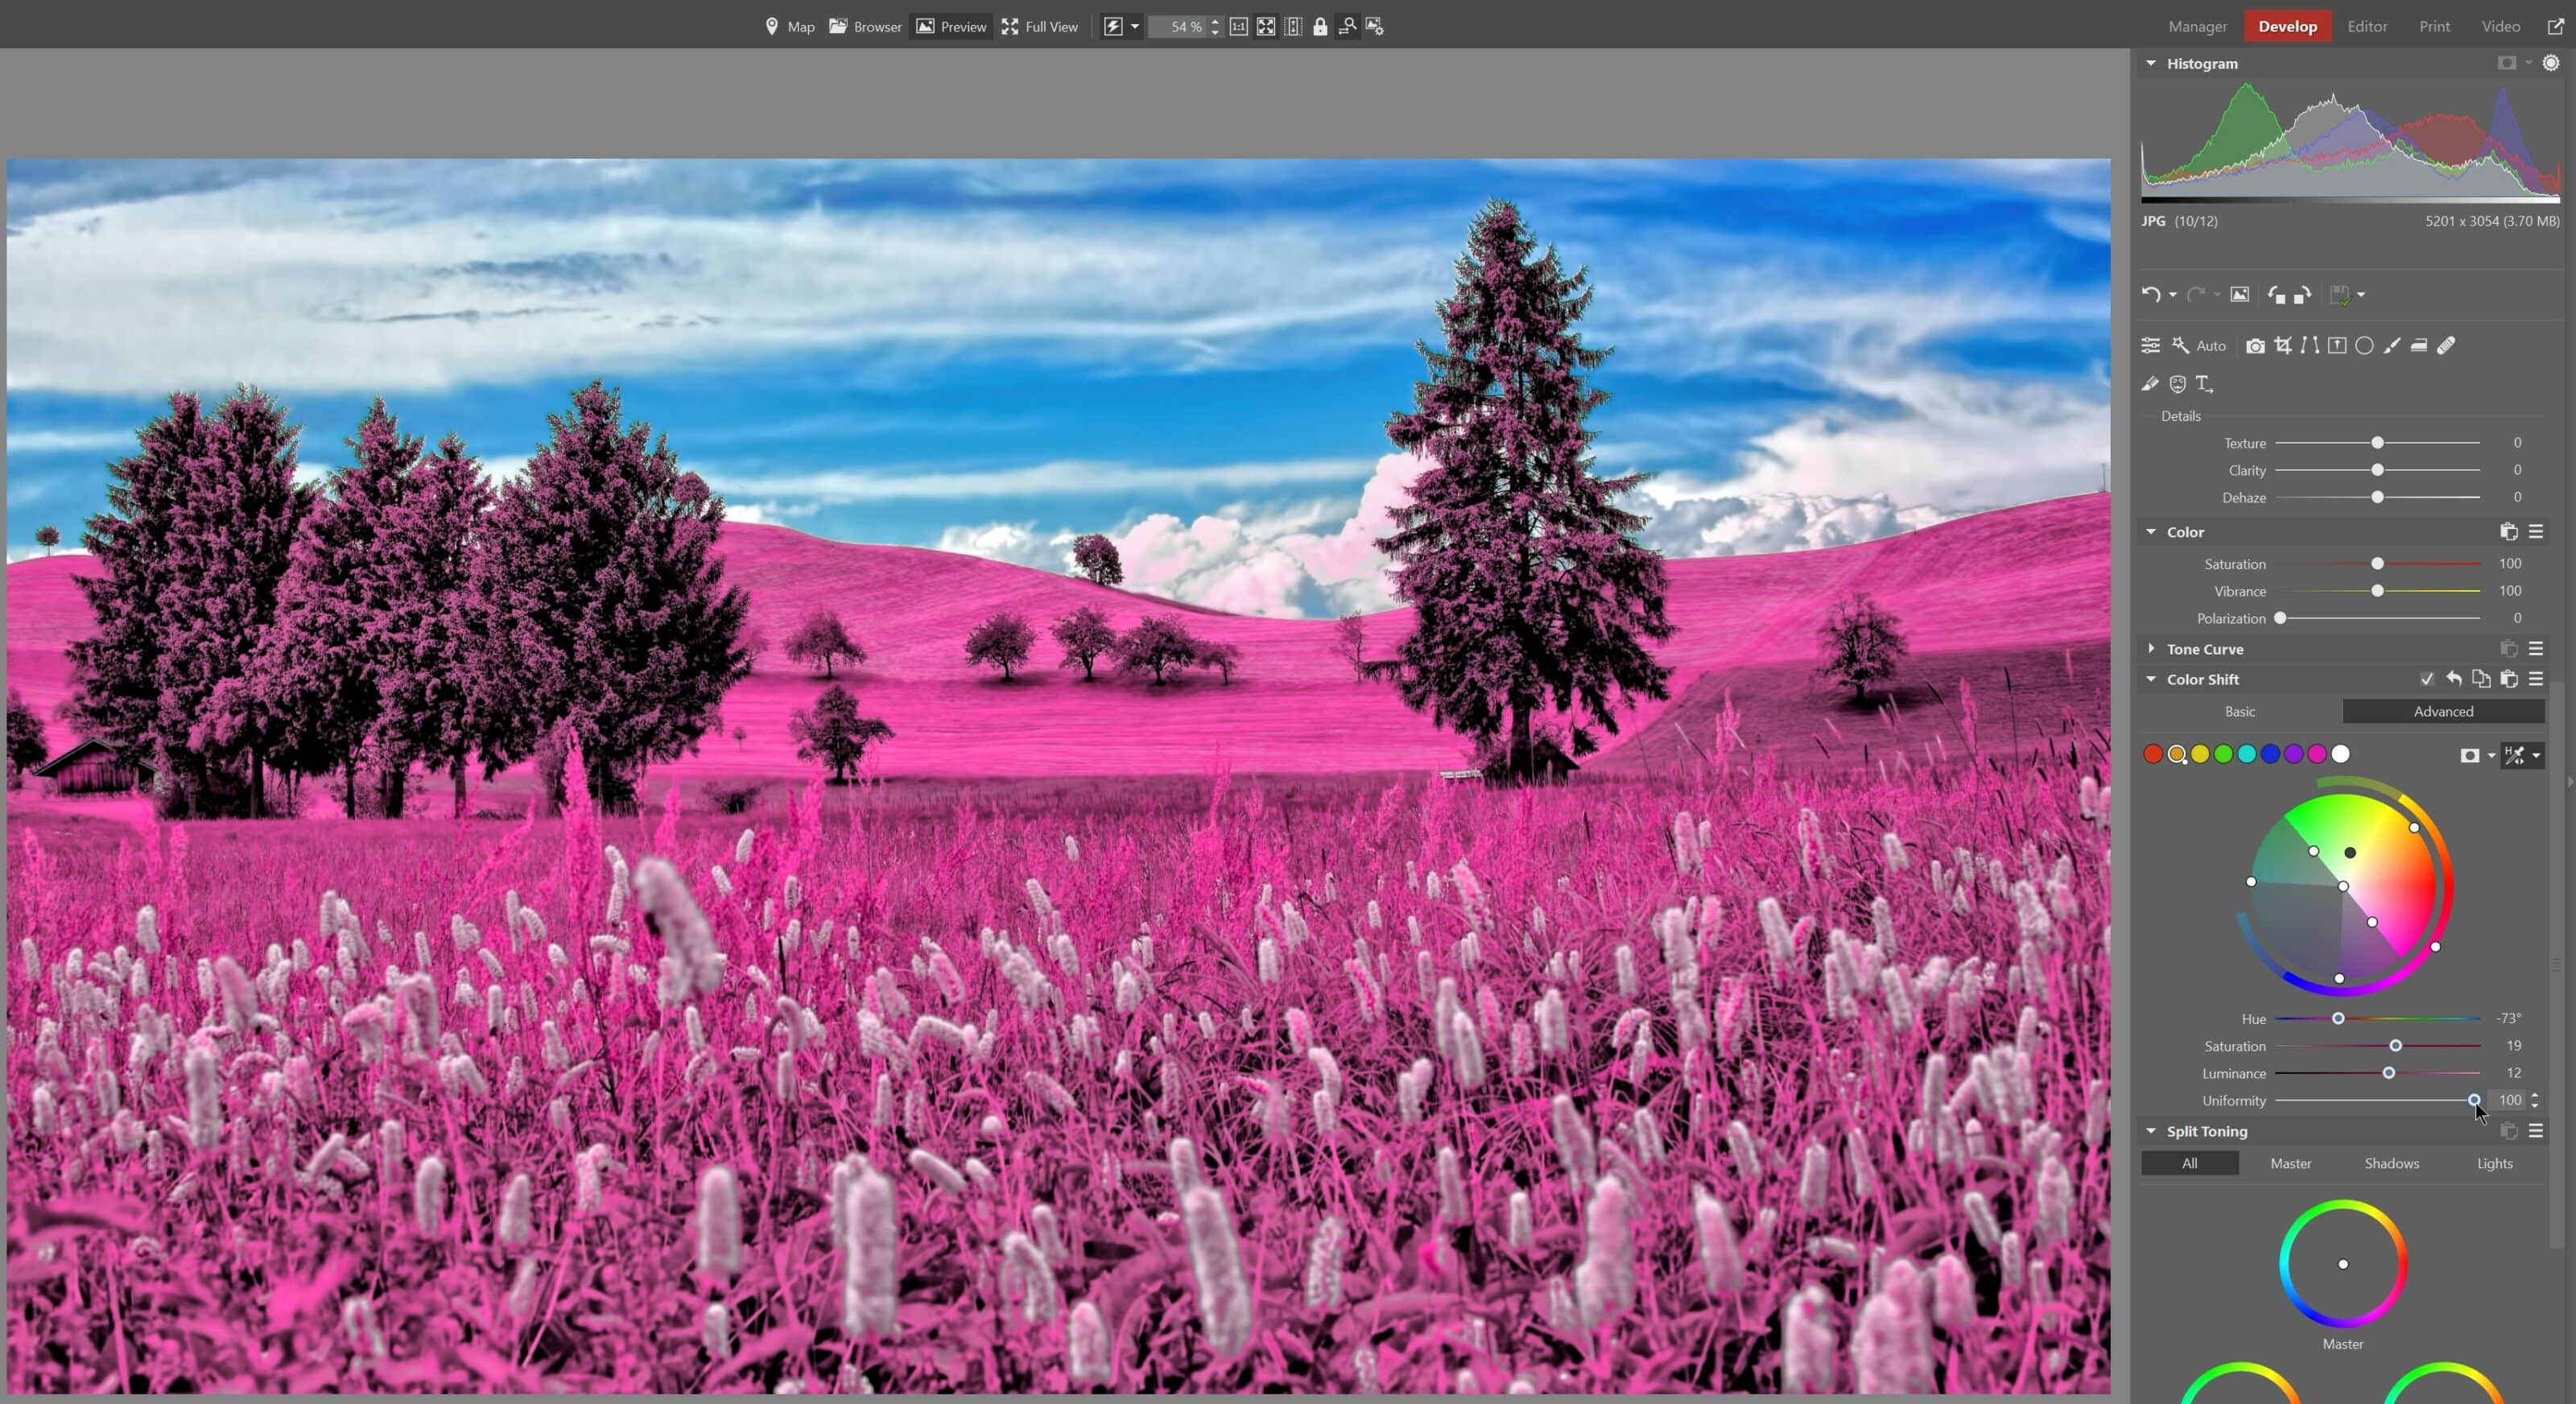
In Color Shift, click the Advanced tab with the color wheel. To the right of the color wheel, click the eyedropper. Make sure the eyedropper has Hue selected in the drop-down menu. Click the mask icon next to the eyedropper to show the selected area for editing. Select a section of colors on the color wheels so that everything except the sky is masked.
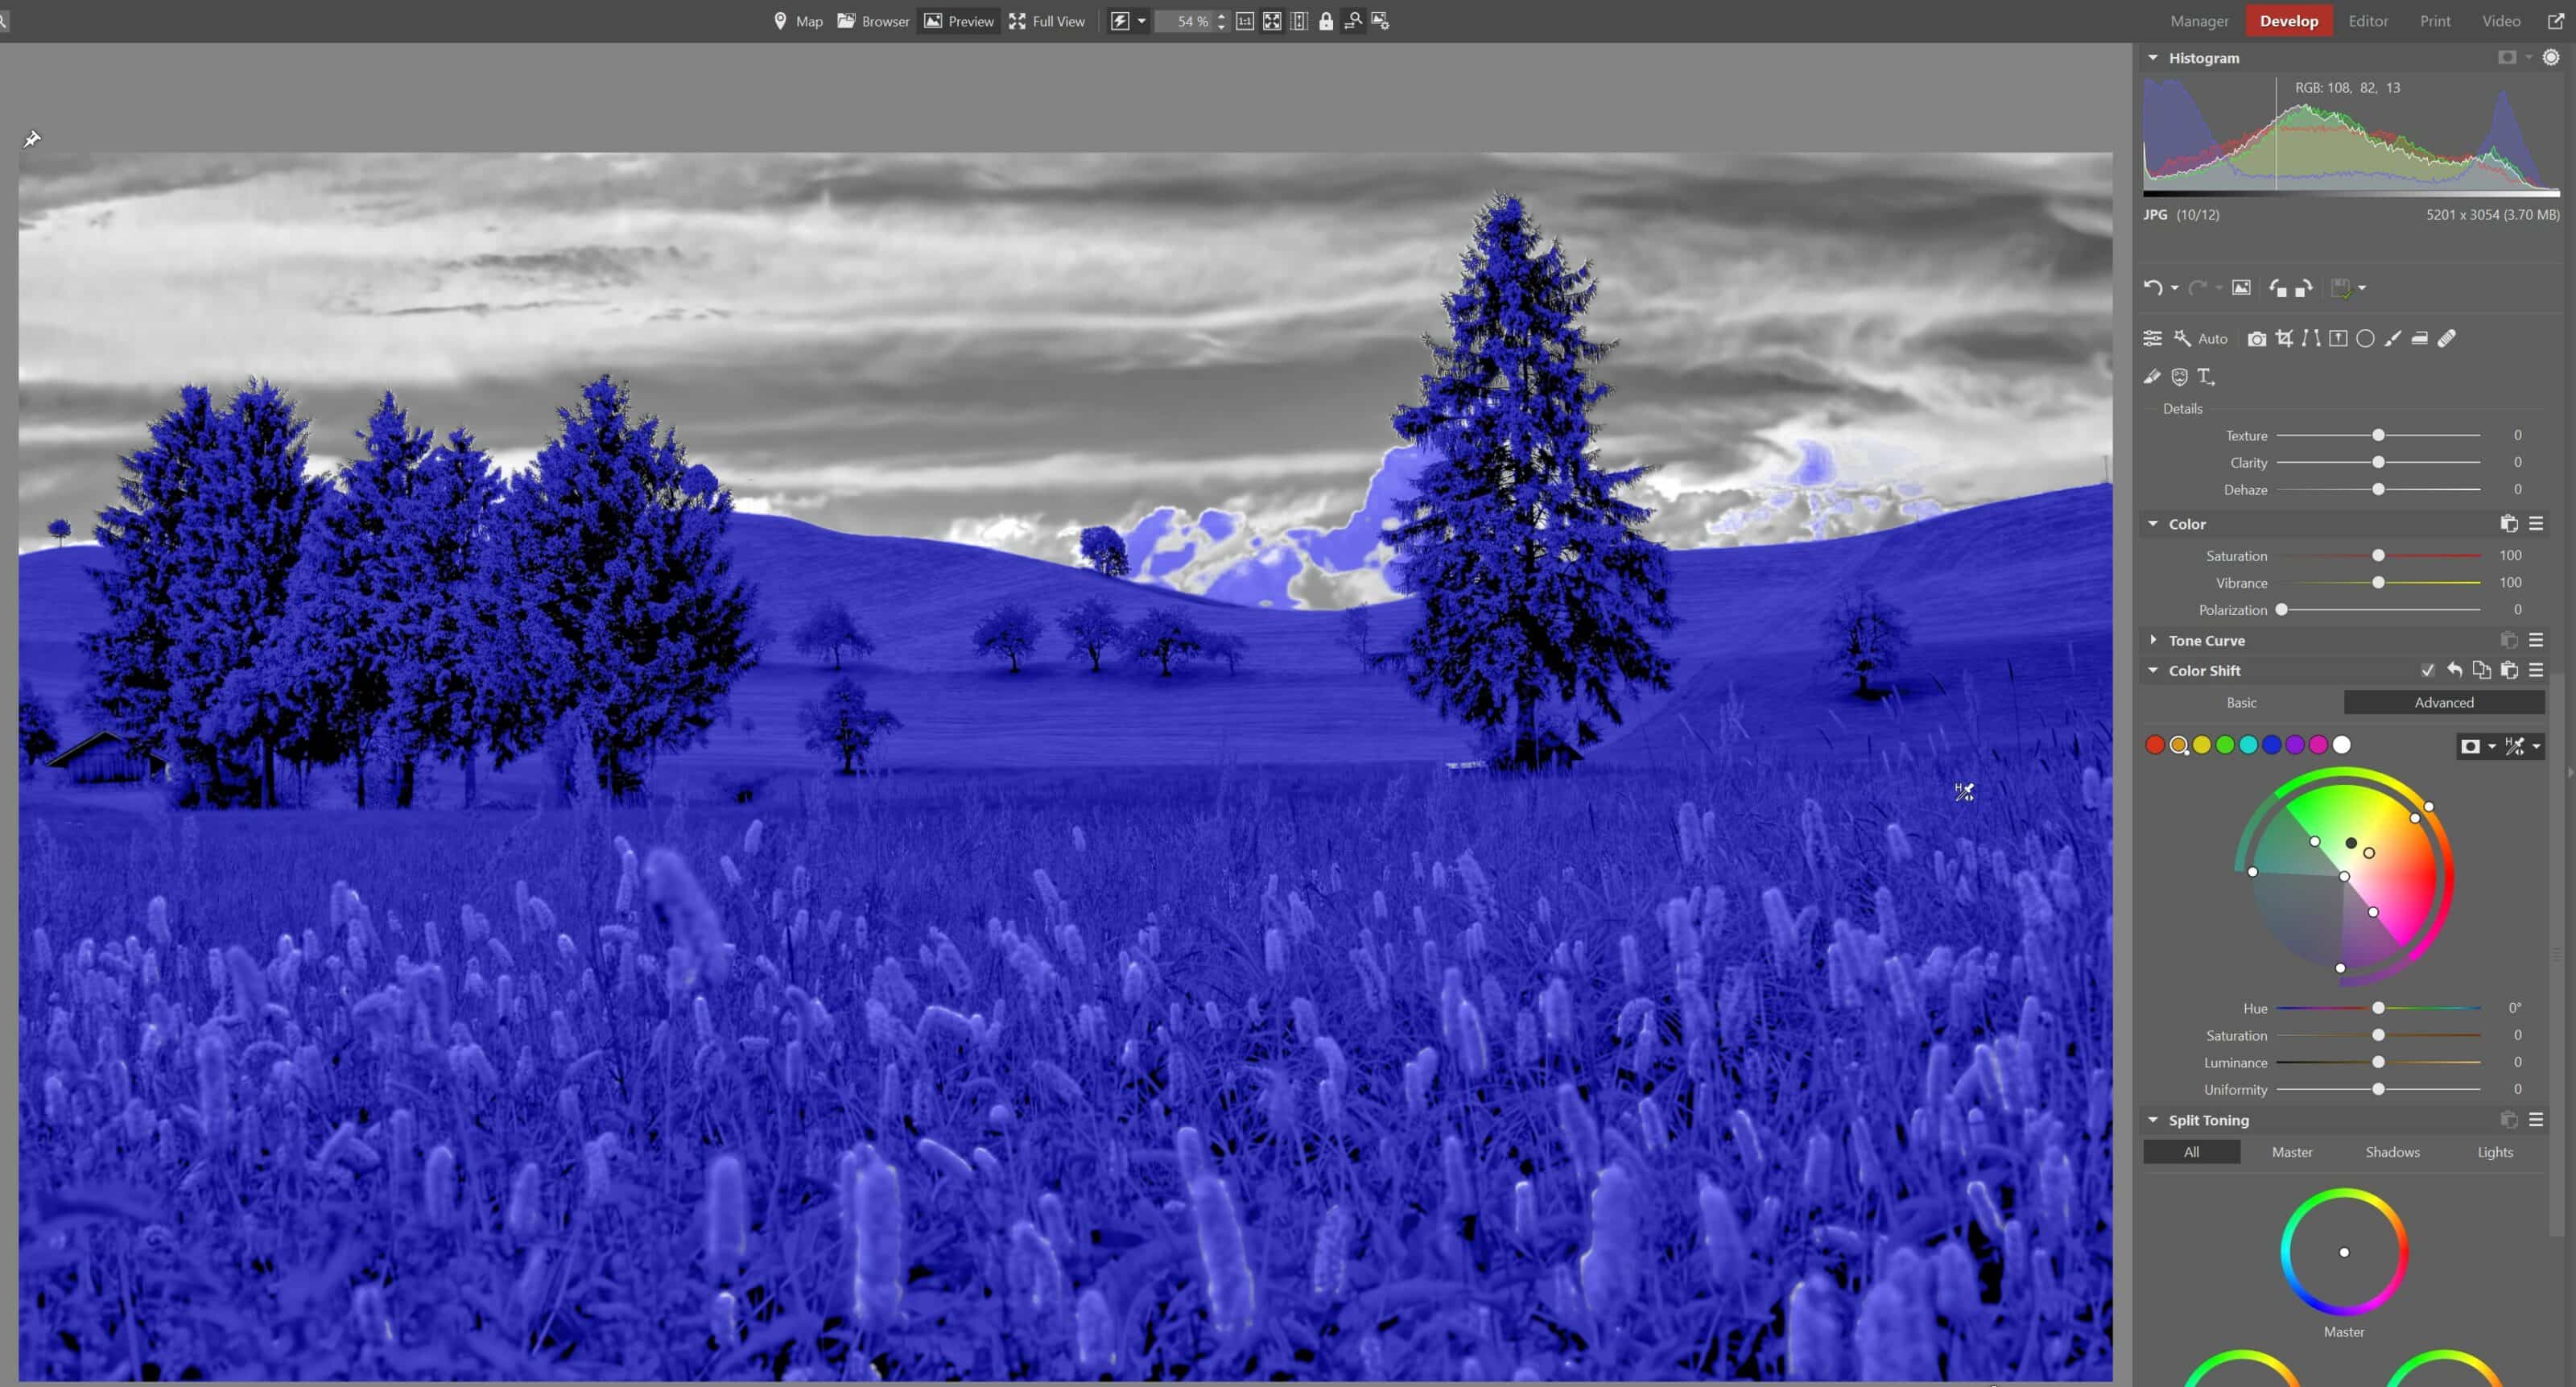
Once you’re happy with your mask, disable Show Mask. Use the outer ring of the color wheel and rotate it to change all the selected colors to the corresponding shades of pink or purple.

Try finding a similar image on the internet to match the colors.
Adjust the Saturation and Luminance sliders as needed. Uniformity is also important—use it to unify your colors and avoid unnatural transitions between colors. If you move the Uniformity slider, you may see the colors change once again. This is normal, just tweak the colors again using the color wheel.
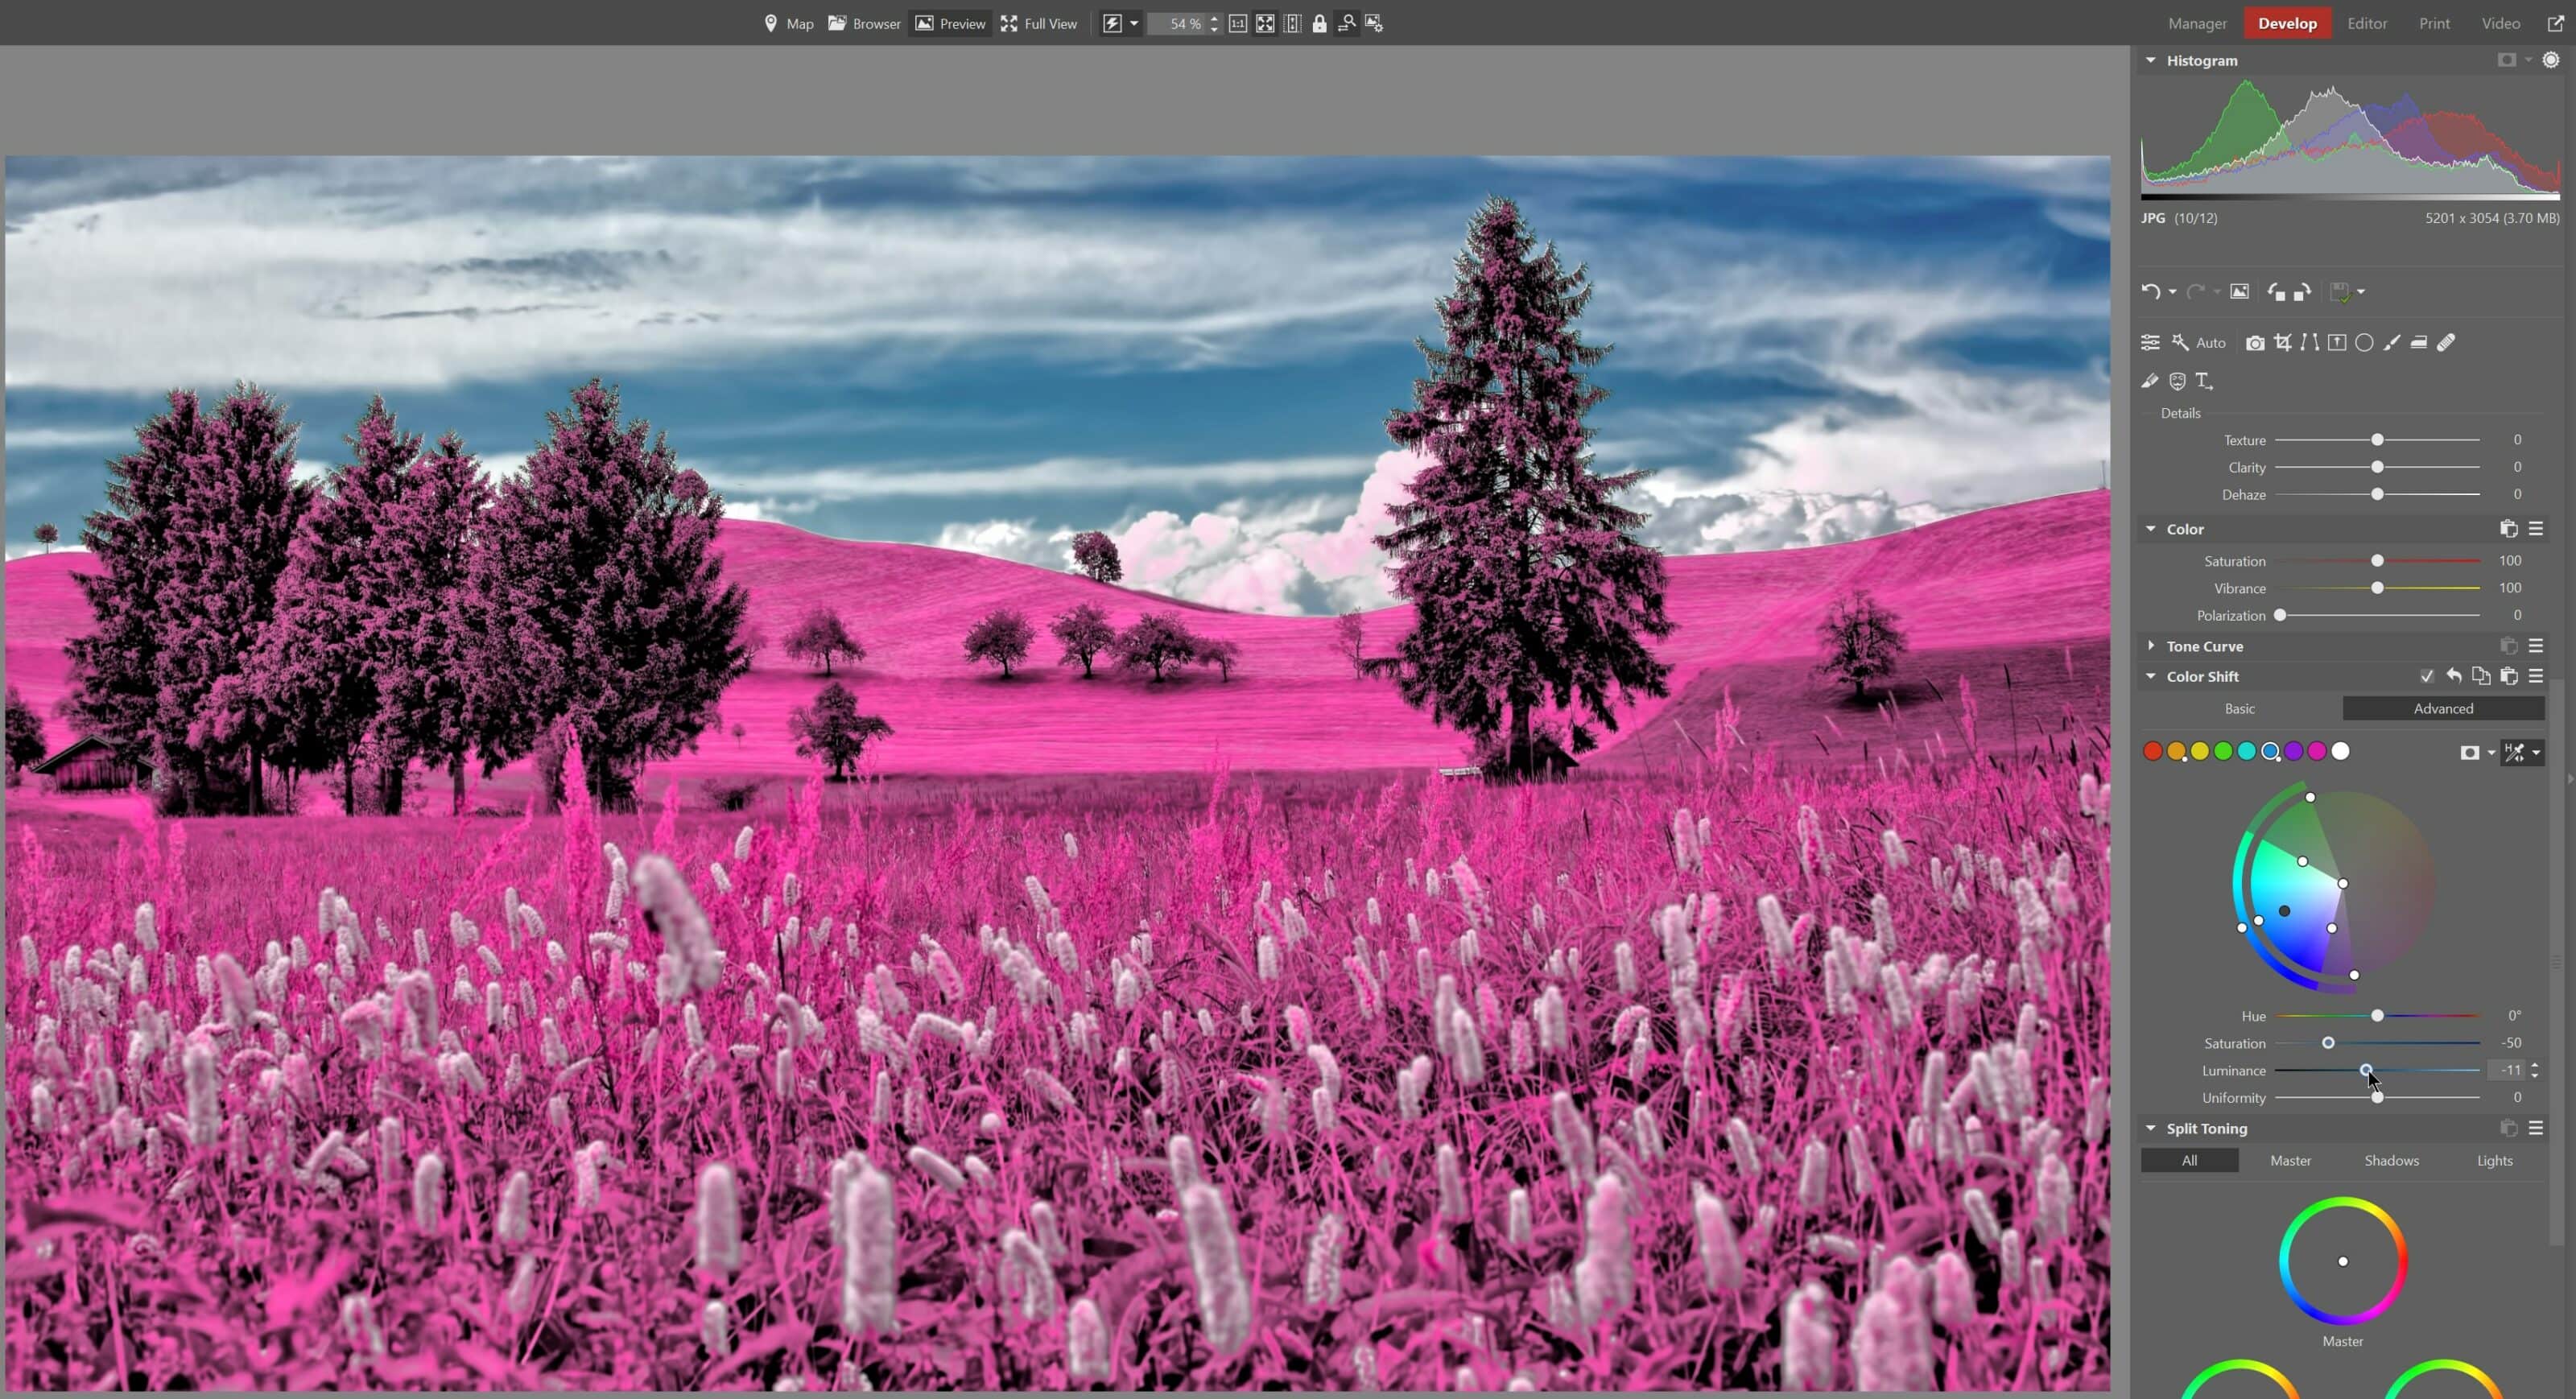
Next, move to adjusting the colors of the sky. The masking process is the same as for green, except you select shades of blue, or the colors of the sky.

Once your mask is done, disable Show Mask and adjust the colors. This time, we’re not changing the hue, but only the Saturation and Luminance. For infrared photos, the sky is usually desaturated and dark, so lower both sliders as needed.
Next, it’s time to fine-tune the details. Remember the earlier mask for the foreground crossed into the clouds? We’re going to fix that now. Use the Filter Brush (B), lower its Saturation to zero, and use a nice pink tint to paint all the areas. Since the clouds are white and have no color, lowering the saturation does not have any negative effect on the image as a whole.
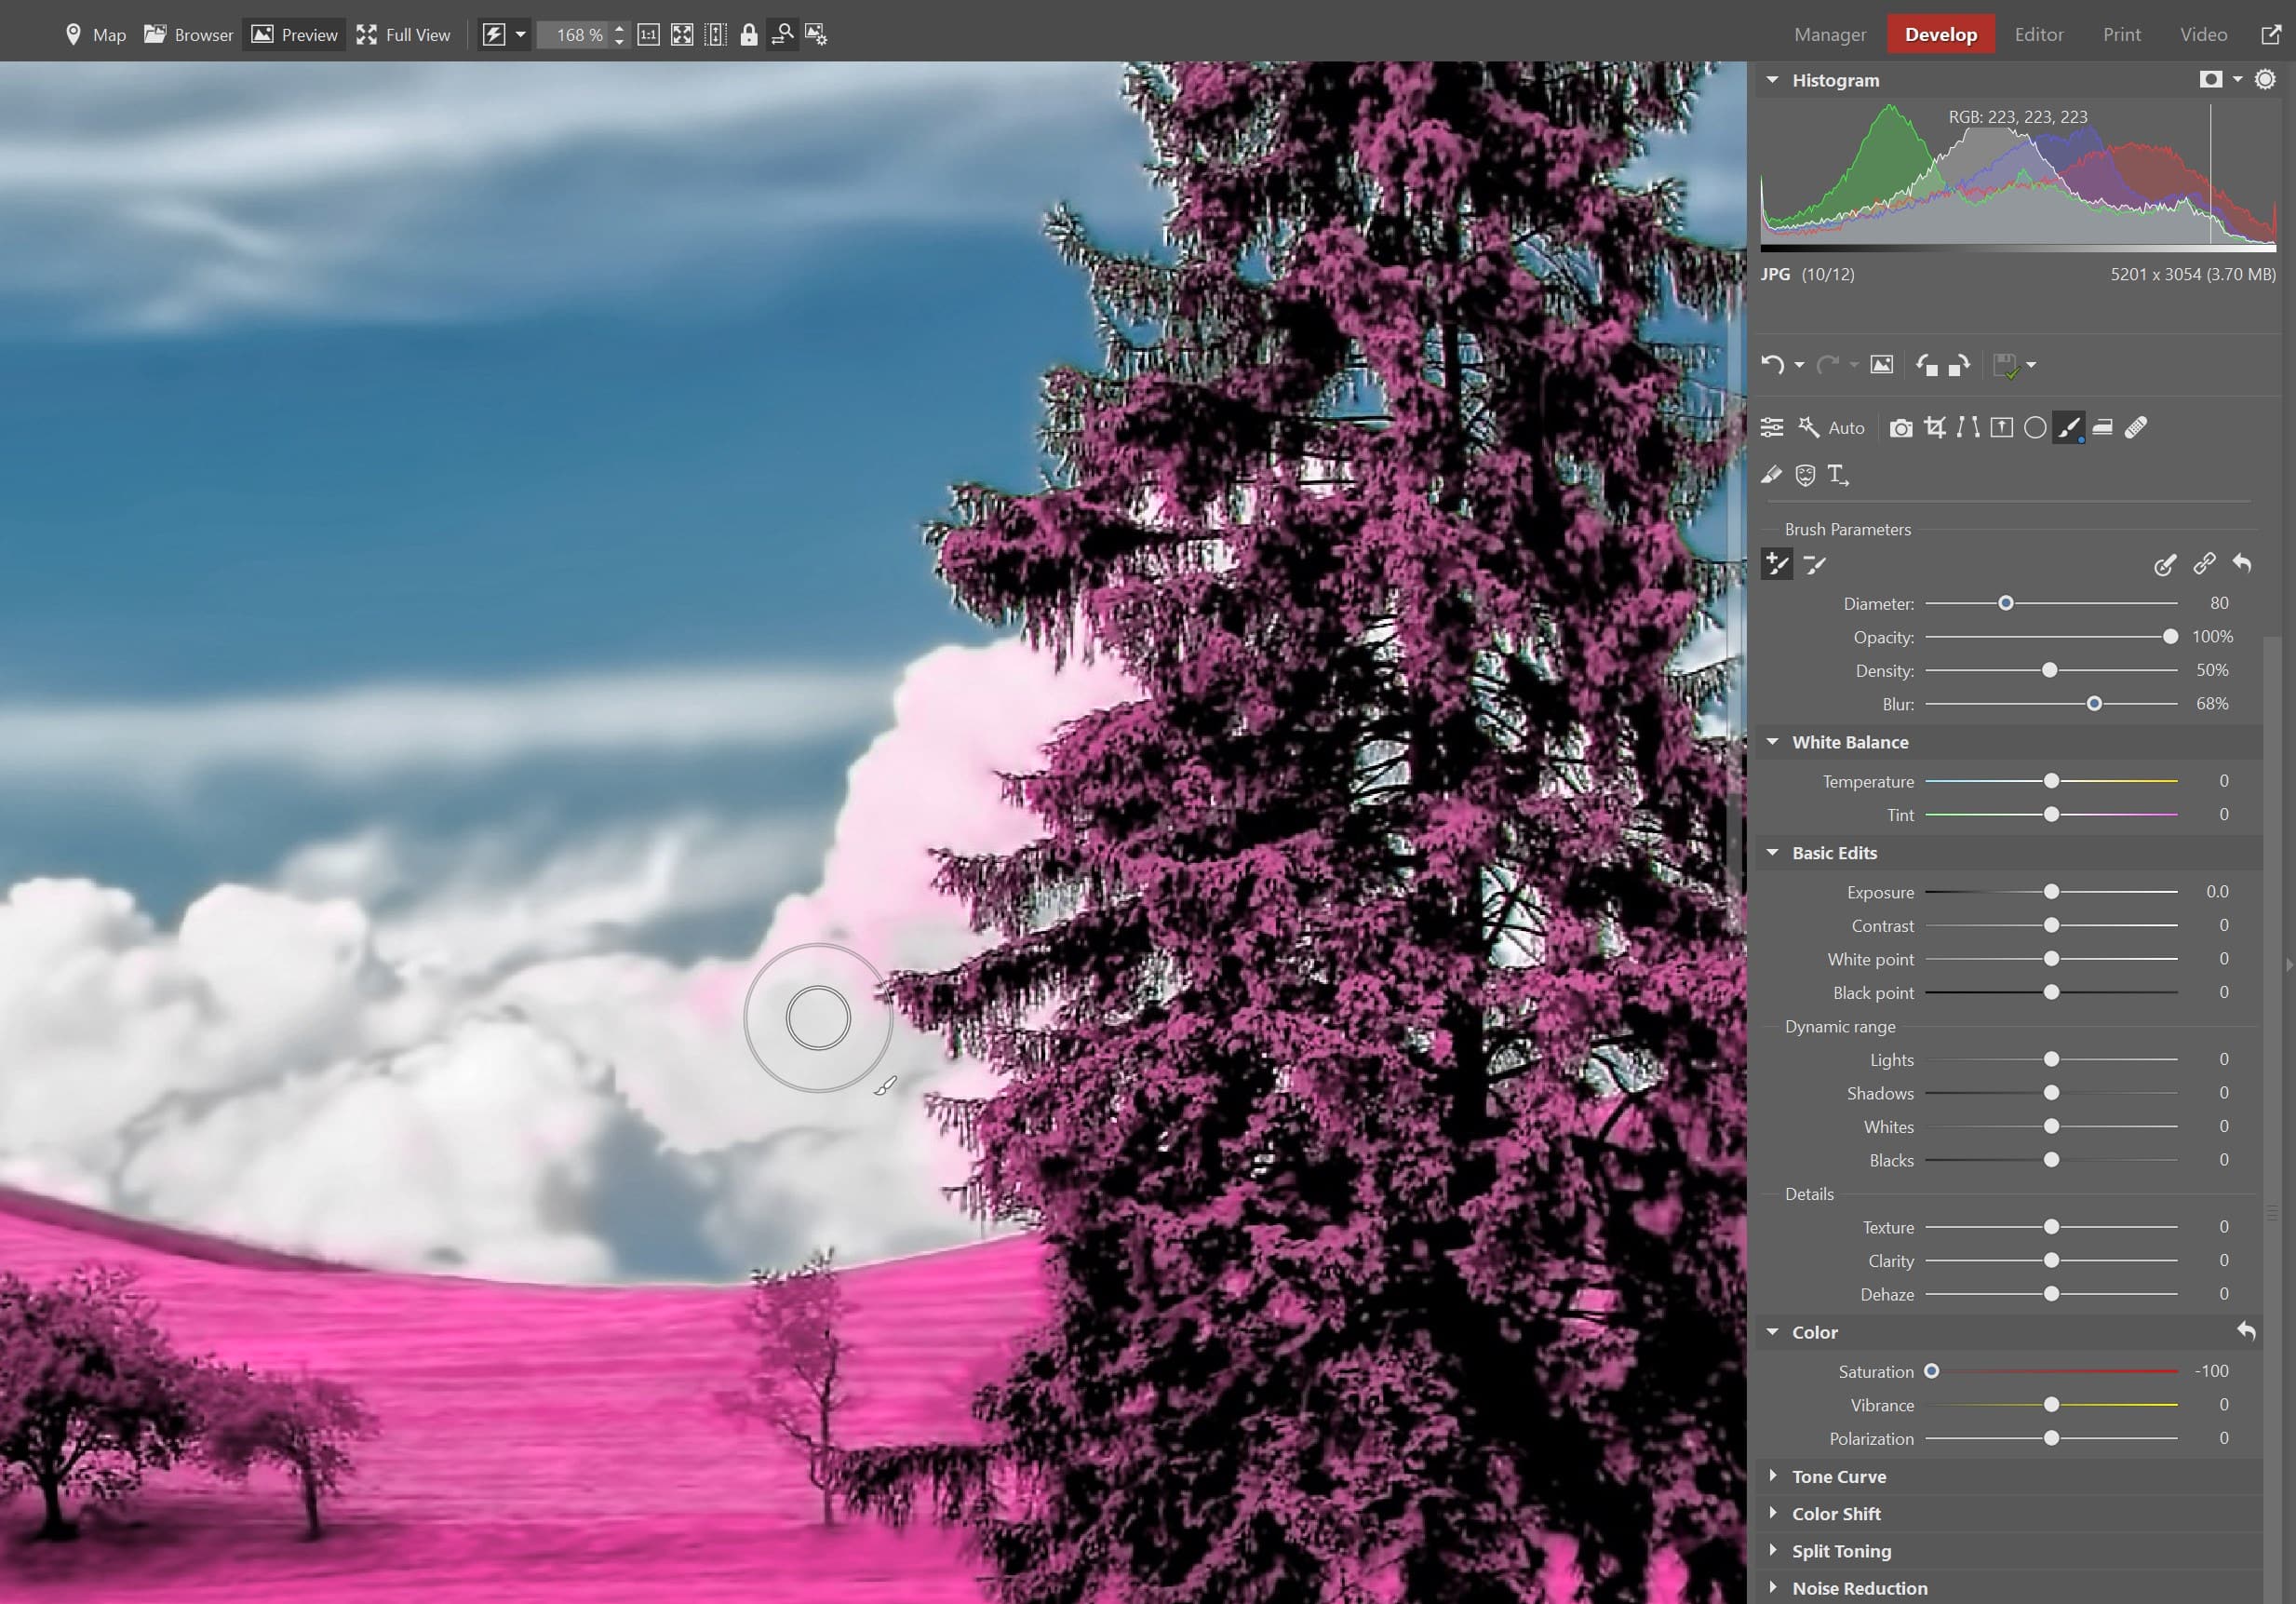
And we’re done!
Try an IR photo effect on your photos
Discover what an infrared effect would look like on your photos. All you need is Zoner Photo Studio X. Don’t have ZPS X yet? Download a free trial version for 7 days.
There are no comments yet.