

Making the Most of the Blue Hour
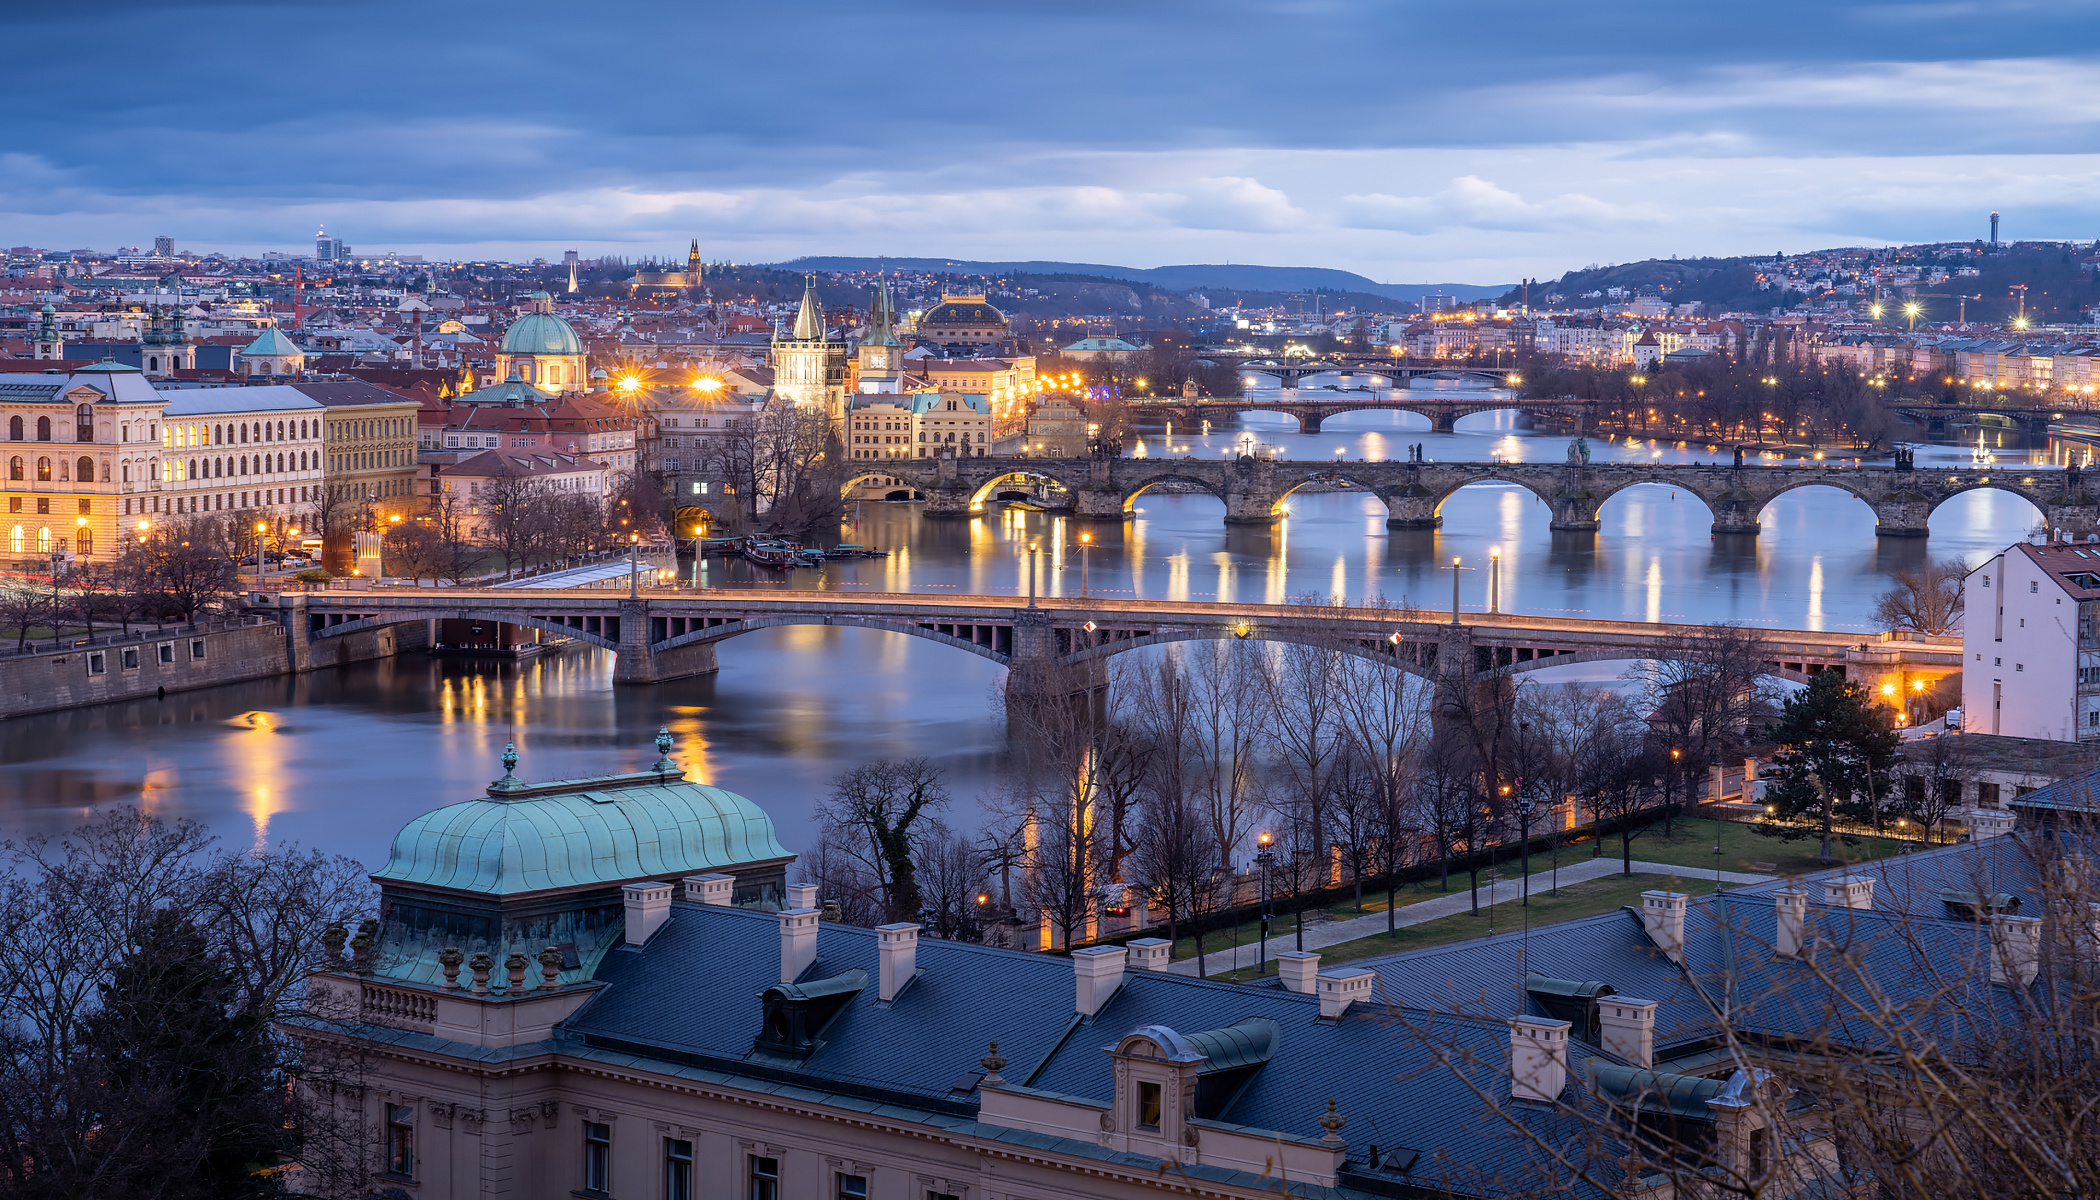
The blue hour is one of the most popular times of day for photography. Soft light, a deep blue sky, and glowing city lights offer conditions you won’t find at any other time of day. In this article, I show you how to photograph cities, landscapes, and portraits during the blue hour—and how to make the most of this brief window of opportunity.
In this article, you’ll learn:
- What the blue hour is and what makes it so special for photographers.
- How to photograph the city during the blue hour.
- How to capture landscapes, water surfaces, and dramatic evening skies during the blue hour.
- How to create striking portraits in both natural and artificial light.
- How to time your shots correctly to achieve the perfect balance between the sky and city lights.
The blue hour is the period when the brightness of the sky is balanced with the city lights. The sky isn’t completely dark yet, and streetlights or car headlights won’t appear overexposed. Although it’s called the “blue hour,” it actually lasts only five to 20 minutes, so you need to work quickly. Arrive at your location early, plan your composition in advance, and be ready to start shooting right away.
City photography during the blue hour
During the blue hour, the city offers two completely different photographic settings.
The streets come alive as people return from work, cafes and restaurants fill up, and city lights gradually begin to glow. The combination of the last remnants of daylight and the warm glow of streetlights creates an atmosphere you won’t experience during the day.
If you want to capture street life, use a faster shutter speed. Streetlights and the first illuminated windows provide beautiful ambient light, adding depth and atmosphere to your photos while people continue moving naturally through the scene. A fast lens and a higher ISO will help, which modern cameras can handle with very little visible noise.


If you have a tripod, a whole new world of possibilities opens up. Long exposures can turn car headlights into captivating streaks of light, smooth flowing water, and cause moving people to partially, or even completely, disappear. Meanwhile, the buildings remain perfectly sharp.
The blue hour is when the balance between the brightness of the sky and artificial lighting is at its best. A tripod isn’t always necessary. Even at shutter speeds between 1/5 and 1/20s, you can experiment handheld with panning, zooming, or rotating the camera to create creative motion effects.

You can also get striking results from observation decks or lookout towers. As the city panorama gradually lights up, the deep blue sky provides natural contrast.
Landscape photography during the blue hour
During the blue hour, landscapes take on an entirely different character. Colors are more subdued, the light is softer, and lower contrast reveals details that often disappear during the day.
Water is one of the most popular subjects. Whether you’re photographing the ocean or a quiet river, a shutter speed of a few seconds transforms the waves into a smooth, silky surface that looks almost dreamlike. At the same time, the blue tones of the sky blend beautifully with the reflections on the water.

The sky itself is just as important. After sunset, it often displays long, gradual color transitions—from dark blue through turquoise to hints of orange or pink near the horizon. If you’re lucky and a few clouds drift into the scene, they can add another dimension. With longer shutter speeds, they blur slightly, creating a more dynamic scene.

For these types of photos, you definitely need a tripod, as shutter speeds can easily reach 30 seconds. Use a higher f-number to avoid overexposing the shot.

TIP: During the blue hour, there may still be too much light for very long exposures. Don’t wait for it to get darker at all costs. The blue hour is when the brightness of the sky is best balanced with artificial lighting. Once the sky turns black, city lights become more dominant. If you need a longer shutter speed during the blue hour, an ND filter is your best option.
Portraits during the blue hour
The blue hour is also an excellent time for portraits. The combination of the cool blue sky and warm artificial light creates flattering lighting and beautiful color contrast.
The simplest approach is to shoot using only available light. The soft, cool light from the sky acts like a giant natural softbox and pairs beautifully with the warm glow of the city lights.

You can also shift the emphasis by lighting your subject with warm artificial light. Store windows, streetlights, and decorative lighting all work well. Simply position your model near the light source and take advantage of its natural lighting.
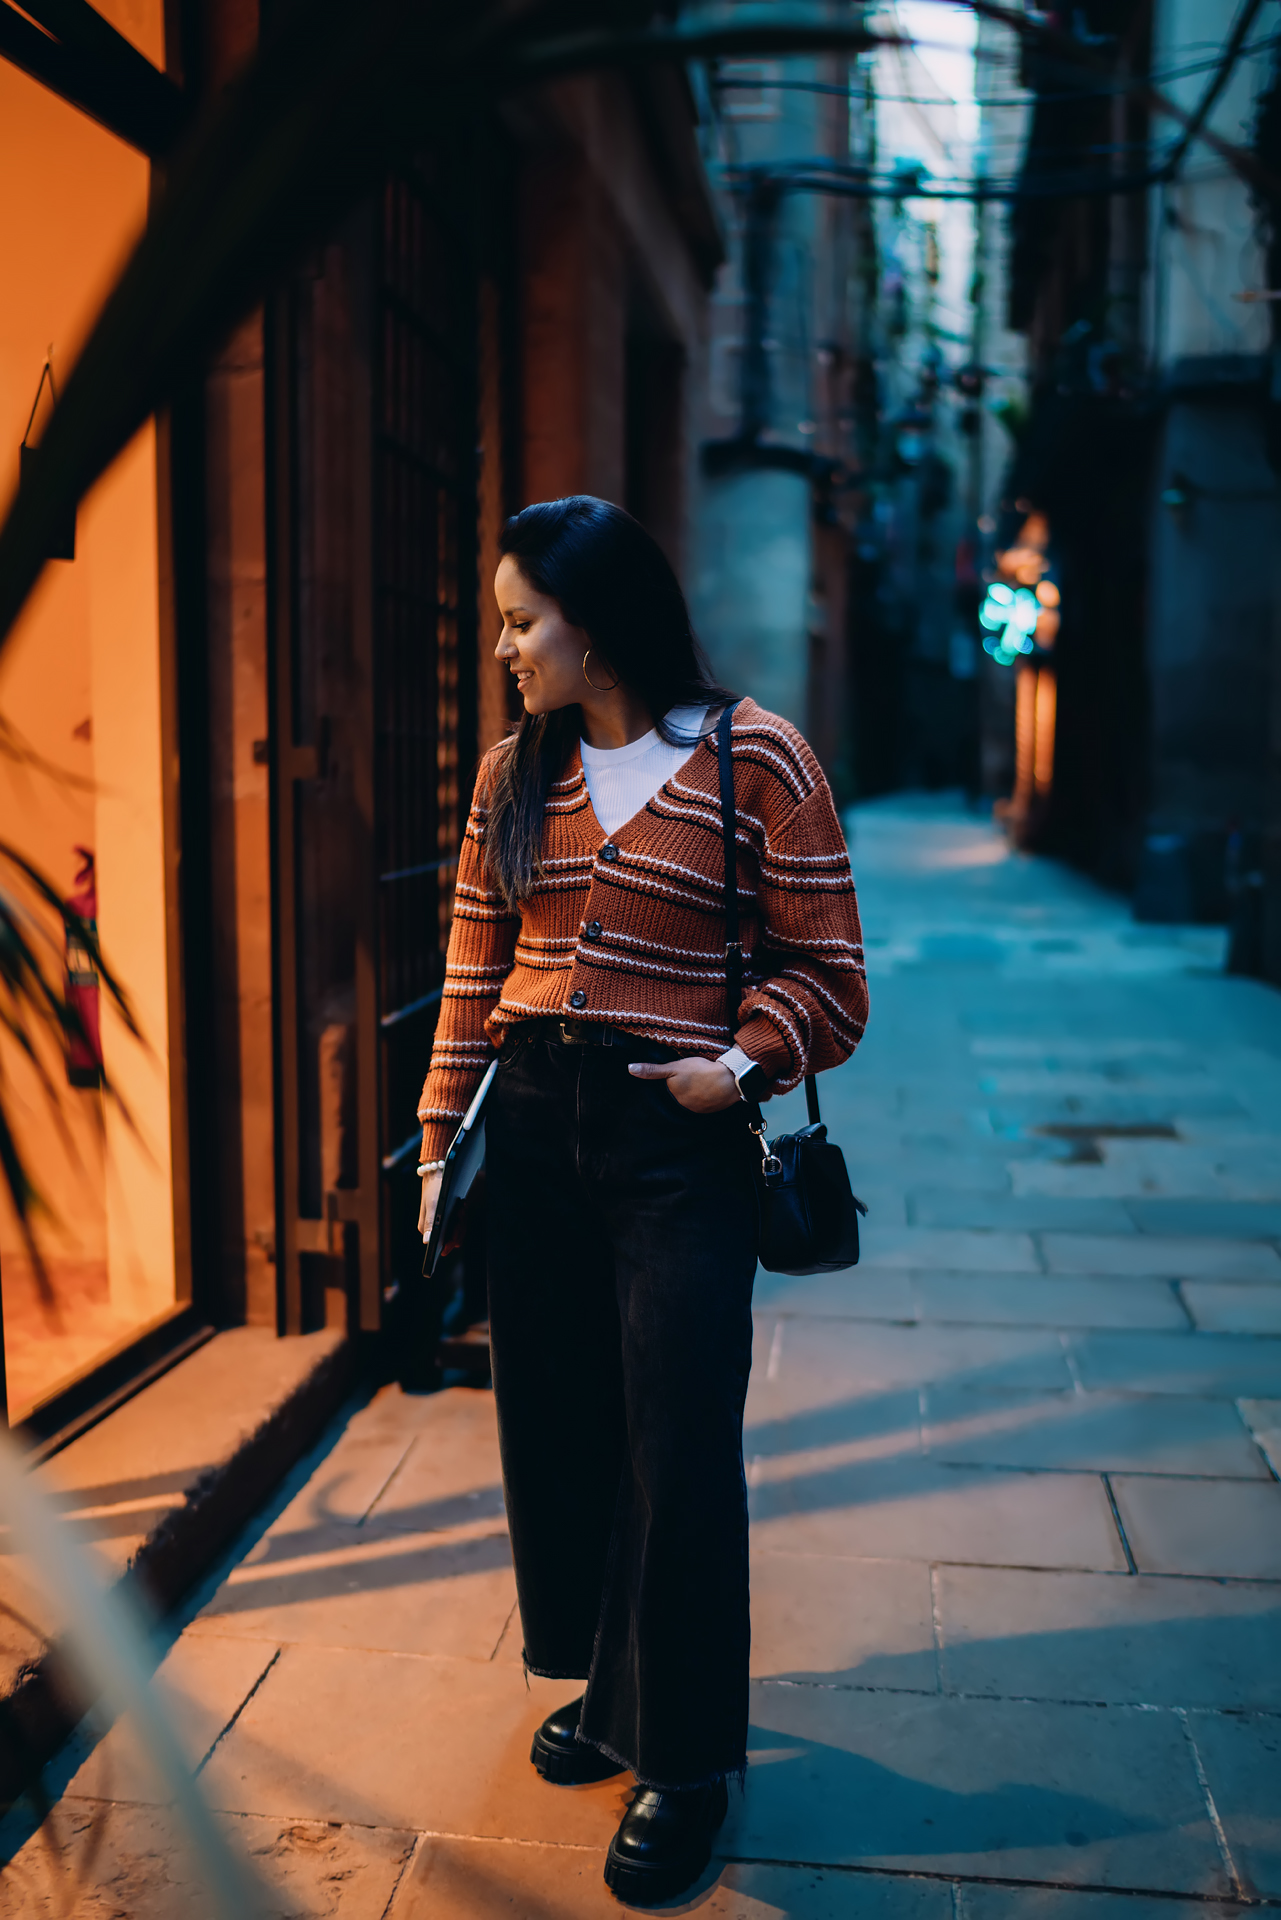

You have even more control if you use your own light source. A flash or LED light tube allows you to separate your subject from the background while preserving the deep blue sky. These photos look professional and resemble advertising shots, but don’t overpower the light output. If the light is too strong, the evening atmosphere disappears, and the background becomes too dark. In many cases, a subtle fill light is all you need while allowing the surrounding scene to retain its natural mood.

Timing is just as important. Ambient light changes dramatically within only a few minutes, so the same location can produce completely different results. When shooting long exposures during the blue hour, I often aim for just one perfectly balanced shot.
FAQs
When is the blue hour?
The blue hour occurs shortly after sunset or before sunrise. Despite its name, it doesn’t last a full hour, but usually only five to 20 minutes, depending on the season and geographic location.
What equipment is best for blue hour photography?
A fast lens, tripod, and, if necessary, a remote shutter release are recommended. When shooting handheld, a higher ISO is helpful, as modern cameras can handle it with minimal noise.
Do I need a tripod for blue hour photography?
Not necessarily. For street photography or portraits, shooting handheld is often sufficient. However, if you’re photographing landscapes with long exposures or car light trails, a tripod is essential.
What camera settings should I use during the blue hour?
Start by shooting in aperture priority or manual mode. When using a tripod, use the lowest possible ISO, and increase your shutter speed as needed. When shooting handheld, raise the ISO to keep the shutter speed fast enough.
Why are blue hour photos so striking?
The blue hour offers the perfect balance between the brightness of the sky and artificial lighting. The result is soft light, rich colors, and natural contrast that you can’t get during the day or later at night.

There are no comments yet.