Tips and Tricks for Editing the Eyes to Make Them Pop
The first thing we notice when we look at a person is their eyes. They convey emotion and sparkle when they catch the light. On the other hand, they are a dead giveaway when you’re feeling tired. The eyes are an important aspect that should not be overlooked when shooting a portrait. It’s important to know how to photograph the eyes correctly. We’ll also show you the steps for enhancing the eyes to make them pop.
The foundation for any photo editing is always a good, high-quality image. The eyes of your subject are no exception. For this reason, we’ll first look at how to photograph the eyes, and then we’ll examine the tools available for editing them.
Photographing the eyes
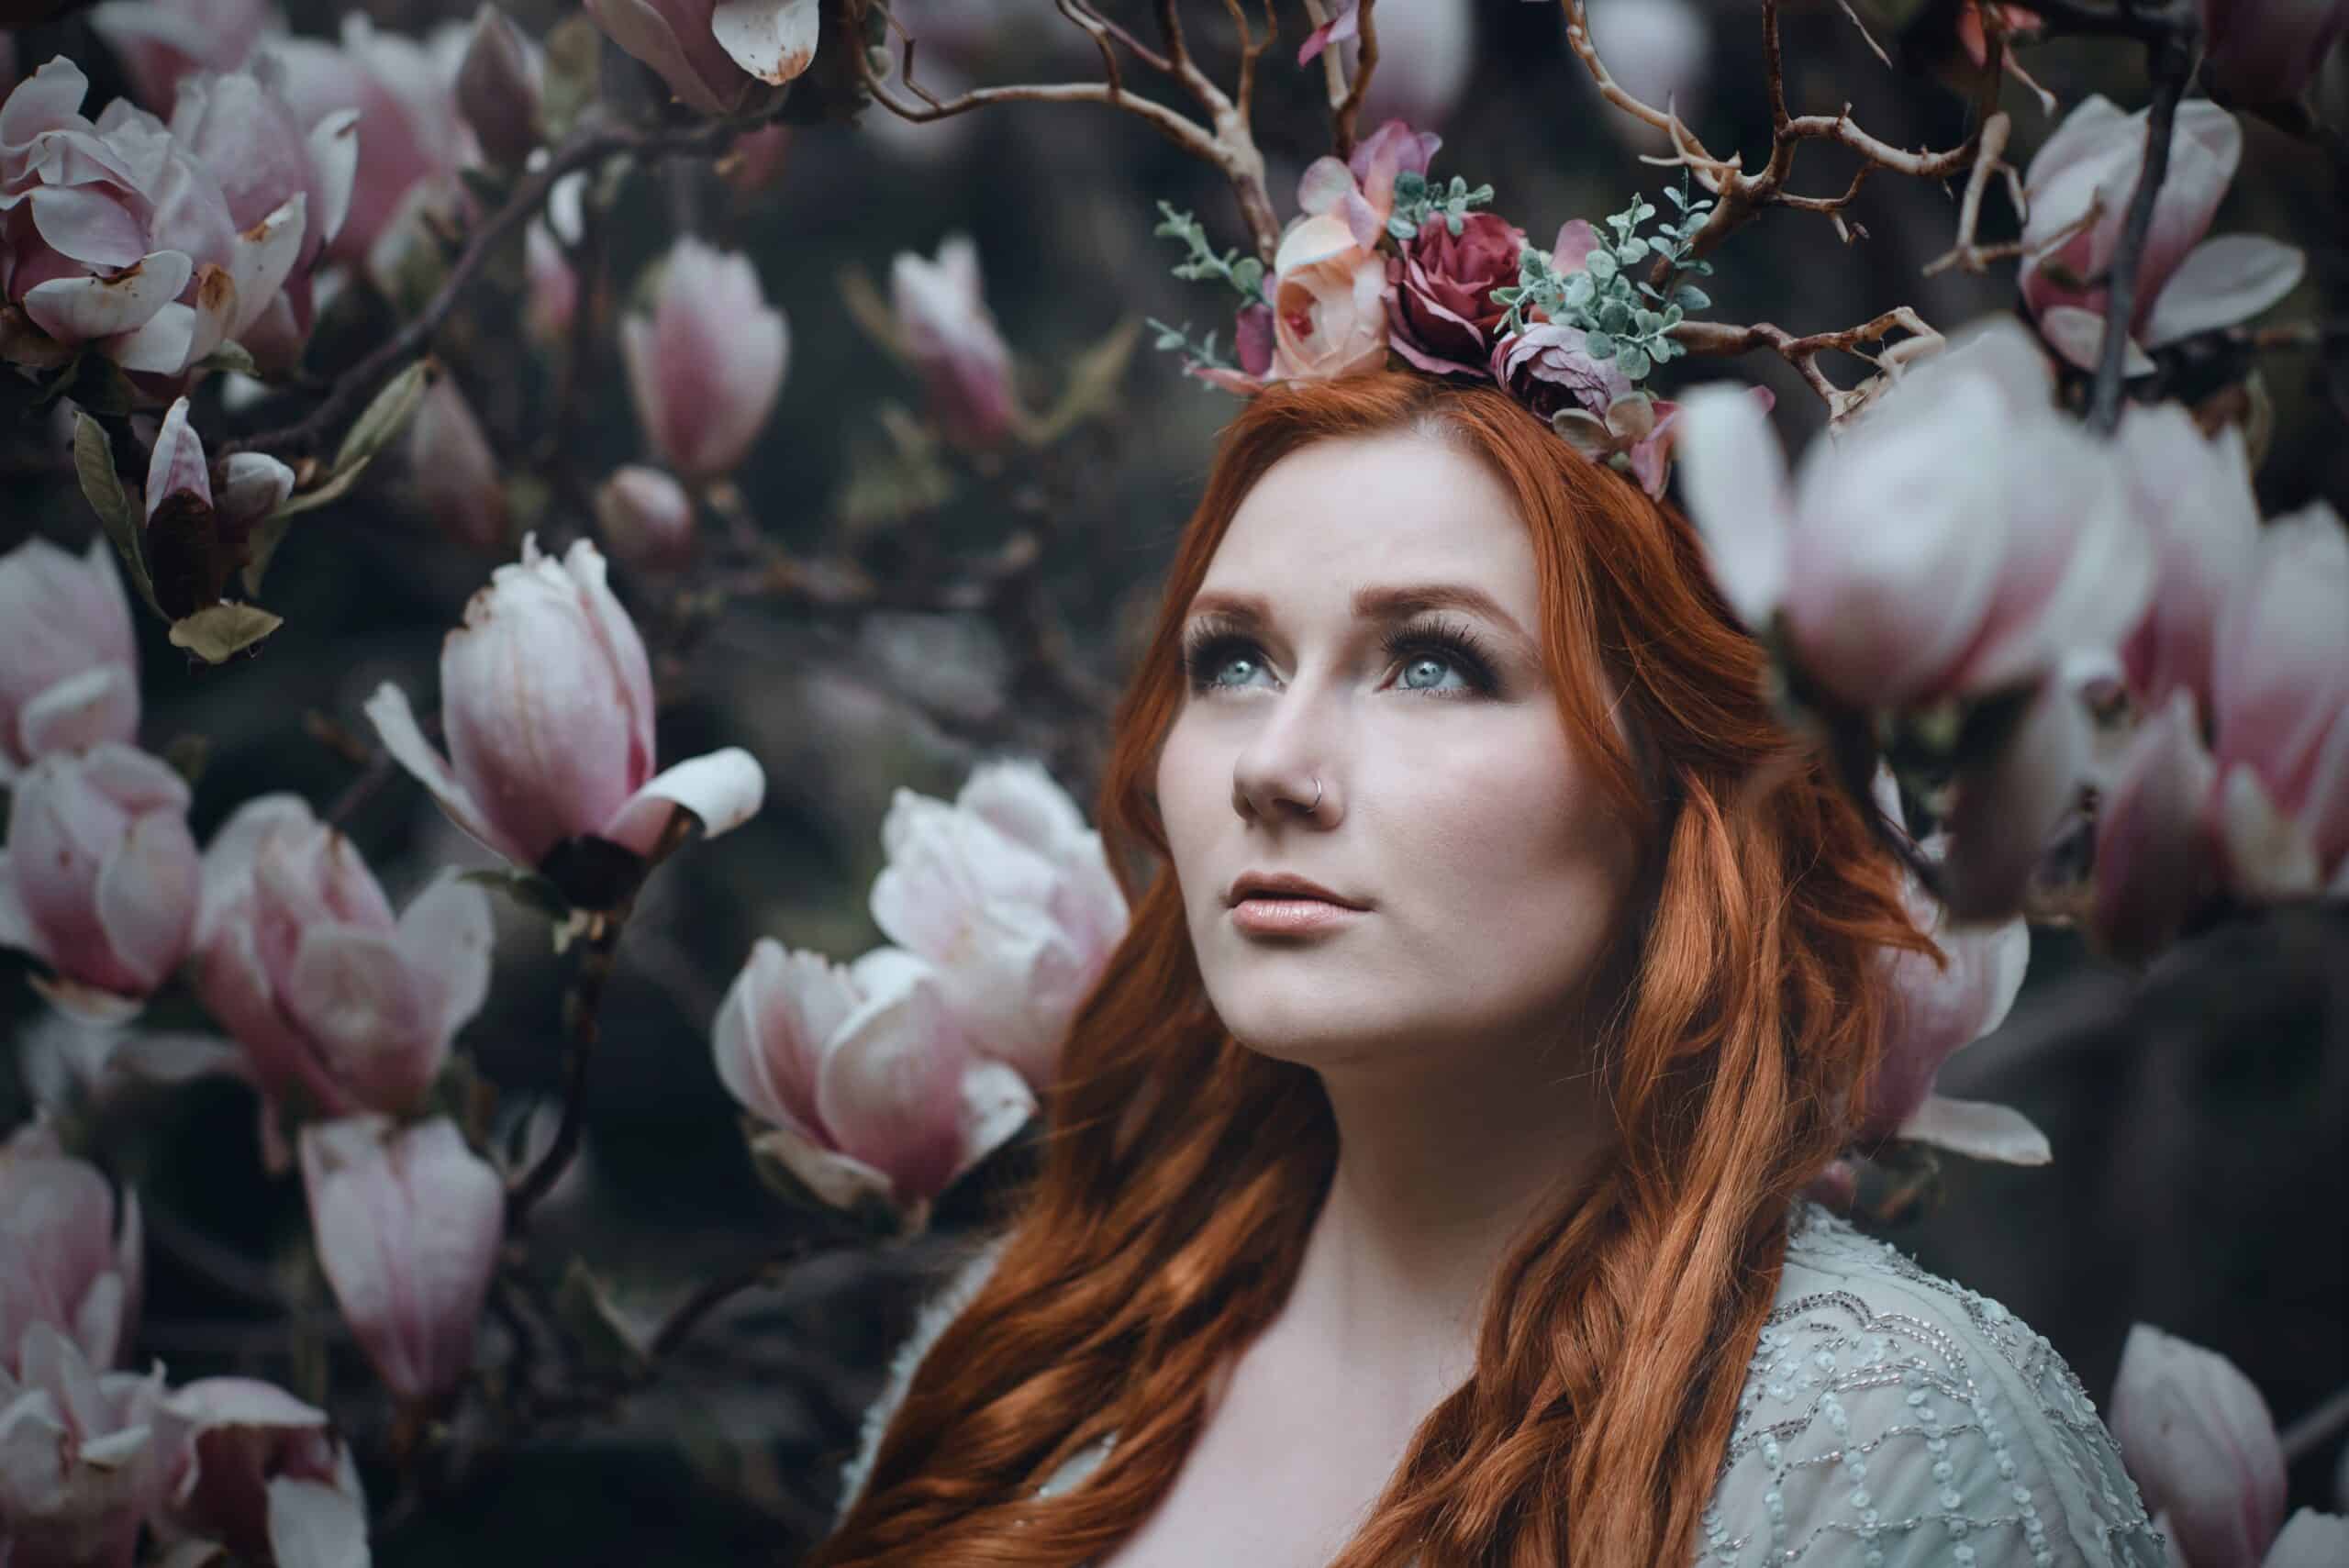
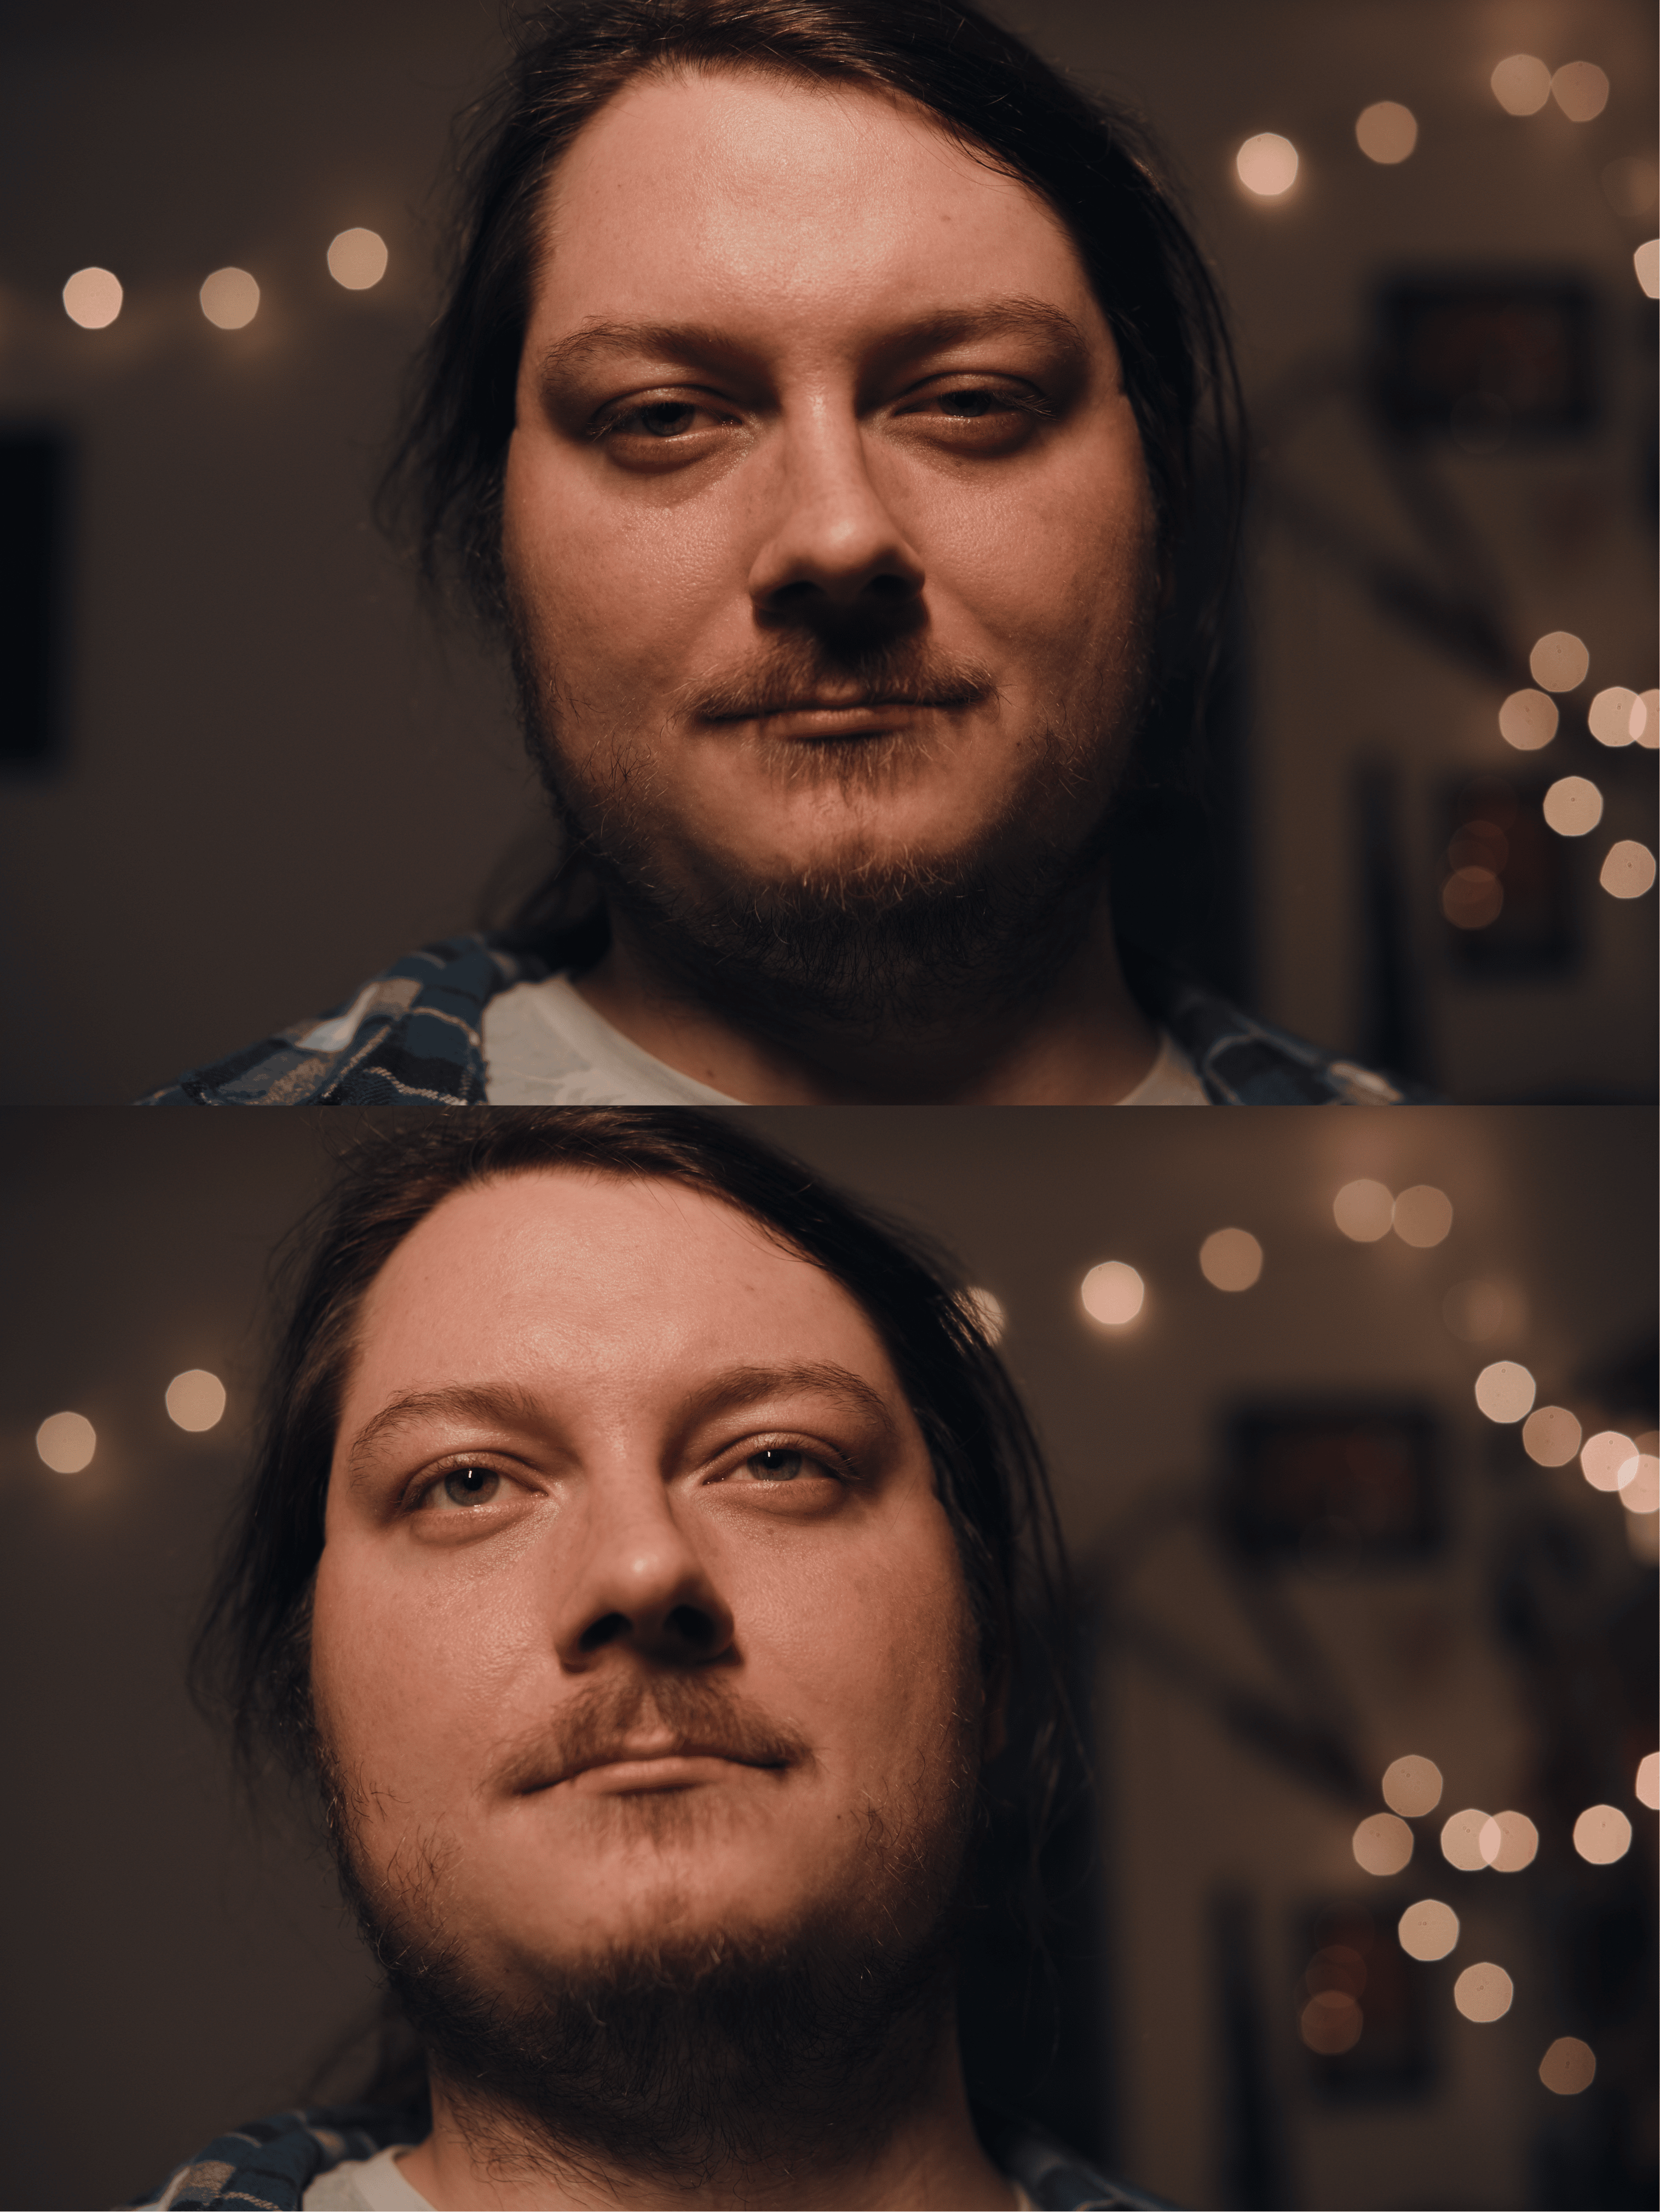
The first and most important piece of advice is to direct your subject’s gaze upwards. You don’t always have to have your model facing upwards, but whenever you have a chance, guide them to lift their head and look up with their eyes. I recommend the following exercise. Take two pictures of whoever you have available. In one, have your subject look at you or slightly down, and in the second, have them lift their chin slightly, face the light source, and look up.

TIP: Be sure your model doesn’t look up or to the side too much. Otherwise, the majority of their eye surface will be taken up by the whites of the eyes and we don’t want this. The irises should always be visible.
If you compare the photos, you’ll see the difference yourself. The light source is reflected in the eyes, creating catch lights, any under-eye circles are much less visible, and eye color is more pronounced. If your light source is a bit higher up, you may find that when tilting the head, the eyes are hidden completely because they are obscured by the brow bone, making your model look like a panda. If you diffuse your lighting, the difference won’t be as pronounced, but will still be noticeable.
You may run into some challenges when shooting, such as shadows from different head coverings, too much, or too little light. You aren’t going to want to shoot your model with their chin up the whole time so this advice won’t work for you 100% of the time, but it’s a good starting point. A reflector is a tool you can use to help accentuate your subject’s eyes. If your model is looking in a direction other than upwards, using a reflector can help bring a lot of light back to their eyes.
How to edit the eyes
If you’re in the mood for some experimenting, you can beautifully accentuate and even change the color of the eyes using Zoner Studio. It’s all done using a single tool in the Develop module – the Filter Brush (B). Start by applying the Filter Brush to the eyes.
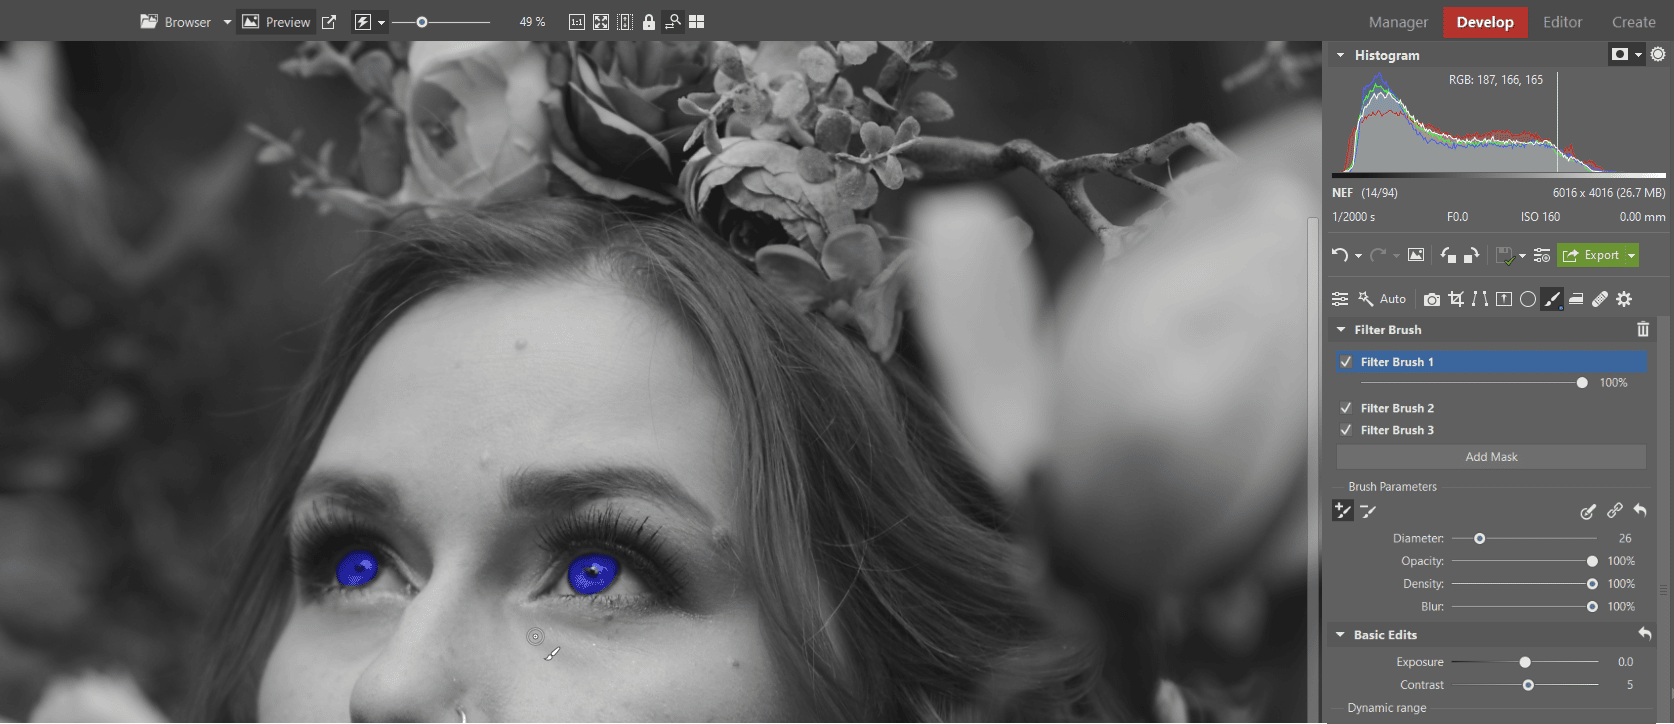
Leave Opacity and Density at their max and apply the brush to the irises, making sure you don’t go outside the lines. Any areas outside the lines can be erased by clicking the Remove from Mask icon and removing any unwanted areas. Once you have the eyes selected, you can begin accentuating them. The method that has worked best for me is to work with the Luma curve in the Tone Curve settings group.

If you increase the lights and decrease the shadows, you emphasize the catch lights and clean up the eyes. You can play around with the Luma curve based on your own tastes and discover what you like best. Also, don’t be afraid to pull up the Lights or Whites sliders in the Basic Edits settings group.
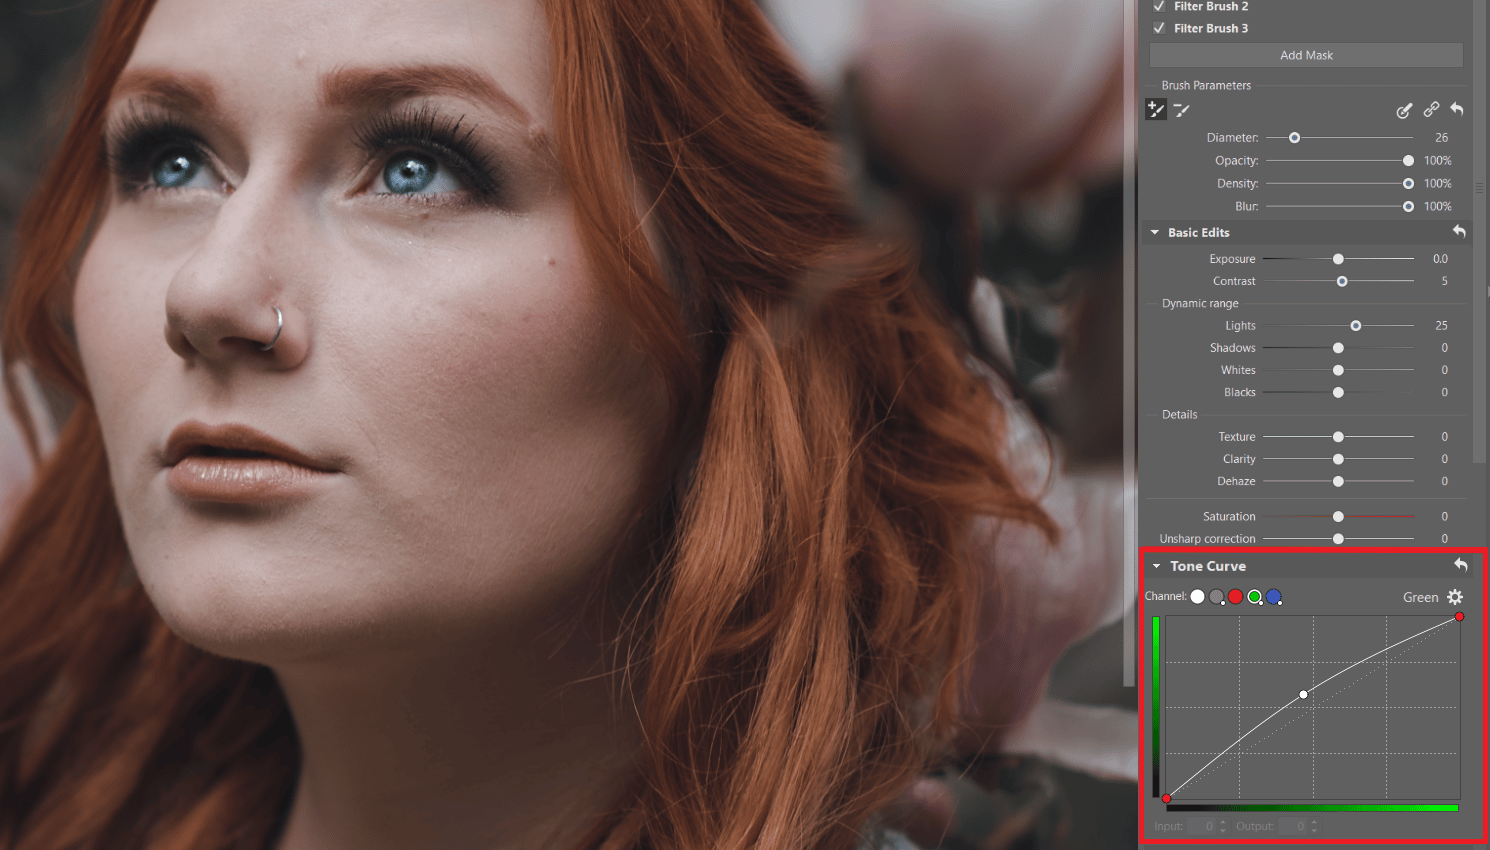
Edit or change the color of the eyes using RGB curves. Of course, color mixing takes a bit of magic. Just try seeing how the colors change as you move the curves and you’ll soon find what you need. When doing color work, definitely don’t forget to turn off Show Mask (above the Histogram). We also recommend dragging the curves mainly in the middle, or the midtones. Leave the highlights and shadows as they are.
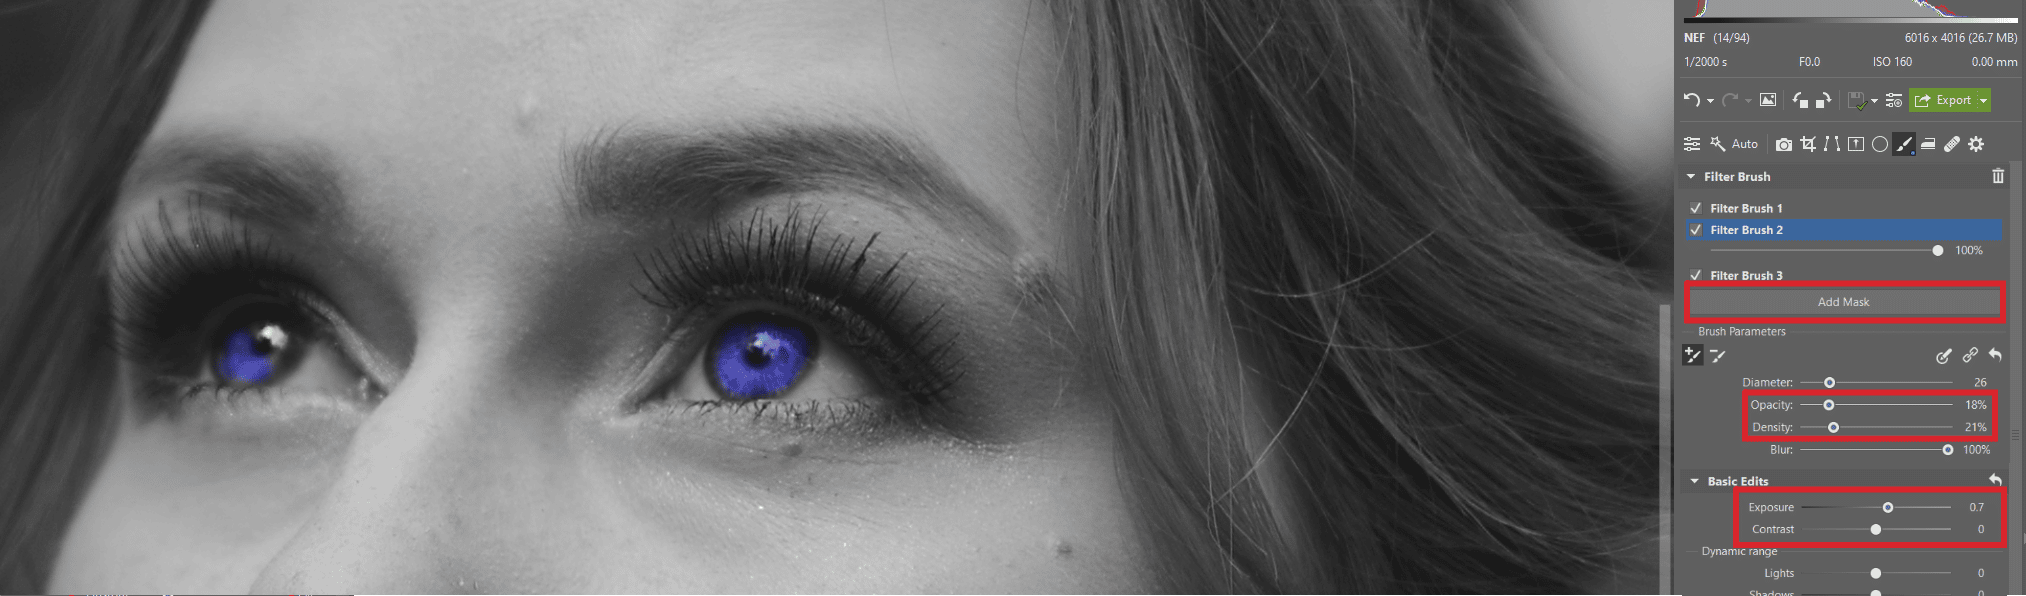
Lastly, you can accentuate the eyes even more by using additional brush masks. Create another mask for the Filter Brush (B) and lower Opacity and Density. Slightly increase Exposure and apply the brush lightly around the pupils, but not to the edges of the iris. Only apply to the areas where there is light in the eye.
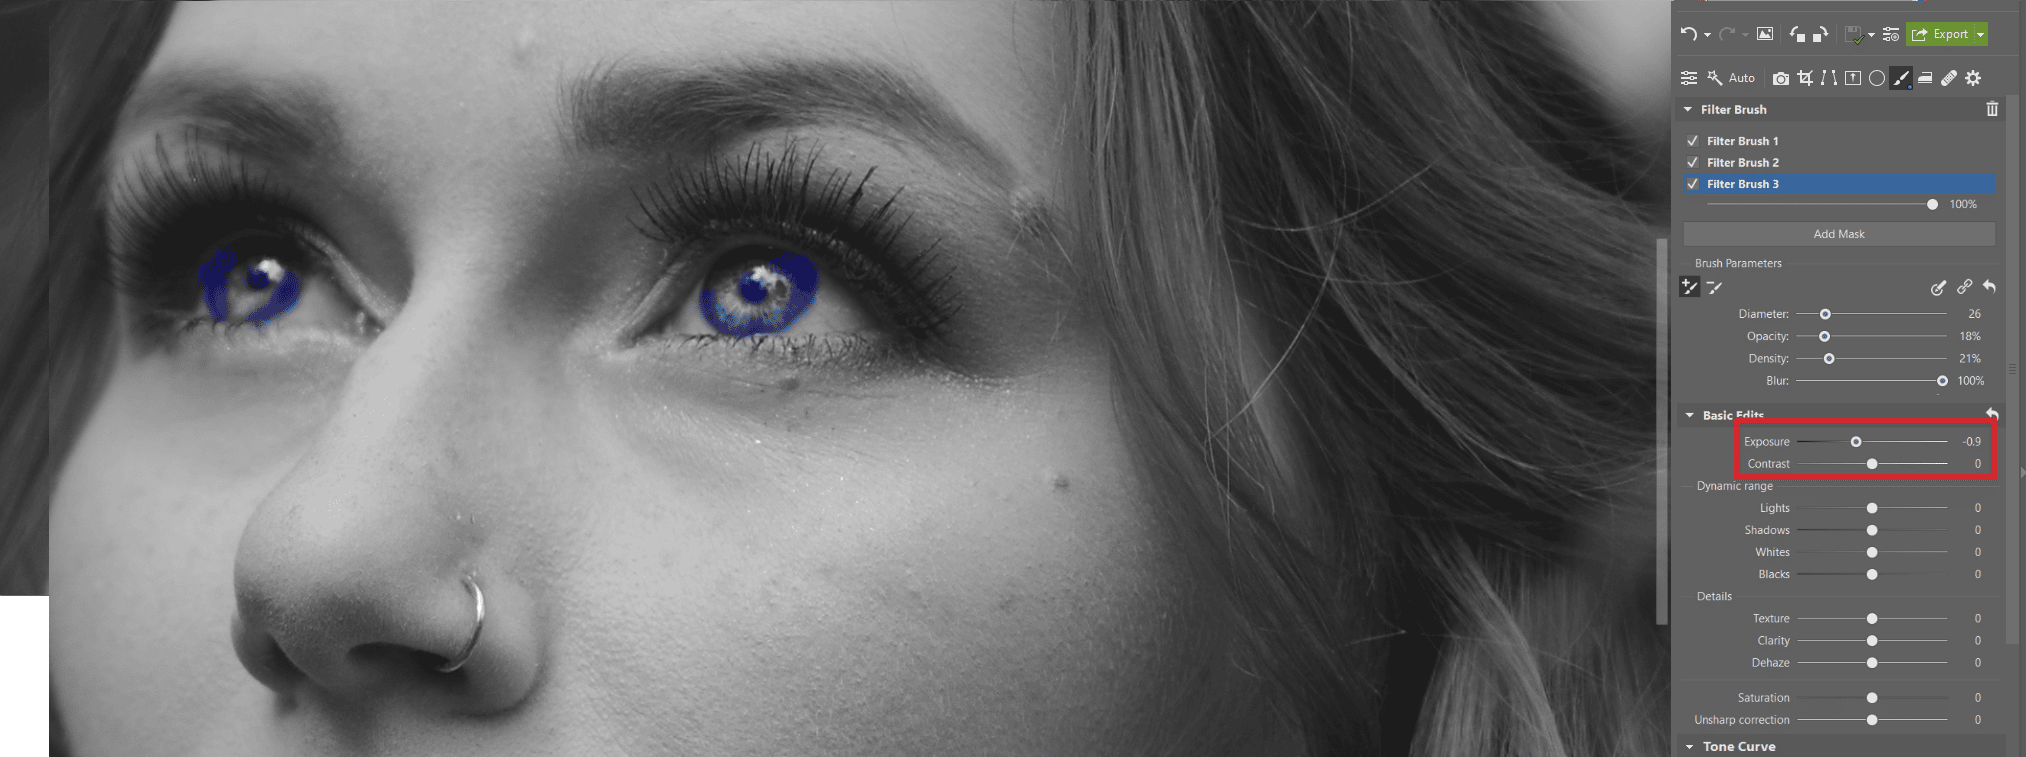
Use the same method to bring out the shadows. You again create a mask, only this time lower Exposure and apply the brush only to the pupils and edges of the irises. You mimic the Dodge and Burn method but in the Develop module. Why is it better in Develop? Because you can work with RAW files that contain much more information.
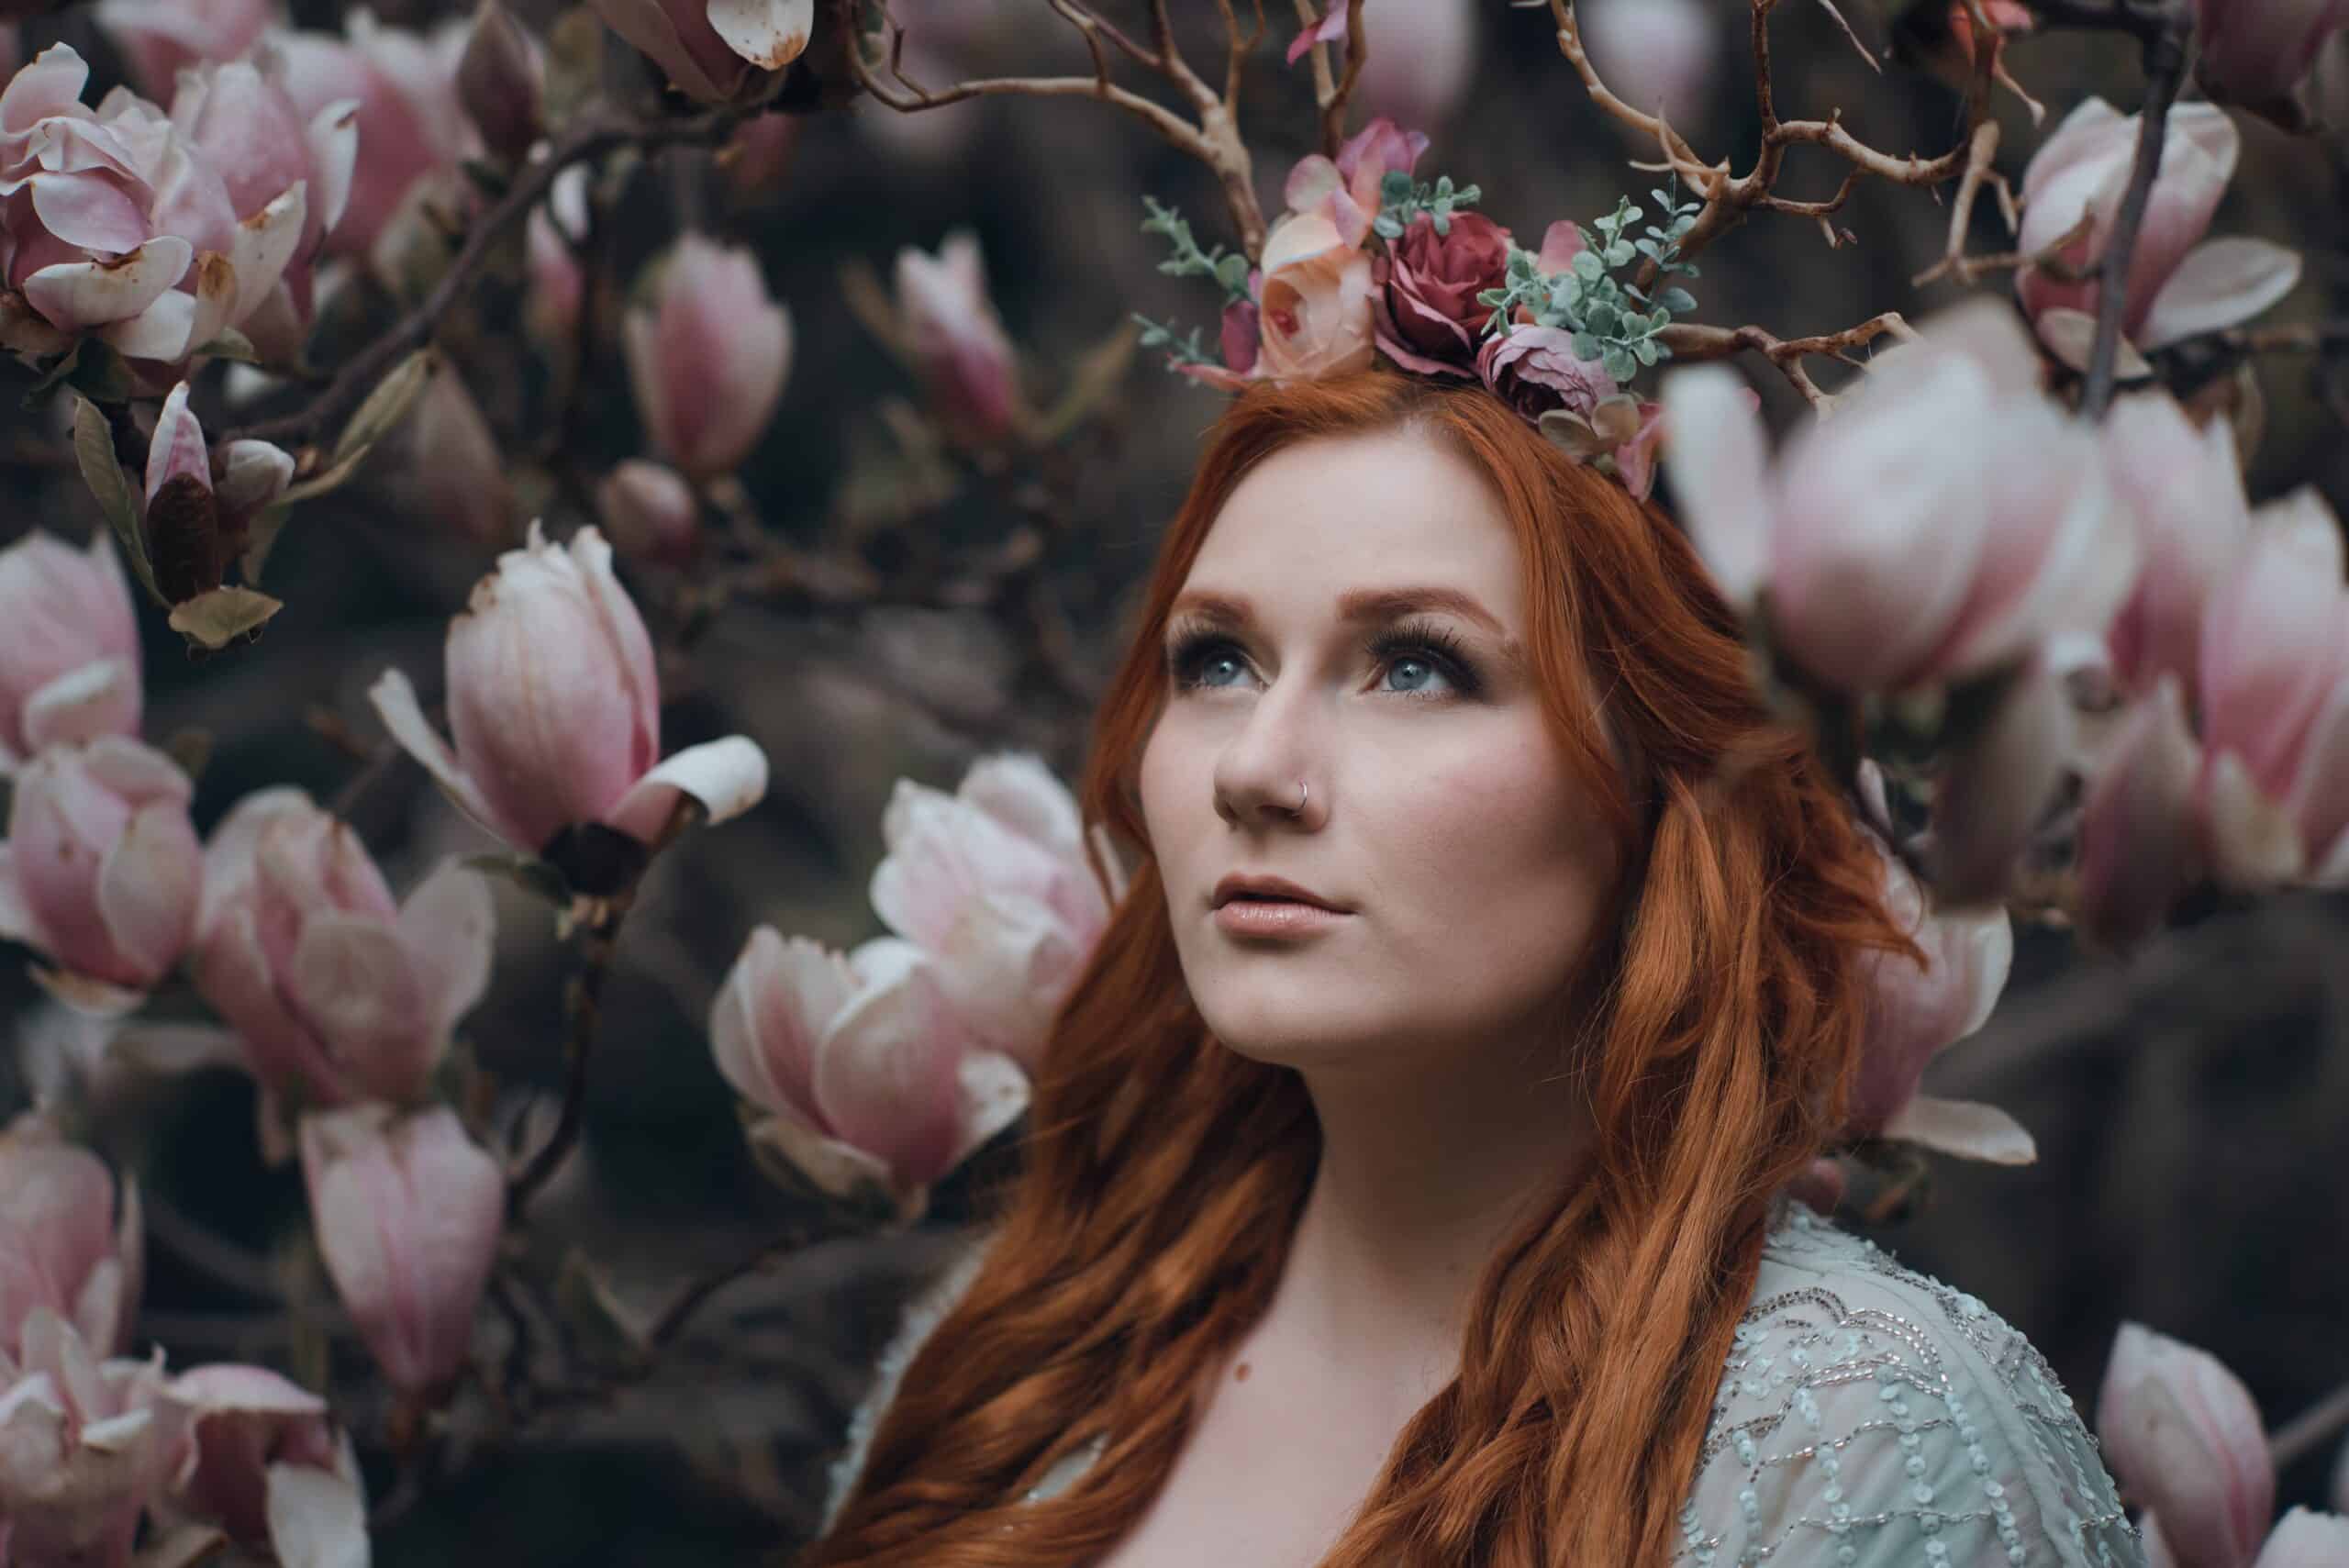

All eyes are beautiful, they just need to be emphasized using the right light
Stunning eyes in a matter of minutes
Now you know how it’s done. Don’t be afraid to experiment. Have the eyes face artificial or natural light, keep an eye out for the whites of the eyes, and don’t let your editing cross the line to extremes. Extremes are never desired. And don’t forget to share your finished photos with us! Download Zoner Studio free for 7 days and get right to editing.
There are no comments yet.