Architecture Photography Part 2: Modern Masters

Modern architecture includes many building styles with similar characteristics. These characteristics include simple forms and the lack of any ornamentation. Read on to learn how to take photos of contemporary architecture and edit them in Zoner Studio X.
In the first part of our architecture photography series, we wrote about how to photograph old architectural masters and edit them in Zoner Studio. This time, we’re moving to modern architecture photography.
Modern architecture includes socialist realism, functionalism, and postmodern architectural styles. Simply put, these are the buildings that were built sometime after the end of World War II. Some were built earlier in the first half of the 20th century, like the Villa Tugendhat in Brno, Czech Republic.
Many of the basics for architecture photography that we covered in the first part of this series also apply to modern architecture. There are certain elements to consider like attention to lines, light, and shadows, in addition to the emotions that buildings evoke.

Modern architecture is often associated with innovation and bold designs. Whether it’s glass skyscrapers, innovative bridges, or oddly shaped shopping malls. These are just some examples of modern architecture that may draw photographers.
Structures built from different materials and unconventional lines can evoke a wide range of emotions from wonder to controversy. Let’s take a look at how to edit modern architecture photography using a specific example to demonstrate some of the adjustments in Zoner Studio.
Editing in Zoner Studio
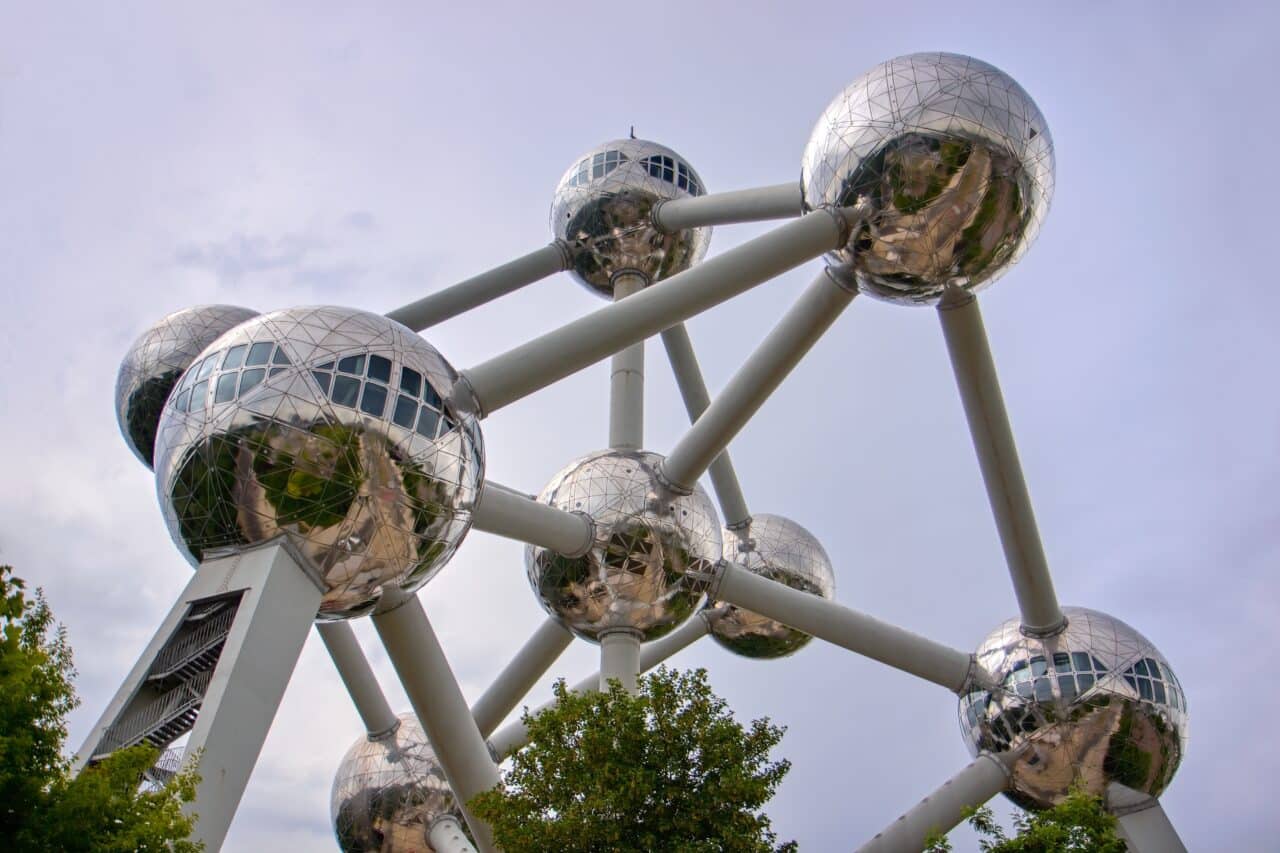
I chose a photo of the iconic Atomium building in Brussels to demonstrate my editing process. The Atomium was built for the 1958 World’s Fair (Expo 58), but distribution of its likeness was prohibited by copyright law until 2016. Now, we can use it as our example of modern architecture.
My photograph of the Atomium was taken on a cloudy and rainy day so the conditions were not ideal. But as we mentioned in the last article, we might not be able to return to a location in hopes of better weather conditions. That’s where editing in Zoner Studio comes in.

First, I start with the Camera and Lens (M) function to help remove lens defects, especially barrel distortion. When editing architecture photos, Straighten Lines (K) comes in handy. I didn’t use it in this case because the building doesn’t have many right angles, which are needed to correct the perspective.
Then, I go to White Balance and use the eyedropper. I use the neutral gray in the photo to set the correct white balance. The tubes that connect the spheres or the stand on the left side of the photo serve this purpose well.

Next, I set the Color Style and chose Vivid Colors. To get as much detail out of the photo as possible, I focus on the Exposure settings. I increase Exposure to positive values and slightly increase Contrast. For the spheres to stand out nicely and brighten up the photo, I increase White point and slightly decrease Black point to make the blacks truly black.
I also play around with Dynamic Range. I decrease Lights and increase Shadows, to give the sky some contour. This also makes the stainless-steel spheres on the Atomium stand out more.

In the Color section, I increase Saturation and Vibrance to give the photo better color rendering. Finally, I use the Tone Curve and increase Shadows and decrease Lights for better balance. The photo comes through nicely now, but it’s not quite there yet.
Since I took the photo from a parking lot that was slightly hidden behind the trees, you can see parts of the tree at the edges of the photo. In some cases, this can be desirable and incorporated to enhance the photo. However, the tree leaves are more of a detriment, so I remove them using Retouching Tools (J).

In this case, the Healing Brush is your best choice. The Healing Brush clones the texture of the clouds and blends the colors and exposure.

I use the Ctrl key and click to select the source location that I’ll copy to the leaves. I do the same thing on the left side. Since the leaves on the left side are quite big, I can also use the Clone Stamp. Although the Clone Stamp doesn’t blend the surroundings, it can copy the entire source area to the specified location.
After using the Clone Stamp to remove the leaves, I recommend cleaning up the areas one more time using the Healing Brush to return some texture to the clouds.
At the very end, I add the Gradient Filter (G) and slightly adjust the parameters for the sky in the background to show the clouds. This is also a good check for how well we edited out the leaves since the filter makes any imperfections more noticeable.

You can even add two gradient filters, one to the top left, and one to the right. You can set the Color Temperature separately for each filter. This can be useful for balancing the color tones of the sky.
And with that, our editing is done. I Export the photo and reduce its size if needed for posting on social media or online. We can also have the photo printed, make a calendar, or other options.

This is what the photograph looks like before and after editing.
The final editing and concept of your architecture photo are very subjective, so everyone may perceive them differently. My editing process is meant to serve as a source of inspiration.
Next steps
Modern architecture offers many opportunities to dig deep into your photography. If you are setting out to shoot modern architecture, try these tips for modern architecture photography.
Since modern architecture is often full of lines, focus on them and make them the main feature of the photo. Don’t forget to use the Straighten Lines function.

Pair modern architecture with older architectural styles and highlight the contrast between the two.

Get up close and look for details that you can use as the main subject of the photo.

Don’t be afraid to look up and get a low-angle shot, especially with tall buildings.

Let minimalism take center stage in the overall feeling of the photo.

Find something unique that does not belong in architecture but begs to be photographed.

You can also find places that look like they’re straight out of a futuristic movie and can be a good subject of interest.

Try hiding behind a different building or another point of interest and put the main subject in the background.

This list of tips for photographing modern architecture is not exhaustive. Hopefully, you can still find some inspiration in the examples presented here.
In the next part of our series, we’ll take a look at various architectural qualities and take a peek at interiors.
There are no comments yet.