Never Let Mixed Lighting Ruin Another Photograph!
The article is over 5 years old. The information in it may be outdated.
![]()
We are working on its update. In the meantime, you can read some more recent articles.
Basically the only thing you need for a photo is light. But unfortunately when you’re out shooting you’ll run into a lot of types of lighting, each with its own color. When there’s more than one source in the same scene, they can cause some real problems. There are a lot of these situations—and a lot of solutions. We’ll take a look at them in this article.
Light sources all have their own intensities and wavelengths—that is, colors. The most typical conflicts among various light colors come when you combine permanent light with flashes. Incandescents, fluorescents, and LED lights all have different colors than the light produced by the discharge tube of a flash.
To make a photo with light-color problems look natural, you’ll need to adjust its color temperature. So let’s take a look at how to fix problems with multiple light colors in a scene, with plenty of help from Zoner Studio.
The First Solution: Black and White
The simplest and, unfortunately, the most often used advice is “When you don’t know what to do, put it in black and white.” This works, of course. Once you’ve done it, you no longer need to worry about your lighting colors. But it’s not a good fit for all situations.
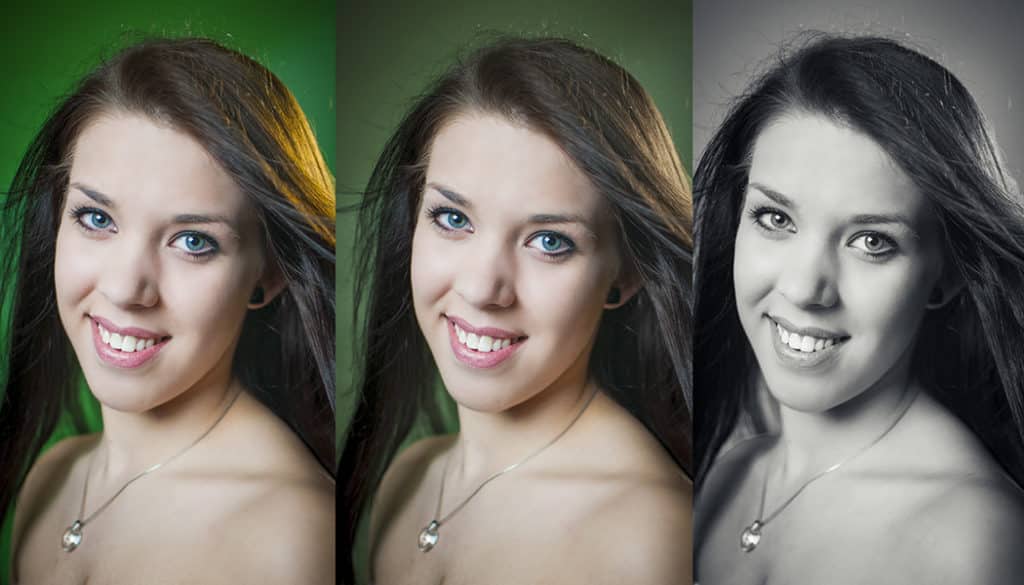
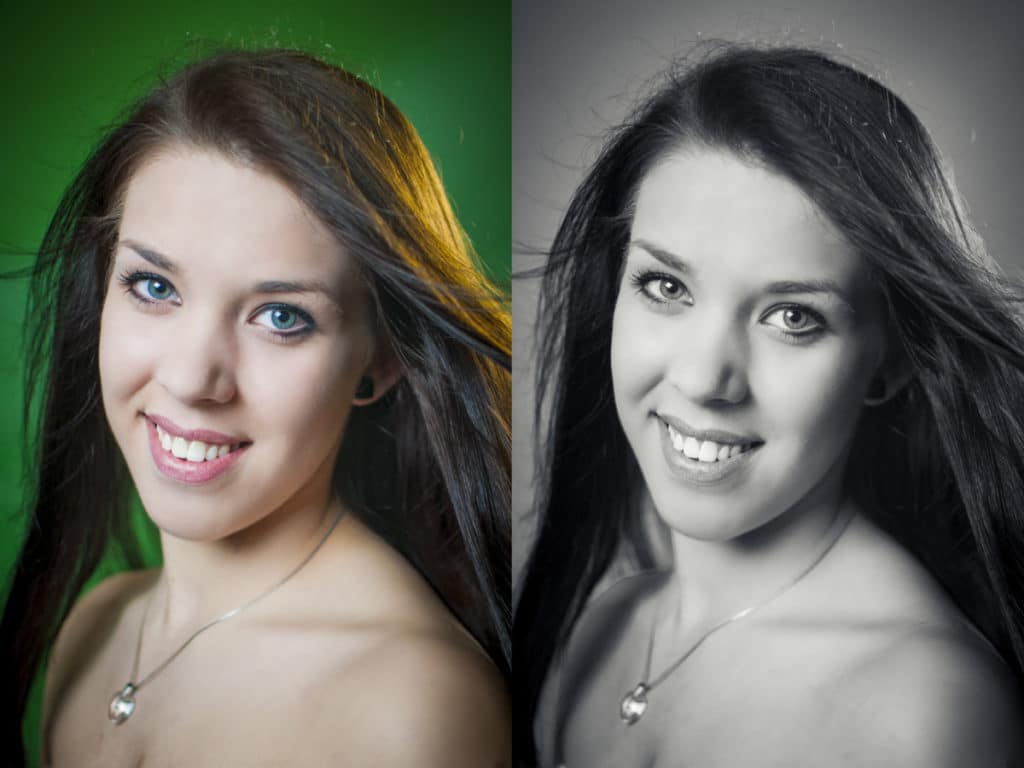
This photograph has been lighted using a single external flash from the front, and an incandescent bulb from the back. Because of this, white balancing to match the subject’s face causes the yellow light from the bulb to show up strongly in her hair.
But in this case the client wanted a black-and-white photo, and so the problem solved itself.
The Second Solution—Local Edits
But what if I had wanted to use that photo in color? Then the yellow tinting in the illuminated part of the subject’s head would definitely have bothered me. It distracts from the actual portrait. So I would try to at least reduce the tinting with help from the Editor in Zoner Studio.
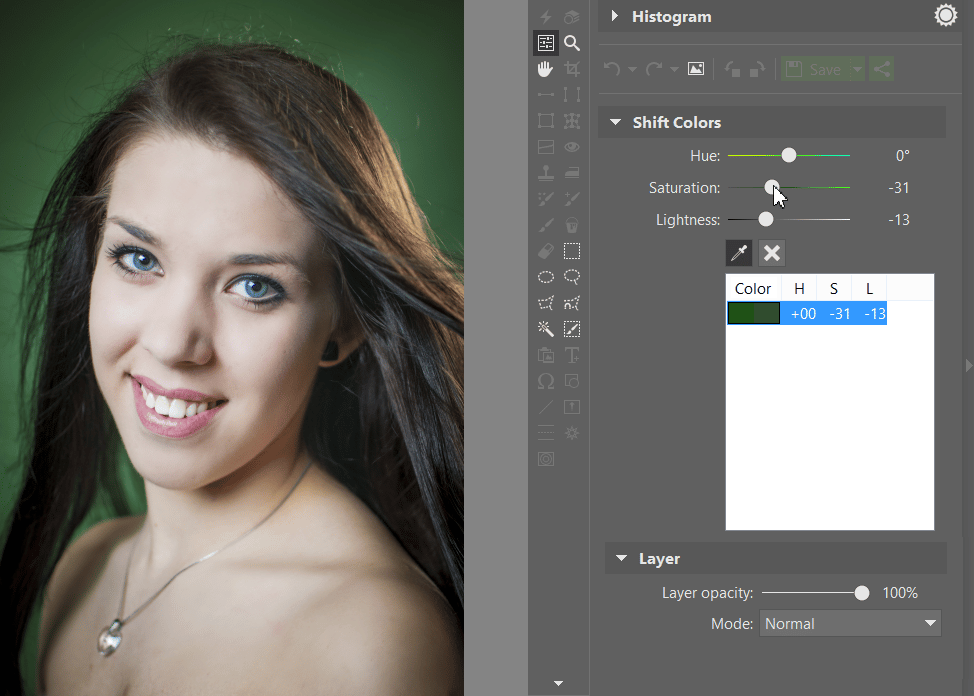
The best way to do this is the Shift Colors function (Filters > Effects > Shift Colors). I’ll go ahead and illustrate this edit here. First I use the eyedropper to select the color that I want to adjust.
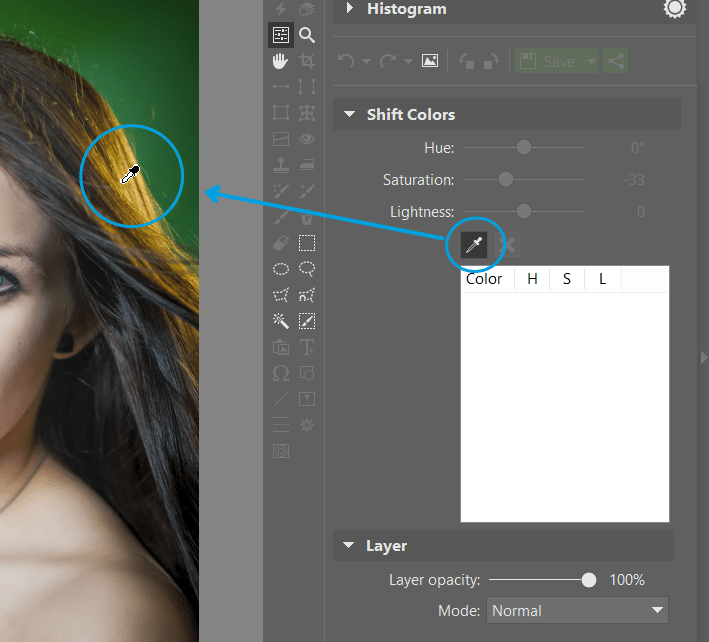
I reduce the saturation of the selected colors and give them a better hue.
The yellow color that I’ve selected is unfortunately quite similar to the color of skin, and so my changes to the hair have also changed certain skin tones, which I don’t want.
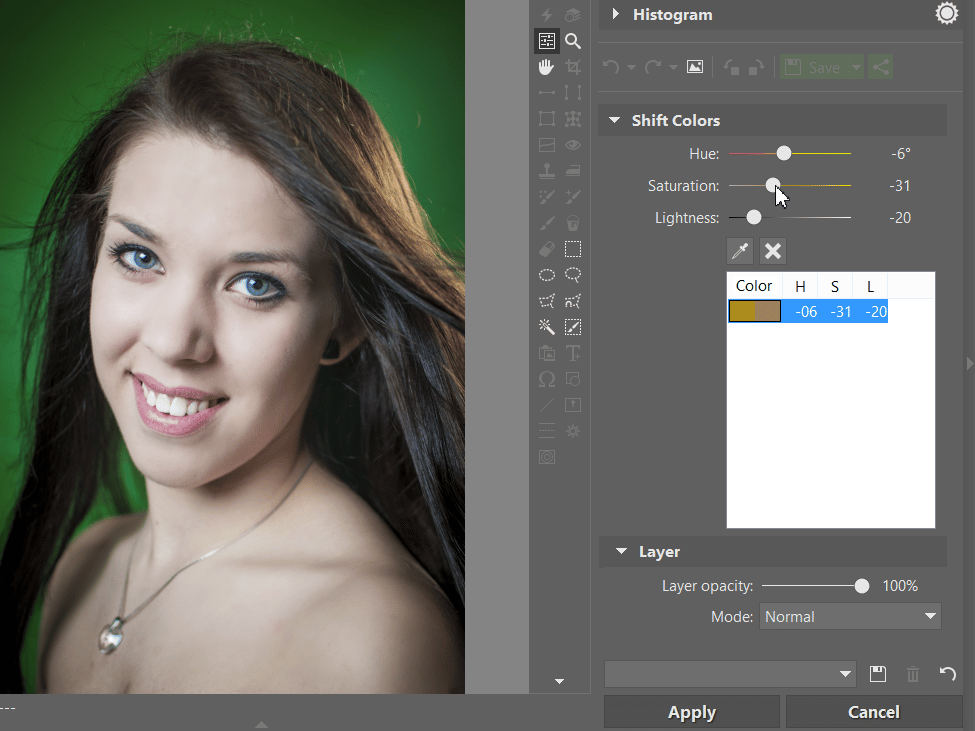
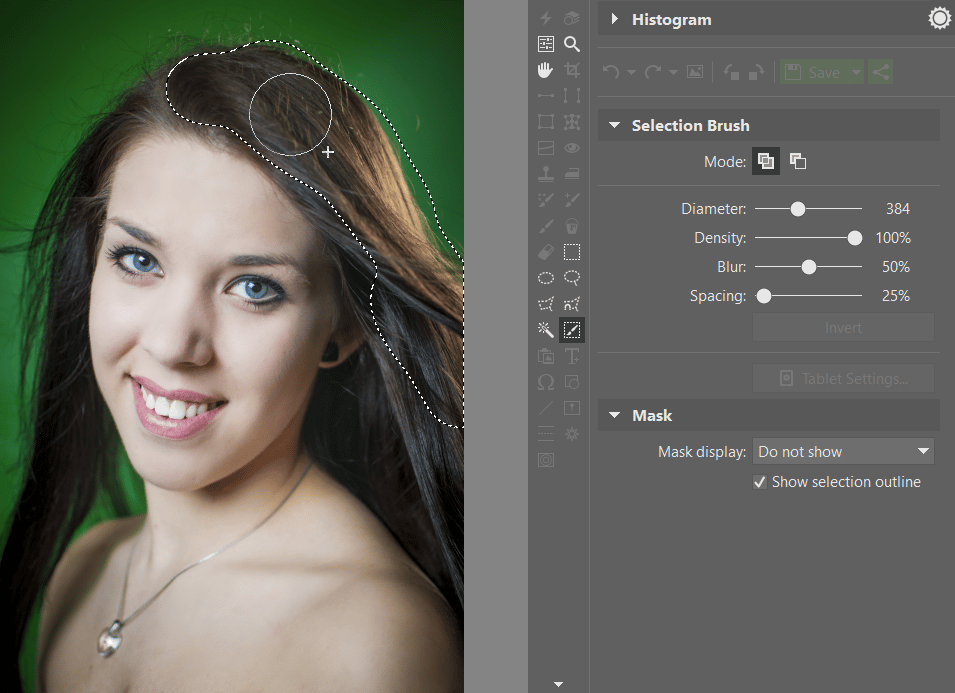
So before applying Shift Colors, I restrict the places where it’s applied, by using one of the selection tools. I generally prefer to use the Selection Brush, but it all depends on the situation. After selecting the area I want (the yellowed area), I click Apply to apply my edit.
After toning down the yellowness, I notice that the green background is also not exactly ideal, and that I might want to edit it, too.
Fortunately, this green color is strongly different from the color of skin. So I can fix this problem without using a selection.
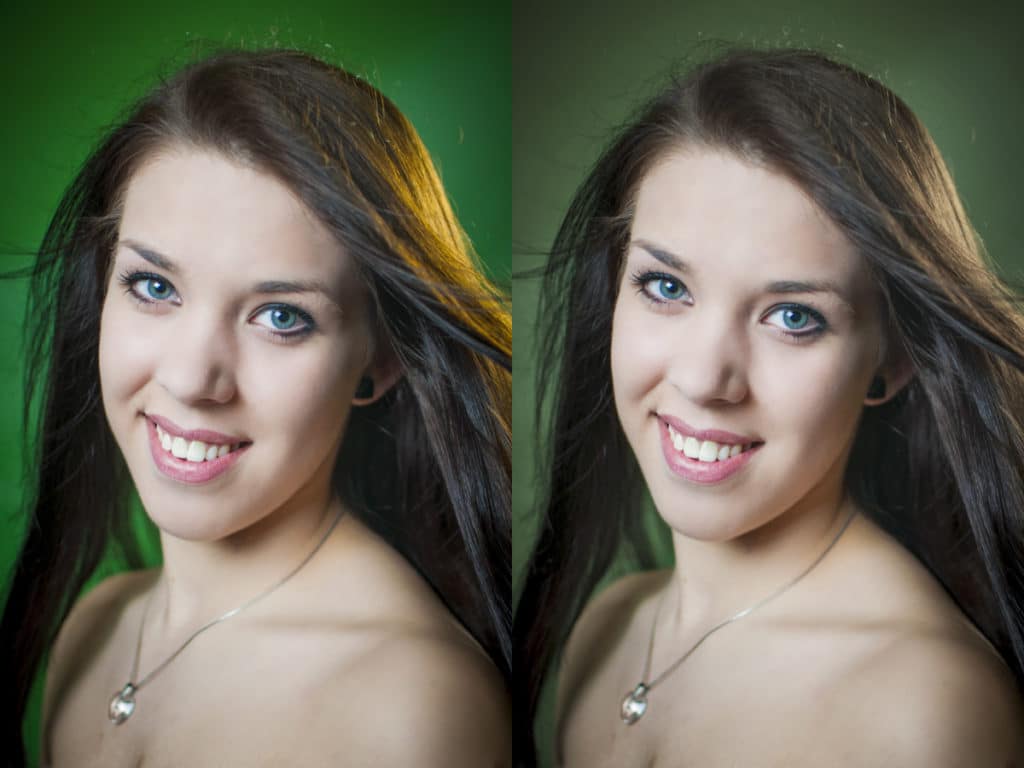
In this illustration you can compare the original against the final edit after the yellow tint has been removed:
Indoor Events
You can also have trouble with conflicting lighting colors when you’re using a flash to shoot dances, weddings, art exhibitions, or other indoor events with non-daylight lighting.
In the photo on the left, the white balance has been set to match the daylight lighting, and because of this, the flash-lighted foreground has an ugly bluish tint.
During this or any other edit, keep in mind that your goal is to save whatever’s in the foreground—not the background. I may sound like Captain Obvious here, but you’d be surprised—more than once I’ve seen event photos that had bad skin colors because they were balanced to the background lighting.

If you want less-yellow backgrounds right out of the camera, there’s a way to do that. You can put a colored filter on your external flash. This reduces the chance of problems with multiple lighting colors.
But they can still happen. Above all, most events take place in spaces with not one, but multiple lighting sources, each with its own color. So I’ve learned from practice that this trick can be counterproductive. Of course you can also find situations where it’s useful.

Keep It Natural
If you’re shooting in a studio, then I don’t recommend using multiple light sources in front (I mean things like two lights at 45 degree angles from the side), because if you do that, each half of the subject’s face will be differently colored.
This problem can be solved using local edits in an editor, but these kinds of edits are time-consuming. Lighting with one color from the front and another from the back is a much more workable variant.
When you’re photographing indoors with lighting like this, you can then just white-balance for the face. Don’t wrestle with the background color, since nobody cares about it. Just get that skin looking right.
And one last piece of advice: wherever it’s not too hard to do, just avoid multiple lighting colors. Keep an eye on the scene and think about your photo in advance. You might find a way to get a good take on the photo with just one lighting source. I mention this because sometimes multiple lighting colors in a photo aren’t a necessity—they only happened because the photographer was inexperienced or distracted. Be aware and think about what you’re doing, and you can save time on photo edits.
Could your photos use some color-temperature edits too? Download Zoner Studio, use it free for 7 days, and fix them.

There are no comments yet.