5+1 Basic Editing Steps To Improve Your Photography
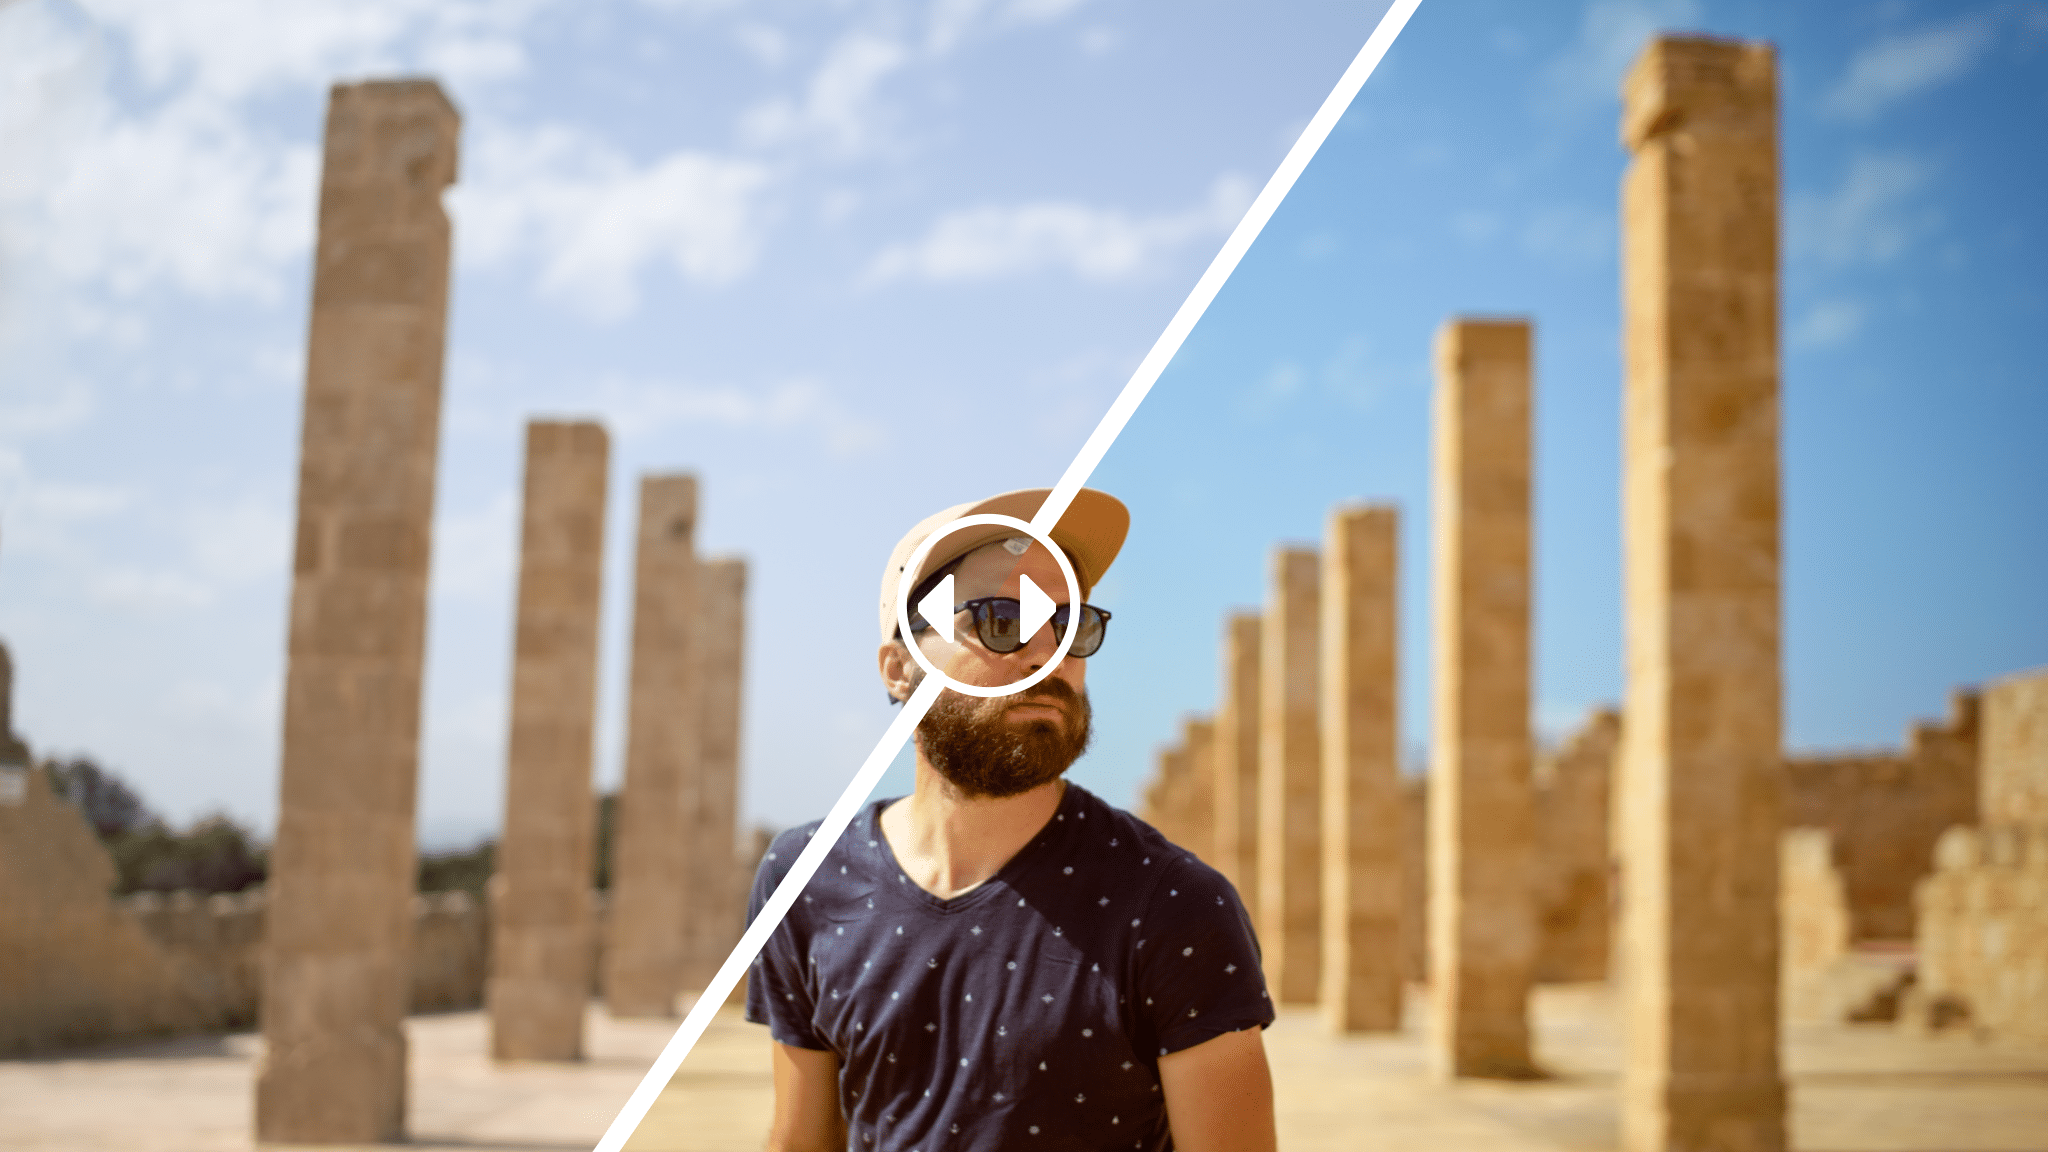
Almost every single photo you take requires some type of editing. All it takes is a few simple steps to take your photo up a notch. Whether you need to lighten up a photo that’s too dark, or you want to crop it, this article combined with Zoner Photo Studio X can help you.
Maybe you’re just getting started with your photography and are thinking about what type of adjustments can make your photos stand out. We’ll go over some very basic editing steps that can help you correct some of the most common issues. For example, brightening up a photo that’s too dark or yellow, or straightening a crooked photo. See how just a few adjustments can go a long way in ZPS X.
Open Zoner Photo Studio X and go to the Develop module. Editing in Develop is non-destructive. This means that if a certain adjustment doesn’t work, you can easily undo it without changing any image data. ZPS X does not overwrite your photo so you don’t have to worry about losing your original.

Camera and Lens
Before you start editing, we recommend using the Camera and Lens (M) function. The device you used to shoot your photos may have optical lens defects. Images from camera and mobile phones contain a lot of information, or EXIF data. Zoner Photo Studio X can use this EXIF data to find and correct defects. The most common lens defects include Barrel Distortion, Vignetting, Chromatic Aberration, and Color Fringing.
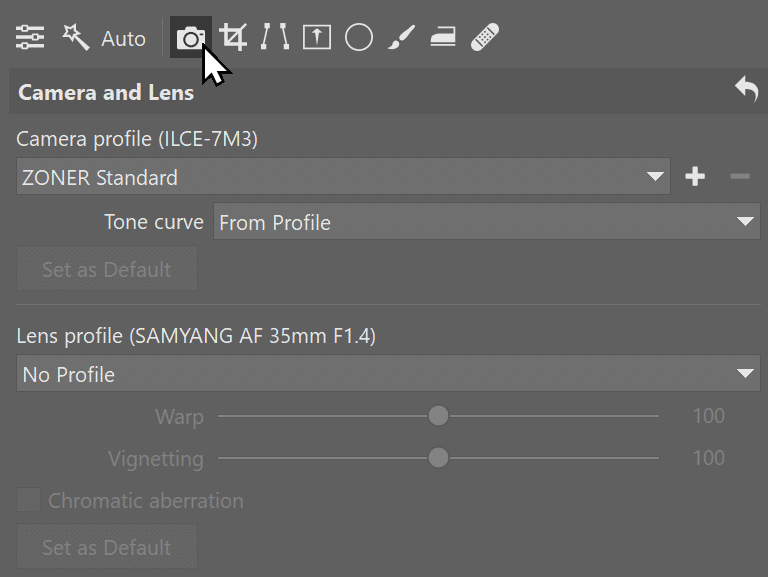
Find your device in the menu and Zoner Photo Studio X automatically corrects the lens defects your photo contains. You can also adjust the intensity of the correction. If you can’t find your device in the list, download the DNG Converter, or find your device’s profile and upload manually to ZPS X. But we’re not going to get into that in detail in this article.
1. Crop and Rotate
Use Crop and Rotate (C) to quickly and easily straighten a crooked photo, or use crop to correct your composition. Use the Rotate slider to rotate the photo. You can also rotate it by clicking outside the highlighted crop area and dragging to rotate.
Use Crop to fine-tune your photo’s composition or remove distractions. I crop the photo so the model is centered. Another option is to follow the rule of thirds when choosing your photo’s composition.
For more advanced straightening of the horizon and converging lines, use Straighten Lines (K). But for basic adjustments, Crop and Rotate (C) should be enough.
The photo’s horizon is crooked and needs straightening. First, I straighten the lines based on the columns and ground. Finally, I tweak the crop by dragging the edges of the grid.

Be careful not to overdo the cropping and needlessly reduce the photo’s resolution. This can be an issue if printing in larger formats or sharing on social media.

Use a fixed aspect ratio when cropping. This makes printing in standard formats easier. For example, you can’t go wrong with the commonly used 3:2 or 4:3 aspect ratios.
2. Color Style and White Balance
The next step is Color Style. Use Color Style to guide your editing. Color, Black and white, or HDR? Whichever you choose, preset Color Style settings work similarly to your camera’s shooting modes, like portrait, landscape, or cinematic.
Use White Balance to adjust your photo’s color temperature. If your photo has an object in a neutral color (white or gray), use the eyedropper to click that part of the photo. This can be eye whites, a white t-shirt, or the snow.
If the photo doesn’t contain neutral colors, you can use the Temperature and Tint sliders to adjust white balance.
If you don’t have the right light settings, your photos could appear yellow when shooting in artificial light or blue when shooting during the sunset. White Balance makes it easy to correct these issues and fine-tune your photo’s colors.

3. Exposure
Use the sliders under Exposure to brighten or darken your photo and make other adjustments related to Exposure. First, use the Exposure slider. Positive values brighten the image and negative values darken it.
When adjusting Contrast, you rarely need to go into negative values. You only need to lower contrast on rare occasions.
Black point darkens dark areas. Use it when the photograph is lacking black. White point does the same thing but for light areas of the photo.
Dynamic Range adjusts the light and dark parts of the photo. Different types of photos require different adjustments to Lights, Shadows, Whites, and Blacks.
Reduce Lights if your photo is overexposed or has overly bright areas. Moving the slider into negative values can help reduce this issue, but won’t completely eliminate it. Positive values bring these bright areas out even more. The Shadows slider works similarly, but for the darker areas of the photo.
The Histogram gives you control over exposure. The Histogram shows the distribution of the highlights and shadows of a photo. This helps you see how the light and dark areas of the photo are rendered.
We also recommend using the Clarity slider to increase contrast at the edges of the objects. This makes the photo sharper and stand out more.

4. Basic color adjustments
The next thing you need to adjust is color saturation. Go to Color and pay special attention to the Saturation and Vibrance sliders. The Saturation slider affects the saturation of all the colors in the photo. The Vibrance slider affects only those that are not as prominent in the original photo.
In most cases, it’s a good idea to lower Saturation and increase Vibrance. This gives you more balanced colors.

A quick and easy, but very effective adjustment, is Split Toning. Use Split Toning to give your photo the right color look. Use the color wheels to choose the colors for Zoner Photo Studio X for the lights and shadows.
You can also open Lights and Shadows separately to set their Saturation or Hue more precisely. There are a number of color combinations you can use, but we recommend using complementary colors. Complementary colors are the colors that are on opposite sides of the color wheel.

Zoner Photo Studio X has a wide range of other tools for color work. Change an object’s color or the entire photo using Color Shift. Adjust basic RGB color channels using Shift Primary Colors. You can also use Color Shift as part of your local adjustments.
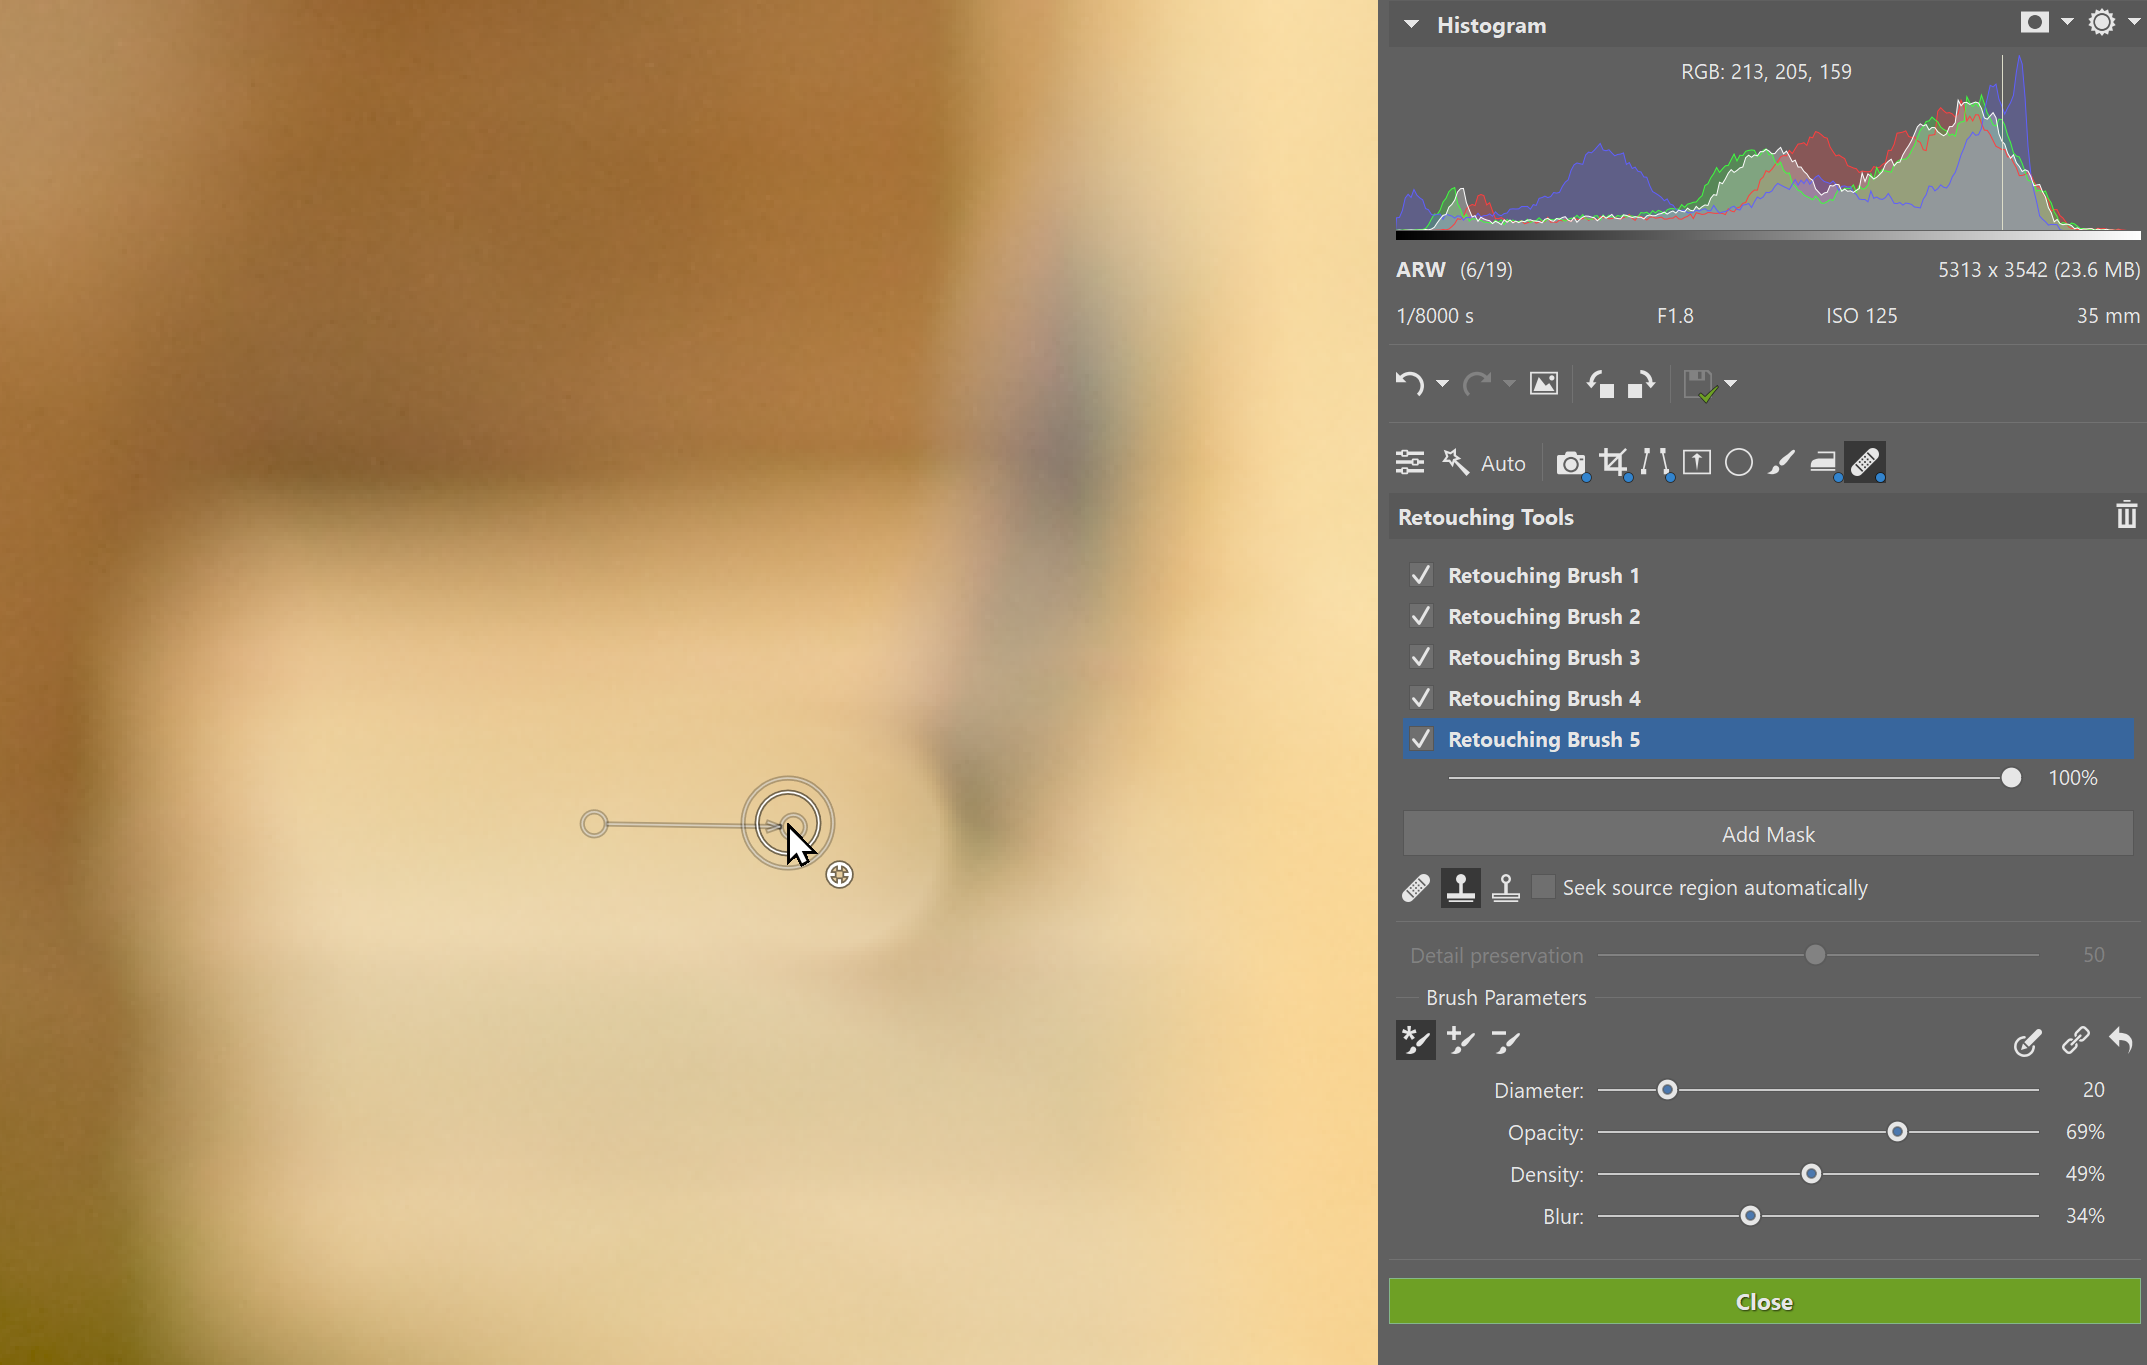
5. Remove unwanted items
Sometimes there’s an unwanted passerby or tag that you don’t want in your photo. Retouching is considered advanced photo editing, but don’t worry. Removing a pimple, cold sore, or other blemishes is very easy. Retouching Tools make it a snap.
Choose from three Retouching Tools (J): Healing Brush, Clone Stamp, and Structure Cloning. Smooth wrinkles using the Smoothing Brush (U).

Improve the photo and remove any unwanted people, as long as there aren’t too many. Do this easily using the retouching tools.
+ Effects: The cherry on top
Effects give you the option to add Vignetting, Grain, Glow, or Halation. All of these effects are very popular and frequently used, but don’t overdo them. Adding light vignetting never hurts. It can help draw your viewer’s attention toward the center of the photo.
The perfect amount of vignetting is not even noticeable at first glance. You can also get this effect using the Radial Filter (R). The Radial Filter lets you add several other effects. Learn more about them in the article 5 Tips for Getting Creative with the Radial Filter.

The grand finale: Save and share
Those are some basic editing steps. As soon as everything is to your liking, save your photo by pressing the Export button. Choose between TIFF, PNG, or various JPG formats.
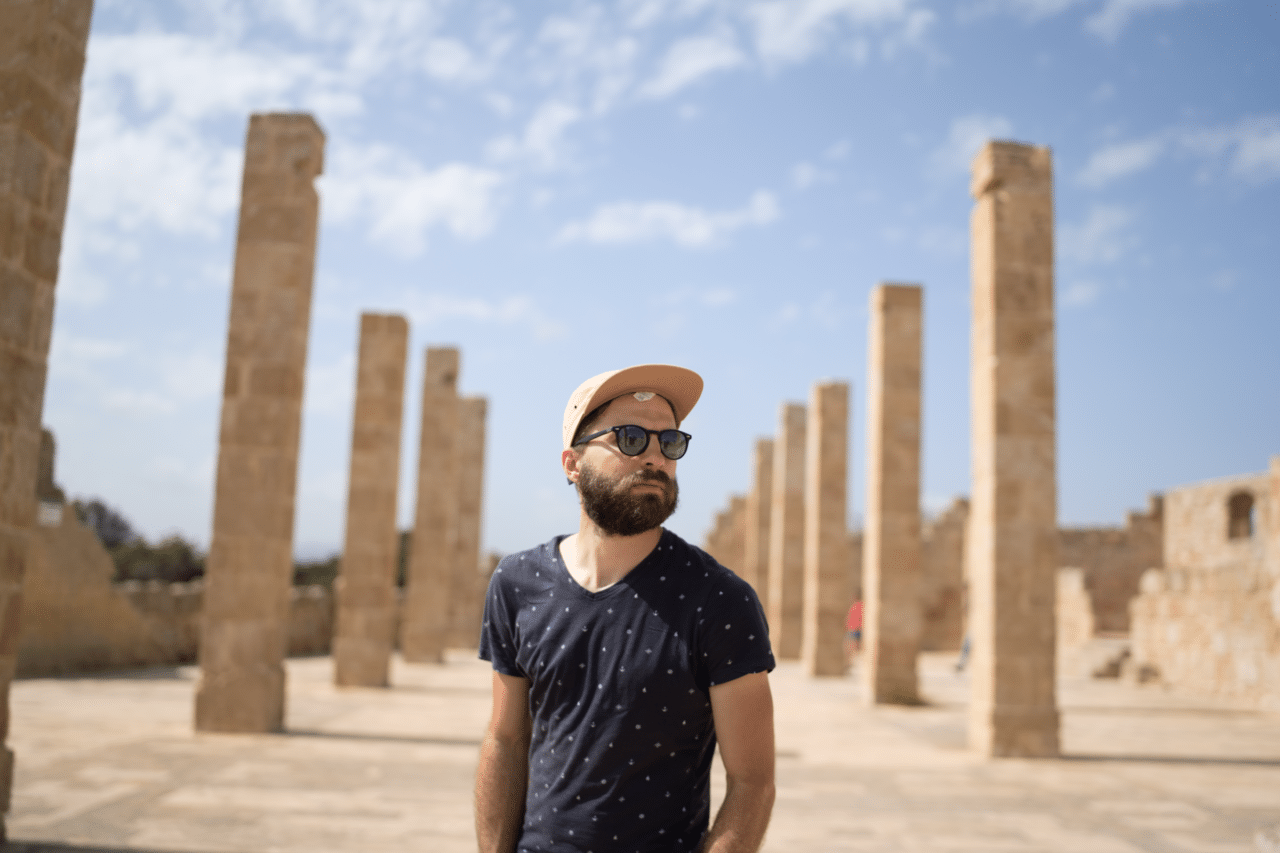

Basic adjustments complete and time to save! If you export your photo at a resolution meant for social media, you can easily upload it right away to Facebook. @najsu.photo
When exporting in the Develop module, you can choose from several different settings. You can also export photos in several different sizes at once. With just one click, you can save your photos in full quality and size suitable for sharing on social media.

Learn more useful tips and tricks, like what to avoid when editing your photos in the article 7 Things To Avoid When Editing Photos.
See for yourself how easy it is to get the right exposure or crop for your photos. Download Zoner Photo Studio X free for 7 days and discover all the ways you can improve your photography!
There are no comments yet.